Incarvillea, or garden gloxinia, is a guest from the Middle Kingdom. It was there that botanist and plant collector Pierre Nicole d'Incarville first saw and described it. The scientific community assigned the name of the researcher to a beautiful herbaceous perennial. In the wild, this plant of the Bignoniaceae family is found not only in China, but also in the Himalayas, Central and East Asia.
Just a few years ago, garden gloxinia was not very popular among landscape designers and was rarely used in creating flower arrangements in garden plots. Now incarvillea, thanks to its endurance and beauty, is gradually regaining its position. It adapts perfectly to different climatic conditions and is very responsive to proper care. Thanks to a few simple techniques, it is easy to get long-lasting blooms of beautiful flowers in delicate pastel colors.
Description of Incarvillea
Incarvillea is a herbaceous perennial plant. Depending on climatic conditions, garden gloxinia can also be grown as an annual or biennial crop. Its height, depending on the variety, varies from 30-40 cm to 2 meters.
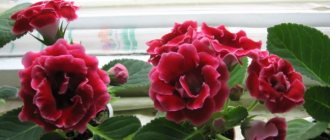
Incarvillea blooms in June-July, delighting with its bright red, pink, yellow, lilac or white flowers. Tubular flowers with a diameter of 6 cm are collected at the tops of peduncles in a brush, where each of them bends outward in the form of a five-petal corolla. At the end of flowering, fruits are formed in the form of a polygonal box with winged seeds.
Large wrinkled velvety leaves cover the base of incarvillea in the form of a basal rosette. They have an oval, pinnately divided shape, with a slightly grayish or purple tint. Some varieties of incarvillea have leaves that resemble ferns in structure.
The root of garden gloxinia looks like a large carrot with fleshy branches.
Types and varieties of incarvillea
The most decorative are perennial varieties of incarvillea, although annuals are more unpretentious and easy to grow.
Incarvillea delawaya
Incarvillea delawaya is a tall perennial plant reaching 1 meter in height. Its large leaves are feathery in shape, reaching 30 cm. The diameter of pink flowers of all shades from dark to light is 6 cm, they appear in June.
Incarvillea Snowtop
Incarvillea Snowtop - has similar characteristics. The only difference is this incarvillea with white flowers.
Incarvillea Myra
Incarvillea Myra is a short plant with red-pink flowers that have white spots inside the corolla.
Incarvillea Olga
Incarvillea Olga - plant height 1.5 m, medium-sized pink flowers collected in loose clusters, blooms for more than 1.5 months.
Incarvillea chinensis
Incarvillea chinensis is a low (up to 30 cm) wild perennial with creamy yellow flowers and pinnately carved light green leaves. Blooms before frost.
Growing incarvillea from seeds
This method of propagating garden gloxinia is the most common because it is accessible even to novice gardeners. Growing incarvillea from seeds begins with their stratification. Although they have a high germination rate, such preparation will increase it even more. Cold stratification is carried out for 2 weeks at a temperature of +2+5°C.
Sowing
For sowing, you need to prepare a shallow box with a fertile mixture. Growing incarvillea from seeds begins in March. Planting material is buried 1 cm, sprinkled with pre-calcined river sand on top. After watering, the seedling box is covered with film and placed in a room with a temperature of +18+20°C.
You can sow seeds directly into the soil of the flower garden. But using this method in hot climates is not always justified. If watering is not regular, tender seedlings may die.
Seedling care
The soil should be kept moist at all times until germination. The first green “loops” of seedlings will appear in a week. It is not advisable to pick tender seedlings, although it is possible with sufficient experience. It is better to sow them in advance in peat pots, in which young plants are planted directly into the ground when stable warm weather sets in. In this case, the optimal sowing depth is 1 cm.
When picking, seedlings are buried into the soil up to their cotyledon leaves. To prevent blackleg disease, sprinkle the soil around the incarvillea with crushed coal or ash. Caring for seedlings means keeping the soil moist and hardening off the plants.
To do this, when the temperature rises, the pots with seedlings are exposed to fresh air in partial shade, gradually increasing the time spent outside.
Do not expect abundant flowering immediately after sowing. In both cases, the first incarvillea buds will appear only in the second or third year.
Pests
Incarvillea, like other garden crops, is susceptible to attack by pests. And in order to promptly detect damage, it is necessary to regularly inspect the plant.
Common pests of incarvillea:
- Mealybug . A characteristic feature of the insect is a white coating. And when several pests accumulate, it seems that pieces of cotton wool are scattered on the leaves of the plant. The mealybug feeds on the sap of leaves and flowers, and reproduces in the top layer of soil. And in order to destroy it, it is necessary to water the incarvillea with Aktara’s solution, and also on the same day to spray its leaves with Twix or Inta-vir. Repeat the treatment after a week.
- Spider mite . The appearance of this pest is difficult to detect immediately due to its small size. But subsequently signs appear indicating damage: small light spots on the leaves, stunted growth, thin cobwebs on the peduncles, a dejected appearance. To combat it, it is recommended to spray the plant with Actellik.
Conditions for growing incarvillea plants
Even proper planting and careful care will not give results if you do not create the necessary conditions for garden gloxinia.
Place on site
To prevent stagnation of water around the incarvillea, when planting, choose an area with a slight elevation. It is better if it is a hillock or hillside. This perennial is responsive to good lighting, so an open area is chosen for its placement. In this case, it is necessary to provide for the possibility of shading the flower garden with garden gloxinia in the afternoon.
The soil
If the soil for planting incarvillea is not light and breathable enough, it needs to be improved. Digging and adding compost and sand will optimally prepare the soil for planting.
To do this, prepare planting pits filled with a nutrient mixture containing:
- leaf humus;
- coarse river sand;
- peat;
- 20-25 g of complex mineral fertilizers.
If the soil is acidic, you can add a handful of ash. All components are mixed as evenly as possible. It is unacceptable to introduce fresh mullein into the planting hole.
Choosing a site for planting and preparing the soil
This flower grows well in elevated areas. It is recommended to plant it on hillocks. This is due to high sensitivity to fluid stagnation. If incarvillea is grown in too dense soil, it needs to be provided with high-quality drainage. It may consist of coarse sand, gravel or crushed bricks.
When choosing a site for a flower, you should give preference to open and sunny places. In this case, after noon the plant should be in partial shade. Incarvillea loves light and fertile soil. Sandy loam soil is good for it. When carrying out planting work, a little wood ash should be placed in each recess. Fertilizer is also added to it.
Planting incarvillea in open ground
In each climate zone, it is necessary to observe the optimal timing for planting incarvillea planting material.
Deadlines
The optimal period is when the threat of night frosts disappears. In the middle zone, this time falls in the middle or end of May. The tuber of the plant can be planted in open ground in early spring, immediately after the first shoots appear on it.
Landing rules
If the seedlings grew in peat pots, they are simply placed in a planting hole, deepening the root collar into the soil. When growing incarvillea seedlings in plastic cups, they are carefully transferred to a permanent place, trying not to injure the root system.
The soil around the young plant is compacted, watered with water, and mulched with peat.
The rhizome of incarvillea is buried 5 centimeters into the planting hole. Further care comes down to watering and mulching the soil.
Preparing for winter
In warm climates, it is enough to cover the plant. To do this, the soil is covered with a mulching layer of peat or sawdust. It is recommended to cover the top of the bed with spruce branches. In colder regions, more drastic measures will be required. In this case, the tubers should be dug up and moved to a warm place. When green leaves appear in the spring, they can be returned to the soil.
The plant can grow in one place for 5 years, then it ages. To achieve rejuvenation of the culture, it can be dug up. This problem can also be solved by dividing the tubers and replanting them in a new location.
Incarvillea care
When caring for incarvillea, you need to stick to the golden mean. Both lack and excess of moisture and fertilizers are harmful.
Watering
Since the plant is very sensitive to waterlogging, and a lack of moisture deprives the perennial of full and bright flowering, it is better to avoid both stagnation of moisture and drying out of the soil. After rain, you need to loosen the soil, ensuring its drainage.
In arid climates, watering should be regular. It is advisable to lightly mulch the soil to retain moisture. This technique will help avoid additional weeding of weeds.
Feeding
Regular nutrition of plants will preserve and increase the decorative effect of flowering. It is best to use complex mineral fertilizer for flowering plants, a solution of bird droppings (proportion 1/20), solution of mullein (proportion 1/10).
Feeding frequency:
- Beginning of the growing season, active growth of leaves and peduncles (mineral fertilizer).
- Formation of buds (potassium-phosphorus or organic fertilizer).
After feeding, incarvillea needs to be watered generously. Plant fertilization is stopped after July 20, since excessive nutrition during this period reduces the frost resistance of garden gloxinia.
Possible difficulties
Incarvillea belongs to the category of undemanding plants. And it can delight with lush flowering with minimal care. But sometimes certain difficulties may arise with its cultivation.
Among them:
- The plant sheds buds and leaves . This occurs due to lack of moisture and nutrition. In this case, it is necessary to organize regular watering and fertilize taking into account the stage of plant development.
- The color of the leaves fades , but the veins remain green. This symptom occurs with the development of chlorosis. The disease appears due to iron deficiency. The provoking factor is prolonged wet weather. To eliminate the problem, it is necessary to water the plant with iron chelate several times.
- Sudden wilting of leaves . The sign appears against the background of prolonged stagnation of moisture at the roots. This leads to their rotting. Such a plant can be saved only at the initial stage. To do this, it is necessary to replant and water with Previcura Energy solution.
Reproduction
In addition to growing from seeds, incarvillea is propagated by cuttings from the leaf blade and dividing the cadeus (tuber). The best time for vegetative propagation in the second case is March or September.
Incarvillea division sequence:
- The bush is removed from the soil.
- It is cut into pieces, each of which has a growing point and at least one tuber.
- The root part of incarvillea is soaked in a solution of Heteroauxin, Kornevin.
- The cut areas are sprinkled with ash.
- Incarvillea is planted in planting holes with a bulk drainage layer at a distance of at least 30 cm from each other. The growth point is buried 4-5 cm or more into the soil.
- The plant is watered, and the soil surface is mulched in the summer to retain moisture.
In the first year of Incarvillea’s life, you should not expect abundant flowering and the appearance of a powerful rosette of leaves. During this period, the forces of young specimens are aimed at root formation.
Leaf division is carried out in June-July.
Algorithm for propagation by leaf cuttings:
- A leaf with a cutting 3-5 cm long is cut from an adult bush.
- The cut site is treated with Kornevin.
- Prepare a light soil mixture (peat + sand).
- The incarvillea cuttings are planted in the soil, and the container with the planted leaf is placed in a greenhouse.
- With timely and dosed watering, the plant quickly forms roots and leaves.
With this method, flowering of incarvillea is possible only the next year.
Watering
For the full development of incarvillea, it is necessary that it does not lack moisture. Therefore, if there is no rain for a long time, the plant needs to be watered regularly, but in doses. To do this, it is recommended to use settled water at a temperature of +18-20°C . Moisturize at the root in the evening. The frequency of watering during hot periods is 2-3 times a week , and the rest of the time once every 4-5 days .
Wintering
If the plant remains in the ground, then in areas with frosty and snowless winters, incarvillea needs deep mulching. The layer of mulch (peat, sawdust, spruce branches, compost, straw) should be at least 6-7 cm. This cover is removed in the spring when warming occurs. The reason for such a rush is the danger that the incarvillea will dry out and the root will rot.
It is recommended to cover a young plant in the first year of growing season with a plastic bottle for the winter to create an air gap between it and the mulch. In areas with a harsh climate, it is better not to risk the safety of incarvillea, but to preserve the tubers in a cool room.
Preparation algorithm:
- Dig up the tuber.
- Soak it in the fungicide solution according to the instructions.
- Dry the root.
- Sprinkle ash on the damaged parts.
- Put away for storage, sprinkled with sawdust, dry sand or peat.
- In the spring, when the first leaves appear, plant them in the soil.
The loss of more than a third of the root in harsh winter conditions deprives the plant of viability. Therefore, especially valuable varieties, in harsh climates, are best preserved at home.