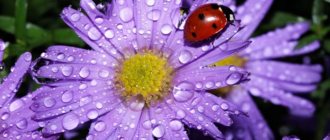
Asters are the favorite flowers of many summer residents and gardeners around the world. This unpretentious, beautiful flower blooms when all other plants are already withering. You can enjoy the bright and lush buds until the coldest weather, and even a novice gardener can grow it.
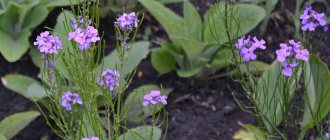
When the aster blooms, the garden is transformed beyond recognition
Aster varieties
Among the varieties of asters there are perennial and annual species. Varietal diversity allows you to create a beautiful flower garden in your personal plot.
Perennial
According to the flowering period, asters can be divided into early flowering and late flowering, blooming closer to autumn. Among perennials, the following varieties are most popular:
- New Belgian . Can grow up to 1.5 m in height. The bush of this variety is loose and easily falls apart. The flowering period begins in August and continues until the first snow falls.
- New England . An even, slender bush that does not need garters can grow up to 1.5 m in height. Large semi-double inflorescences appear in September and decorate the plant until the first frost. The buds with a reddish or yellow center are colored white, pink, lilac and violet.
- Alpine . An early flowering species with compact size. The shrub does not exceed 30 cm in height. In May it becomes covered with single inflorescences.
- Shrub . Grows no more than 60 cm. Stems are heavily leafy. Among other fall-blooming varieties, bush asters are the first to bloom.
- Italian . Great for rose gardens and rockeries. It grows no more than 70 cm in height. The inflorescences are large, up to 5 cm in diameter, and bloom in June-July.
There are many types and varieties of aster, each beautiful and unusual in its own way.
Perennial asters can be grown in one place for 6 years . Caring for them is very simple and boils down to timely watering, loosening the soil and removing weeds. Despite the ease of care, many gardeners prefer to grow annuals, since perennial varieties do not have such variety and lush buds.
Annuals
The classification of annual asters is very diverse. It has about 4,000 varieties, differing in flowering time, bush height, shape, size and color of buds.
Classification and types of flower:
| Flowering time | Bush size | Purpose | Inflorescence structure |
| Early (July) | Dwarf (up to 25 cm) | Casing . They bloom for a long time, form many inflorescences | Tubular |
| Average (early August) | Short (up to 35 cm) | Cutting . Grown for bouquets. Lush flowers on long stems | Reed |
| Late (mid-August) | Medium height (up to 60 cm) | Universal . Perfect for bouquets and flower beds | Transitional |
| Tall (up to 80 cm) | |||
| Giant (above 80 cm) |
Tubular inflorescences look very delicate and unusual . Flowers with a yellow center are densely covered with tube-shaped petals.
Reed annual asters are distinguished by lush spherical flowers . Petals sticking out in different directions give the inflorescences a shaggy appearance. According to the principle of structure, inflorescences can be curly, spherical, imbricated, hemispherical and needle-shaped.
The flowers of transitional varieties of asters consist of 1-2 rows of reed flowers , and the middle is filled with tubular flowers. Based on their structure, simple, semi-double and coronal inflorescences are distinguished.
Simple asters consist of a yellow center , densely strewn with short tubular petals and framed by straight reed petals, arranged in 1-2 rows.
Semi-double varieties are distinguished by voluminous flowers , with a clearly visible center and reed petals sticking out in different directions.
The crown varieties of asters have lush, pom-pom-like inflorescences with a barely noticeable core. Such flowers look very beautiful both in flower beds and on balconies and terraces.
Aster is an unpretentious plant; even novice gardeners can grow it in the garden without fear.
It’s easy to get lost in the variety of types and varieties of asters. When choosing seeds in a store, it is important to pay attention not only to the size and color of the inflorescences, but also to the flowering time and the size of the bush itself.
Popular types and varieties of perennial asters
Only a few species are grown in culture:
- Spring (early flowering) - alpine and Anders asters;
- Summer (mid-flowering) - Italian asters, sedum-leaved, Fricara;
- Autumn (late-flowering) - heather asters (good varieties are Finale, Schneegitter, Lady in Black), bush asters (popular varieties are Rudelsburg, Heinz Richard, Alice Haslam, Blau Lagune, Kristina, Schneekissen), New England (the most common varieties are Barrs Blue and Rudelsburg), New Belgian (varieties Marie Ballard, Mont Blanc, Jenny are suitable for growing in the middle zone).
Seed selection
When choosing which of the many varieties of asters to plant on your site, you must take into account the plants with which the flower will be “adjacent.” Then it will be easier to decide on the color and size of the flower.
Low-growing varieties are usually planted in the foreground, and tall asters can be planted in the background or in the center of a flowerbed open on all sides. When combining plants, it is advisable to achieve a harmonious picture so that the asters and the entire flowering area do not stand out from the overall design.
Asters planted along the fence will look very nice at the dacha
Seed preparation
Before sowing, asters are soaked or germinated. Germination is carried out a week before planting. To do this, the seeds are wrapped in soft cloth or gauze soaked in weak potassium permanganate. The fabric must be periodically moistened so that the seeds do not dry out, and after a week it must be placed in a plastic bag. In a few days, the seeds will hatch and can be planted in the soil.
Soaking is the fastest and easiest method of pre-sowing treatment. To do this, the seeds are soaked in a light manganese solution for 10-13 hours and then they can be planted in the ground.
By paying due attention to the aster seeds, during the season it will delight you with abundant flowering
To make future asters more resistant to disease, you can pre-treat the seeds with a solution of succinic acid or epin, according to the instructions on the package.
Which aster seeds to choose
Aster seeds usually have good germination, so you can buy them without fear, but be sure to check the expiration date on the bag. You can grow your favorite variety from your own seeds, but the second generation plants may differ from their predecessors. The reason may be the proximity of another variety. In this case, bees and bumblebees transfer pollen from one plant to another. Hybrid varieties marked with the letter F never produce seeds that retain the parental varietal qualities. You can only buy them.
Growing aster seeds for seedlings
Since the growing season for asters is quite long, it is better to grow these flowers through seedlings. It is important to take into account the characteristics of the selected variety. Some early flowering asters in warm regions with long summers can actually be sown directly into open ground, but for the middle zone and northern regions it is better to take care of the seedlings first.
At home, aster seeds germinate better, and seedlings appear quickly. This way you can guarantee that every planted seed will sprout and soon turn into a beautiful flower.
The process of growing an aster from a seed
Asters, when to plant?
The time for planting an aster depends on the variety and type of plant. Typically, asters begin to be sown as seedlings in March-April. Early-flowering varieties with a growing season of about 90 days can be sown in April-May, and late-flowering varieties in March. It is important to take into account the peculiarities of the climate in the spring, so that by the time the most favorable weather for planting sets in, the seedlings are already strong enough and ready to move to their permanent place of residence.
The soil
Asters are quite demanding on the composition of the soil. Light, loose soil that allows water and air to pass through well is suitable for them. You can purchase a ready-made mixture in the store or take fresh from the site. The ideal option would be a soil mixture composed of turf soil, peat and coarse sand in a ratio of 3/1/1 . The prepared substrate is sifted and poured with boiling water or heated in the oven; you can also treat it with a strong solution of potassium permanganate.
At the germination stage, seeds are not fertilized with organic fertilizers. Organic matter can negatively affect the condition of seedlings, therefore, in the early stages of planting asters, nutritional compositions are not used. Asters react especially poorly to fresh mullein, so it is not recommended to use it.
Sowing seeds
Seeds are sown immediately in separate cups or in a common wide container. The pots for sowing are chosen to be shallow, approximately 5-7 cm high.
Sequence of sowing aster seeds for seedlings:
- The dishes for sowing are filled with soil mixture, the soil is well moistened (the main thing is not to overdo it).
- Using a toothpick, match or thin stick, make small holes or grooves no more than 5 mm deep.
- The seeds are placed in the depressions and sprinkled with sand. The dishes are covered with film or glass and placed in a well-lit and warm place.
Sowing aster seeds for seedlings
Temperature and humidity
For successful germination, aster seeds need a lot of heat and moisture. After planting, it is important to maintain the temperature at 20-22 degrees and, as the substrate dries out, spray it with water from a spray bottle. The film or glass must be removed every day for 5-10 minutes to prevent condensation from accumulating.
If everything is done correctly, then within 7-10 days seedlings will appear on the soil surface. When all or most of the seeds have sprouted, the film is removed and the room temperature is set at 15-17 degrees. It is important to water the emerging sprouts in a timely manner , preventing the substrate from drying out, but it is important not to overdo it with watering, as this can cause various diseases that affect the seedlings.
If you maintain the correct temperature conditions, aster seedlings will be of excellent quality.
Picking
After the seedlings have formed 3-4 leaves, they can be planted in separate pots or cups. To do this, the dishes are filled with soil mixture, which is mixed with mineral fertilizers. At this stage, young asters require nitrogen, potassium and phosphorus.
Seedlings dive in the following sequence:
- Water the seedlings well to make it easier to remove the sprouts along with a lump of earth without damaging the delicate roots.
- Make small depressions in the prepared planting soil and moisten the soil well.
- The seedlings are placed in depressions, leaving about 1 cm between the leaves and the soil surface; it is important to deepen the root collar a little so that fragile plants are not washed out during watering.
- The plantings are sprinkled with earth and watered again, but avoiding moisture getting on the leaves.
- Cups with seedlings are placed in a well-lit place, but protected from direct sunlight. The temperature should be approximately 18-20 degrees.
When the plantings take root, the seedlings can begin to be hardened off by gradually lowering the temperature and leaving them in the open air overnight. Before transplanting into open ground, adult seedlings can be placed on the balcony if it is not so cold outside.
At night, you can use a fluorescent lamp, which will allow you to maintain an optimal microclimate all day long.
At what depth should asters be planted and when will they germinate?
In order to properly sow aster seeds, you should adhere to the following procedure:
- Prepare drainage in the container for seedlings. You can use expanded clay or large pebbles as it. This stage is especially important, since aster seedlings do not tolerate waterlogging and stagnant water.
- Fill the container with soil, not reaching the edge by 2-2.5 cm.
- Spray the soil with a spray bottle with clean, settled water. Wait until moisture is completely absorbed.
- Mark the beds for sowing in the box. If a glass or cassette is used for germination, then this step should be skipped. The distance between the holes must be at least 3 cm.
- Plant flower seeds to a depth of 1 cm . There should only be one seed in each hole.
- Sprinkle the holes with clean calcined sand. It will protect the plant from waterlogging and reduce the risk of blackleg. The sand layer should not exceed 5 mm.
- Cover the container with film or a lid and place it in a bright place with a temperature in the range of 18-20 degrees. The first shoots will appear in 10 days.
Important! After filling with sand, re-wetting is not required. Otherwise, the seeds may become moldy and not sprout.
Transplanting aster into open ground
Grown seedlings with 7-8 leaves and a stem height of about 7 cm can already be transplanted to a permanent place in the flowerbed. It's better to do this early in the morning or late in the evening, while it's not too hot.
- Boarding time . Seedlings are moved to open ground in April-June. Asters can easily withstand slight cold snaps down to -2 degrees, so you don’t have to be afraid of being slightly wrong with the period.
- Location and lighting . Asters require a lot of light, so choose their planting location on the sunny side. You can place plantings near buildings or fences, as well as near other green spaces, to protect the plants from direct light. Unrooted seedlings must be specially shaded.
- Planting in open ground . It is advisable to prepare the area for planting asters in advance by digging it up with compost or humus in the fall. In the spring, the site is dug up again and enriched with superphosphate, ammonium sulfate and potassium salt. If the soil is already sufficiently fertile, then fertilization is not required. Asters grow best in light, neutral soil.
Planting seedlings in a flower bed is carried out as follows:
- The area prepared for planting is weeded and loosened 4-6 cm deep.
- Make shallow furrows and water them.
- The plants are removed from the cups and, together with a lump of earth, planted at a distance of at least 20 cm from each other; it is better to maintain about 50 cm between the rows.
- The seedlings are covered with dry soil and watered after 2 days. 2 weeks after transplanting to the flowerbed, the flowers can be fed with nitrogen fertilizers.
Asters tolerate picks and transplants well, so they easily take root in a new place
Care after flowering
Pre-winter sowing
When the flowering of annual (garden) asters ends, it is recommended to remove the bushes from the soil and destroy them, as pathogenic microorganisms or pests could have settled on them. After the first frost, the aster seeds you have collected can be sown in open soil, but for this you should choose a different area. Sowing of seeds is carried out in previously prepared grooves, which are then covered with humus or peat. Some gardeners carry out winter sowing in December or January immediately in the snow. To begin with, crush the snow in the selected area and make grooves in it, into which the seeds are sown, do not forget to cover them with peat on top. The advantage of sowing seeds in the snow is that thaws cannot harm them. In the spring, when the snow cover has melted, it is recommended to cover the area from above with film, which facilitates the faster appearance of seedlings.
How to sow asters before winter. . Website "Garden World"
Collecting seeds
In order to collect seed material, you need to wait until the inflorescence on the bush of the variety that you really liked has withered. You can cut it off after its center darkens and a white fluff forms in it. The cut inflorescence should be placed in a paper bag where it can dry. Don't forget to write the variety and date of collection on the bag.
Please note that seeds collected last season have the best germination rate. And the seed that has been stored for 2 years or longer sharply loses its germination capacity.
Wintering perennials
Perennial asters can be grown in the same area for 5 years. As a rule, it is in the autumn that it is recommended to dig up, divide into parts and plant in a new place aster bushes that have reached the age of 5 years. During transplantation, try not to injure the plant's root system.
Such perennials are highly resistant to frost; therefore, they can easily winter in open soil. However, for some varieties, it is still better to cover young bushes for the winter with flying leaves, peat or spruce branches. Before covering the area, you need to cut off all the dried stems of the asters. With the onset of spring, the shelter is removed from the area, as a result of which the bushes will begin to grow faster and bloom earlier.
Planting without seedlings
Asters planted immediately in open ground acquire immunity to diseases and temperature changes. Of course, at home you can guarantee almost complete germination of seeds, but flowers grown immediately on the plot no longer need replanting or picking.
Usually, in order to get flowering bushes as early as July, early varieties are sown in March. It is important that the air temperature is not lower than 10 degrees Celsius. Late-flowering varieties are sown in April-May. Plants grown using the seedless method bloom a little later than those planted as seedlings.
Seedless method of growing aster:
- Step one . The seeds are sown in furrows no more than 4 cm deep, watered and sprinkled with soil. Before the first shoots appear, crops can be covered with mulch or non-woven material to protect them from dry and cool weather.
- Step two . After the crops grow and have 2 true leaves, the plants are thinned out, leaving a distance of 10-15 cm between them. Excess seedlings can be transplanted to another place or disposed of.
Beauty aster
Brief description of cultivation
- Sowing . Seeds are sown in open soil in early spring (March) or before winter, and for seedlings - from mid to late March. Seedlings are planted in the garden in April or May.
- Bloom . In summer and autumn.
- Illumination . Well lit or shaded place.
- Soil . Nutritious loamy soil, cultivated to a depth of about 20 centimeters.
- Watering . Moderate. On hot days it is necessary to water more rarely, but more abundantly.
- Fertilizer . The aster needs to be fed three times throughout the season: 7 days after the seedlings appear, during the formation of buds and when flowering begins.
- Reproduction . Annual species and varieties are propagated only by seed, while perennials, as a rule, are propagated vegetatively, namely, by cuttings and dividing the bush.
- Harmful insects . Slobbering pennies, spider mites, leaf and root-knot nematodes.
- Diseases . Powdery mildew, ring spot, gray rot of flowers, verticillium wilt and viral jaundice.
Aster care
Caring for asters is not difficult. Basic care comes down to watering, loosening the soil and removing weeds, as well as applying fertilizers at different stages of flower growth. After flowering, the buds are immediately removed so that the plants do not waste energy feeding the seeds.
- Watering . If the flowerbed with asters is located in a well-lit place, then you should take care of frequent and abundant watering so as not to suppress the plants. It is important to know that these flowers tolerate drought better than waterlogging, so water them as the substrate dries, spending about 1.5-2 buckets of water per 1 sq.m of soil.
- Loosening and weeding . After each rain and watering, the soil around the asters must be loosened to a depth of 4-6 cm, so the roots will receive more oxygen. Along with loosening, all weeds are immediately removed. To speed up root growth, before branching begins, the bushes are hilled to a height of 6-8 cm.
- Feeding . After transplanting the asters to a permanent place, fertilizer is applied 3 times. The first feeding is carried out 14 days after transplantation. Then, per 1 sq.m of soil, 50 g of superphosphate, 20 g of ammonium nitrate and 10 g of potassium sulfate are consumed.
Important! The second feeding is carried out at the moment of bud setting with potassium sulfate and superphosphate (50 g of each substance per 1 sq.m of soil). At the beginning of flowering, the second feeding is repeated.
Graceful aster with bright, light pink inflorescence
Possible difficulties and mistakes in growing
Asters are widespread everywhere due to their unpretentiousness.
But problems can arise if agricultural practices are violated. Seeds of the second year after collection reduce the germination rate of seedlings to 20%. And during picking, it is often discovered that neighboring plants are intertwined with their roots, which is why they have to be torn off.
Asters do not like soil with high levels of nitrogen and subsequent dense sowing. A small distance between individual bushes will lead to fungal and bacterial infections.
Preparing aster for winter
After the asters fade, they are dug up and burned. At the same time, various diseases, fungi and pests are destroyed. In perennial varieties, all dry stems are cut off, and the bush is covered with dry leaves or peat. The cover is removed in the spring and then the plants will actively begin to grow.
Seeds of the varieties you like can be collected and sown immediately in open ground for the winter, but in a different area. In this case, planting material is planted in small furrows and covered with peat. Seeds overwintered in this way will begin to sprout, and the plants will be more resistant to the vagaries of the weather and various diseases.
Seeds can be harvested when the inflorescences are already fading and their center is darkening, then a white fluff appears on the surface. The inflorescences are picked and placed in paper bags where they will dry. If you do not plan to plant for the winter, then the seeds can be stored for no more than 2 years and planted next spring. It is better to sign the package with planting material so as not to forget the name of the plant and its variety.
Many varieties of aster bloom until late autumn, and sometimes even until winter
Peculiarities of reproduction of perennial asters
Seedlings of late-flowering perennial asters are planted in the spring, and early-flowering ones - in the autumn. Alpine aster is most often grown from seeds.
Alpine aster bears fruit in July-September
The remaining perennial asters are propagated mainly by green cuttings (in May-June) or by dividing the bush. In March, bushes are dug up, cut into pieces with a sharp knife, each of them should have enough young roots and stems, after which the divisions are planted.
Perennial asters can also be propagated by layering: before the buds swell, the height of the bushes is trimmed to 15-20 cm, the layering is provided with high-quality watering, and the shoots are separated in the fall.
In one place, perennial asters grow for up to 6 years, but it should be taken into account that when propagated by seed, they bloom only in the second year.
Diseases and pests of aster (names, how to fight)
As with most annuals, it is better to prevent asters from being damaged by diseases and harmful insects than to try to get rid of them later. Often infection occurs when the rules of plant care and planting are violated.
Diseases
The most common problem with asters is fusarium. The plant affected by this disease begins to turn yellow and wither. In order to avoid disease, you should not plant asters in the same place. It is best to alternate plants in the flowerbed and after the last planting of the aster, wait at least 5 years. The greatest risk of contracting fusarium is in flowers planted in places where potatoes, tomatoes and other nightshades previously grew. In case of damage, diseased plants are dug up and burned.
Blackleg is a fungal disease that leads to rotting of the root collar and base of the stem. The affected seedling turns black and dies. If blackleg is detected, diseased plants are dug up and disposed of, and the area is disinfected with a 1% solution of potassium permanganate.
Rust manifests itself as darkening of the lower part of the leaf blades, which soon wither and dry out. It may appear if coniferous crops grow next to asters. To prevent and treat rust, use a 1% solution of Bordeaux mixture, which is used to treat plants. When powdery mildew appears, asters are treated with foundationazole.
With aster your garden will sparkle with magical colors
Pests
The main pests that can cause trouble for a gardener are: spider mites, arable slugs, armyworms, meadow bugs, bud aphids, slobbering pennies and common earwigs.
To avoid the appearance and spread of insects, in the winter it is necessary to remove all annual asters by the roots and prune all perennial asters. Chemicals will help get rid of aster pests on your site .
If arable slugs are detected, you must first collect the pests and then treat them with Metaldehyde. Treatment with phosphamide, carbaphos and pyrethrum will help against spider mites, cutworms, meadow bugs and slobbering pennies, and use foundationazole against earwigs.
Despite the fact that asters are almost never used in flower shops to decorate bouquets, cut flowers retain their freshness for at least two weeks. A variety of colors and shapes of annual asters will decorate any bouquet or flower bed. Following simple tips and recommendations, growing this beautiful flower will not be difficult.
Author of the article: Lastovskaya Lyudmila Viktorovna
Tags: perennials
- Related Posts
- Perennial flowers for the garden, the beauty of which will take your breath away - name, description, photo
- When to plant tulips: varieties, planting rules, growing secrets
- 38 of the most unpretentious long-flowering perennials for growing in country flower beds
« Previous entry