Yandex.RTB RA-1479455-7
Most often, clematis is cultivated in the ground, but it will also feel quite comfortable as a houseplant.
It is usually planted in pots, boxes or tubs (at least 60 cm high), placed in a well-lit place. Several holes must be made in the bottom of the container, then drainage and fertile soil are filled in, and after planting, a support for the plant must be installed. To provide the roots with coolness and shading, low-growing “neighbors” are planted in a pot of clematis.
Variety “Polish Spirit” combined with hyssop, rose and hosta
Yandex.RTB RA-1479455-3
Clematis planting and care in open ground.
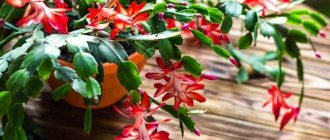
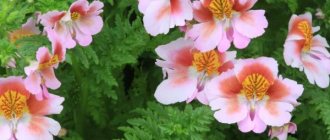
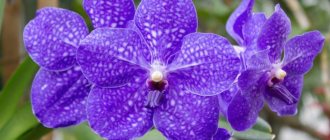
Indeed, choosing your variety from this variety of luxurious flowers is quite difficult. One is more beautiful than the other - huge, bright, terry, each simply strives to outshine the others in beauty. Each type promises to turn our dacha into a real Garden of Eden! After all, any variety looks beautiful both on its own and in combination with other flowers, especially roses.
Yandex.RTB RA-1479455-8
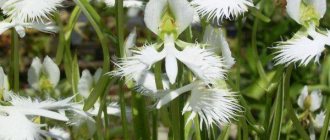
One of the most beautiful and sought-after varieties of clematis is Clematis Manchurian. This beautiful vine is actively used to decorate the landscape of the yard by gardeners all over the world, but only in the last few years has gardeners in our country paid attention to it. Thanks to its snow-white beauty and ease of care.
Clematis Manchurian (photo)
But, because We plan not just to admire the flower, but to grow it, then we need to know the features of caring for it. It is best to buy seedlings in pots, and when choosing a variety, we first look not at the shape of the flower, but at its group. It is she who will determine how we prune it, how to cover it for the winter and when to expect it to bloom.
Types of clematis by group and pruning method:
- First group. The liana will produce flowers only on last year's shoots. Therefore, if you cut off all the old shoots in the winter or spring, you will never see flowering. Flowers from this group are the most luxurious, fashionable and amazing, but they definitely need to be covered for the winter.
- Second group. In these varieties, flowers appear both on last year's shoots and on new shoots. But, if the variety is double, double flowers appear only on last year’s shoots. Only simple-shaped inflorescences appear on young shoots and with a short break after the first flowers on old shoots.
- Third group. Flowers appear only on young shoots. There is no need to cover it - I cut it almost to the root and that’s it. These species are the most unpretentious - they are ideal varieties for beginners, because... Caring for the liana is simple and straightforward. And although there are almost no terry species in this group, believe me, there is plenty to choose your treasure from.
Variety ERNEST MARKHAM. Group 3, height 2.5 m
Which supports to choose?
Installing a support on rooted vines is fraught with injury to the roots. In this regard, novice gardeners are interested in how to properly set spacers. Supports for climbing plants are placed before they are transplanted or immediately after it, before the roots have time to take root and grow. The main thing for any supports is the diameter; it should be no more than 2 cm so as not to injure the shoots.
There are several types of supports:
- arch;
- Column;
- pergola;
- Rabitz;
- screen.
The simplest supports for vines
More complex designs are jungles and garden rooms. If desired, gardeners can purchase supports in specialized stores or design them themselves. For example, arches are the simplest garden structures; they are made from durable wood, but more often from a metal profile.
Screens are wooden or thread frames. The most elementary screen is a string stretched between wooden slats, along which vines are allowed to run. Instead of twine, you can install a chain-link mesh. It will be much more convenient for the shoots to curl along it.
Planting clematis - tips for beginner gardeners
When you solve the problem of how to grow healthy clematis, remember that it does not tolerate transplantation at all, so immediately plant them in a permanent place. And in this place it can grow for up to 40 years, provided that you have prepared the planting hole correctly.
Clematis Comtesse de Bouchaud photo
How to preserve a seedling before planting.
If you bought your plant in the supermarket in early spring and still need to get to your dacha, or perhaps it’s still too cold to plant, you need to make friends with the plant at home.
Place the pot with the seedling on the sunniest windowsill. Now we must disinfect the soil in the pot, because... here it’s better to play it safe than to hope that it will pass - you don’t want to then treat diseases in our vine. We use Fitosporin for the soil. And in order to support the small vine itself, we use spraying with Epin solution. And for the roots we will buy vermicompost (instructions on the label). We repeat these procedures every ten days.
How to plant clematis yourself correctly.
A seedling in a pot can be transplanted into the soil after the night frosts have passed. Before planting, the pot with the plant should stand outside in the shade for a couple of days to adapt.
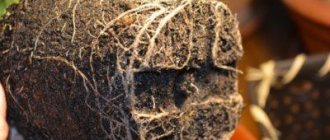
The main thing to remember is that you need to dig a hole for it that is wide enough and deep enough - almost the same as for planting an apple tree 60x60x60 cm. If you have close groundwater, do not forget to put a 10-12 cm layer of gravel or broken brick at the bottom of the hole so that The clematis roots did not rot.
Everything depends on how the root system of the plant feels: abundant flowering, brightness of flowers, number of new shoots and buds. And if the root system grows well and develops stably, then everything will be fine. It is necessary to add peat, humus and turf soil to the planting hole, and be sure to add a glass of ash. Mix this nutrient mixture in the pit and compact it lightly. We plant the seedling in a hole at the same level as it grew in a purchased container - the roots cannot be buried too deep.
Clematis Etoile Violette photo
Advice. If you want to get a bush with lush flowering, then you need to take care of the intensive formation of roots. To do this, make a hole in the middle of the hole 10 cm below the general level and plant a seedling in it. At the same time, pour a little sand onto the root collar of the vine to prevent it from being damaged by putrefactive fungi. During the summer, we gradually pour fertile soil into the hole until it is completely equal to the general level of the planting hole. This way we simulate the formation of roots, and with a strong root system the bush will be healthier and there will be more shoots.
Where to plant clematis.
Wet, swampy soils are completely unsuitable for the plant, so we exclude areas where there is stagnant water or water from roof drains for planting them. Such places guarantee fungal diseases and death of the vine. Also, you should not plant the vine near large trees - the roots of the plant are large and will begin to compete with the huge roots of the tree.
I would like to remind you that the flowers of the vine love a sunny place, and the roots love the shade. Therefore, it is good to plant low-growing flowers or ornamental grasses next to it. For example, hostas are excellent companions for vines. Another option is to mulch the roots. Pine needles, sawdust or straw are ideal as mulch.
How to feed clematis
Clematis Hania photo
The plant throws out a large mass of flowers over the course of a season, so the bush cannot do without serious feeding. Once every 10 days it must be supported with fertilizers that promote lush flowering. These are Agricola for flowering plants, Agricola Fantasy, Grow-Up, Effecton for flowering plants.
In the fall, be sure to feed the plant in winter: 1 tbsp. spoon of superphosphate and 1 tbsp. spoon of potassium sulfate per 10 liters of water - move carefully. Water one bucket of this solution per adult plant, then next spring the flowers will bloom faster and will delight you until the fall.
Tricks of experienced gardeners for lush flowering.
To grow beautiful clematis, you need to be aware that they are real gluttons, they should not be fed, but fed regularly and plentifully!
- When to feed clematis. Fertilize the vine once every 10 days with small portions of fertilizer, always in liquid form. We begin fertilizing in May, when shoots begin to grow.
- What to feed:
- 1 tbsp. spoon of ammonium nitrate per 10 liters of water or
- cow manure in a ratio of 1:10, or
- bird droppings in a ratio of 1:15 or
- 2 tablespoons of vermicompost per 10 liters of water.
- How to fertilize. Alternate mineral fertilizers with organic ones. When the buds appear, give organic and mineral fertilizers at the same time.
- We protect from pests. If the soil is acidic, to prevent wilt disease, you need to deacidify it with lime milk (200 g of lime per 10 liters of water). Ash is also suitable for these purposes.
- We strengthen the plant. These garden vines love growth stimulants - so spray them with Epin extra once every 10 days. This protects them from stress, helps them successfully survive spring frosts and makes shoots grow more actively.
We use one bucket of solution per bush.
Pest and disease control
No less dangerous for clematis are pest invasions, such as:
- Aphid. It settles on the underside of leaves, feeds on their juice and leads to drying and curling. To eliminate it, spraying with “Fitoferm” (2 mg per 1 liter of water) helps.
- Spider mite. Causes white spots to form on the bottom of leaves and cover the plant with cobwebs, causing it to appear weakened. Insectoacaricides and acaricides (toxic drugs diluted at 1 mg per liter of water) are considered effective means of combating it.
- Slugs. They eat leaves and stems at night. Against them, ammonia is used (2 tablespoons per liter of water), which is used to treat the plant.
Slugs can be collected manually after dark
How to propagate clematis by cuttings and shoots
There are three ways: cuttings, shoots and dividing the bush.
Clematis Hagley Hubrid photo
Propagation by cuttings. We prepare cuttings at the moment of bud formation, place them in Kornevin’s solution and, when roots appear, plant them in loose soil. Keep in mind that the average percentage of root rooting ranges from 10 to 60%, depending on the variety.
The method of propagation by shoots gives a higher percentage of rooting. Some of the vine branches, falling to the ground, begin to form roots. If at this time, without cutting off the shoot from the branch, you place it in the soil in a peat pot, then in a month you will be able to separate a healthy rooted seedling from the main bush. It is important to water the seedling in the pot abundantly.
Dividing a bush involves breaking an old bush with a shovel into several parts and planting each part in a new place.
Reproduction of clematis
Clematis is propagated by seeds, layering or cuttings.
- cuttings in spring can be either green or woody.
- Cultivated varieties are most often propagated by grafting onto more winter-hardy clematis species.
- Reproduction by layering is quite simple: the lower shoot is pressed to the ground and this place is kept moist all summer. By autumn, roots form on the shoot. You can cut it off and plant it as a separate plant.
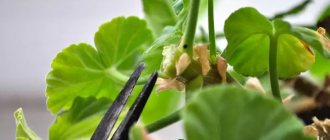
How to prune clematis to produce more flowers
The liana definitely needs support, and the mesh cells must be large enough - up to 15 cm, then it is easy to remove the liana from them, trim it and cover it for the winter.
Clematis Blue Angel photo
If you have a plant for the first year, then in the fall it is cut off almost completely - leaving one bud above the ground. This way we stimulate the bush to form new roots and shoots. All subsequent years, with the help of proper pruning, we continue to shape and strengthen it.
You might be interested in how to choose a rotary hammer for your home.
How to prune clematis of the first group , which form flowers only on last year's branches: in the fall we remove the vine from the support, if the bush is thickened, we cut off some of the shoots to the roots, we also cut out weak thin shoots, and cut all other shoots to a height of 1 to 1.5 m.
How to prune clematis of the second group , which form flowers both on last year’s shoots and on new shoots: in the summer after flowering, we cut off the flowering part of the old shoot, in the fall we cut out thickened and weak shoots, trim the remaining shoots at a height of 1-1.5 m, then shorten some of the shoots are cut in half again and some are cut very short - this is how we form a lush bush for next year.
How to prune clematis of the third group , where our flowers will only be on young shoots, consists in cutting off the shoots almost completely - up to the first bud.
If the new seedling you bought is of a group unknown to you, prune it as for the second group, and this way you can determine the group of your vine.
Do clematis need to be covered for the winter?
In order to prevent freezing of the lower bud and roots, these vines need to be protected from frost. Therefore, before covering the shoots, we remove all the leaves from them to prevent rotting. Then we remove the mulch at the base of the bush and fill the neck of the vine with compost or peat. After this, we lay out the stems in a circle in a ring, fasten the stems to the ground with thick wire clips, cover the top with mulch and cover with waterproof material, leaving holes for ventilation. In early spring, we free the shoots and tie them to a support.
For all their beauty, clematis frighten some summer residents with the difficulties of growing and caring for it. But, if you care for this amazing liana correctly, then you will be able to grow wonderful and luxurious flowers in the country, which look especially beautiful paired with climbing roses.
Recommendations
When planting vines in spring, it is recommended to follow a number of tips. This is necessary to prevent common mistakes among novice gardeners.
Basic recommendations:
- In early spring, the soil under clematis should be dug up so that the pest larvae inside die.
- If the acidity of the soil is increased, add lime to a depth of 20-25 cm.
- After planting, the flower should be given partial shade to prevent sunburn.
- To stimulate root growth, you can pinch strongly growing shoots.
- When deepening the vine during planting, you need to take into account the pruning group and the location of the tillering unit.
- In the first year, it is recommended to remove early buds from the flower to speed up the growth of shoots.
Following these recommendations will help you grow a beautiful vine with lush and bright buds. The tips presented will be useful for both beginners and experienced gardeners.