Plants » Flowers
0
1098
Article rating
Kira Stoletova
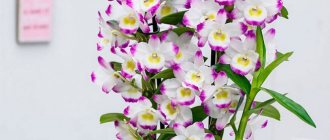
Proper care of phalaenopsis after purchase plays an important role, because... It depends on it whether the flower will take root in new conditions and whether it will bloom.
Home care for phalaenopsis after purchase
WHEN TO REPLANT PHALAENOPSIS?
Replanting after purchase
Important! Phalaenopsis should be replanted immediately after purchase !
Why do you need a transplant after purchase:
1. Update the substrate.
Over time, the qualities of the substrate necessary for the growth of the orchid are lost.
Hard mineral salts accumulate and air permeability deteriorates.
2. Remove the peat (coconut) cup
Nowadays, very often there is a peat (coconut) cup or a lump of pressed moss in the roots of an orchid.
The manufacturer plants the baby phalaenopsis directly from the flask (incubator for seedlings) into a peat (coconut) cup, since babies cannot grow in clean bark.
Then they are put into pots for sale. The peat (coconut) cup is not removed, since it is impossible to immediately plant phalaenopsis in the bark after the cup (a highly moisture-intensive substrate). An orchid can die from a sudden change in substrate.
3. Inspect the roots
Orchid roots are an indicator of plant health. The transparent walls of the pot allow you to choose an orchid with a well-developed root system, but the roots are not visible inside the pot.
It is unknown how the orchid was cared for during transportation and sale in the store.
Indicators for the next phalaenopsis transplant
- The leaves begin to grow smaller than the previous ones (if you are sure that the care is normal) - this is the first indicator that it needs to be replanted.
- The salinity of the substrate depends on the hardness of the water. This is an important indicator for transplantation.
- The density of the substrate, if it has decomposed and become highly compacted.
- Different hybrids and varieties grow differently, so you need to look at them individually.
Advice! When watering with hard water, you need to replant approximately once every 2-3 years , with soft water - once every 3-4 years, or less often.
When transplanted with flowers or peduncles, phalaenopsis takes root much faster and grows roots better.
I noticed that when replanting with growing leaves, the growth of the growing leaf slows down, so I try to replant the flowering ones.
The most important thing after transplanting is to provide enough light, but not direct sun.
If during the winter months you cannot provide illumination to the orchid after replanting, then it is better not to buy or replant in December-January.
Initial measures
Immediately after purchasing a phalaenopsis, they take care of it, starting with taking a number of measures, including:
- examination for the presence of pests and diseases; if symptoms are detected, treatment should begin after 2 weeks, during which the plant can strengthen in its new environment;
- analysis of the upper layer of bark for the presence of a white toxic coating on it; if it is detected, the affected bark is thrown away.
During the inspection process, plants do not immediately cut off wilted and yellowed foliage, because it can recover during the adaptation period. Immediately after purchase, the flower is watered no more than once every 7 days; fertilizing complexes and growth-stimulating drugs are not used.
Which pot to choose for phalaenopsis
The first pot for transplanting phalaenopsis after purchase should be at least twice as large in volume (for mini phalaenopsis 3-4) than the one in which it was sold.
For the first transplant after purchasing an adult standard, the pot should have a volume of about 2.5 liters. It is desirable that the pot fits into the cube.
It is not advisable to use tall pots because the top will dry out and the bottom will be damp.
If you put large pieces of clean bark at 1/3 of the bottom, and then a normal substrate, then you can plant it in a tall pot.
Important! The bottom of the pot should not fit tightly to the tray.
Phalaenopsis doesn't care whether the pot is transparent or not. The main thing is that there are drainage holes in the bottom.
Transparent pots are useful for beginners. Through their walls it is convenient to monitor the condition of the root system.
But in transparent pots in the light, algae, the most dangerous blue-green algae, begin to actively grow in the substrate.
Which pots are not suitable
- Pots with holes in the sides.
Holes in the dry air of an apartment are dangerous and harmful. Roots die from drying out in the same way as from waterlogging.
After reading recommendations on the Internet, I planted my very first phalaenopsis in the same pot.
Phalaenopsis continued to bloom, but the leaves gradually began to dry out. As a result: one leaf remained, then a new one appeared, but the old one dried up. And all because the orchid did not have enough moisture and it took reserves from its leaf.
The orchid was able to emerge only after proper transplantation and proper watering.
- Flowerpots.
Phalaenopsis needs fresh air, which must move freely around the pot for ventilation.
The air in the pots is stagnant, poor ventilation, drying, humid air. This is a good environment for fungi and bacteria.
Important! You can't put the pot in a flowerpot!
Watering and fertilizing
For the first 3–5 days after purchase, the orchid is not watered, except in cases where the plant has been on the road for a long time and looks sluggish when the substrate is clearly dry. Here, watering is necessary with a small amount of warm, soft water, preferably boiled and cooled to room temperature for the first time.
Further, the need for watering is determined by the condition of the substrate, but during adaptation to the microclimate of the new room, it is better to underwater the purchased plant than to overwater it. The lack of moisture can be replenished, but the excess will have unpleasant and sometimes irreversible consequences, leading to rotting of the roots.
After the end of the quarantine period, the orchid is gradually accustomed to watering by immersion, spraying and warm showers, but this should happen in stages and not all at once, because the need for these activities for each type of orchid is individual and depends largely on the environment.
Plants are not fertilized in the first weeks after purchase. Experienced orchid growers believe that they reduce the immunity of the plant, which must independently mobilize all its defenses to overcome a stressful situation. It is also not recommended to treat an orchid for prevention with means of protection against non-existent pests. If there is a suspicion of the presence of parasitic insects, wash the flower in a solution of laundry soap, then observe and determine the need for treatment with insecticides. During the quarantine period, vegetative propagation of orchids is not carried out.
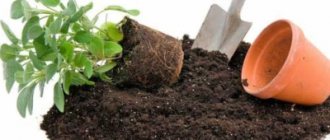
Transplantation process
A properly selected substrate is 60-80% of success in growing phalaenopsis.
Substrate requirements
The substrate for phalaenopsis should be:
- moisture-intensive - must take and retain moisture;
- breathable - should not cake and become dense (do not have fine dust and fine bark).
The best substrate is well-boiled pine bark (at least 16 hours), 2-3 cm in size.
If the bark is not cooked , it does not absorb and retain moisture well. Therefore, you need to add chopped sphagnum moss (30% by volume).
The bark is cut into pieces with pruning shears:
- For adolescent phalaenopsis, the optimal fraction size is 1–1.5 cm.
- For adult specimens, prepare pieces of 2.5–3 cm.
You can read about bark and sphagnum moss in the article “Substrate for orchids.”
Preparatory stage
Before transplanting, soak the bark in water at room temperature for 4-5 days. Then drain the water (no need to dry).
Important! You cannot plant phalaenopsis immediately after a moisture-intensive substrate in clean bark!
Before transplanting, the orchid needs to be watered . The roots will become more elastic and will easily tuck into the pot.
Carefully remove the orchid from the pot, lightly shake off the old substrate that has grown in - do not tear it off .
Inspection of the root system
It is necessary to check the root system of phalaenopsis. Dry, wrinkled roots, as well as threads without velamen, rotten, should be removed.
Important! Do not wash the roots before planting!
All roots should be dense, without blackness or soft wet spots.
Normally, the roots of phalaenopsis are dense, white or yellowish in color; when moistened, they acquire a green color.
If there was pruning or stripping, then dry it for a couple of hours before planting .
Preventative treatment
If there is wet rot on the orchids, they need to be cleaned to the living thing and treated with systemic fungicides : foundationazol (benomyl) or Previkur.
If the stains are local , then make a paste of foundationazole and coat it. If you need to spray or soak the entire plant, then dilute 5-10 g of foundationazole in 1 liter of water.
Transfer
At the bottom of the pot, about 1/4-1/3, put large bark.
Important ! Phalaenopsis should be planted a moist substrate and watered immediately or the next day, but no later.
Align the orchid vertically in the center of the pot.
Do not compact the substrate , but pour it in parts between the roots, tapping the wall of the pot with your palm.
Important! be no substrate in the leaf axils !
When replanting, you need to fall asleep right under the leaves , that is, deepen the orchid.
Why do you need to remove the lower leaves and plant in a hole?
Because new roots are important , which will grow in your conditions and will be adapted to them.
If the lower leaves get in the way (when the roots grow high above the lower leaves), then the leaves are torn off without leaving any residue.
Important! should be remains of dried on the phalaenopsis stem .
Leaves are removed as follows: cut the leaf along the longitudinal vein and tear it off in different directions from the base.
When replanting phalaenopsis with flowers or with peduncles, the orchid takes root faster and grows roots better.
Video from manufacturers about proper transplantation.
Plant pruning
If the phalaenopsis fades and there are no more unopened buds left on it, the question arises: is it necessary to trim the peduncle? In this case, there is no need to rush.
The fact is that phalaenopsis very often blooms again, forming flowers from a “sleeping” bud on an old peduncle. Therefore, it is possible to completely cut off the peduncle only when it has completely dried out and become woody.
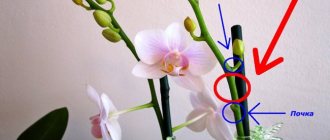
If the peduncle remains green and elastic, you should not cut it off completely: in a couple of months it will delight you with new flowers. In this case, you only need to remove its upper part, that is, the place where the faded flowers were located.
The cut location should be 1-2 cm above the last dormant bud . It is easy to identify, since dormant buds resemble unopened scales.
For pruning, it is optimal to use pruning shears that have been pre-treated with any disinfectant. Manipulations should be carried out with gloves to avoid burns from the plant juice.
The place where the peduncle is cut must be sprinkled with crushed coal to protect the plant from possible infection.
Care after transplant
The most important thing after transplanting is to give enough light, but not direct sun .
After planting , water immediately or the next day, but not later.
If during the winter months you cannot provide light to the orchid after transplantation, then it is better not to buy it.
If transplanted correctly, the orchid should not notice this. There should be no wilting of leaves or dropping of flowers.
Reasons for leaf wilting after transplantation
1. Not enough moisture.
There may be a lack of moisture for two reasons:
- insufficient watering or the substrate does not take up water (fresh living bark);
- lack of roots (rotten, dried out).
2. If the orchid is placed in the sun after transplantation .
Yellowing of leaves
It is normal if the bottom leaf turns yellow at the end or evenly . A leaf that has turned yellow at the end must be removed, tearing it off completely when it has turned 2/3 yellow.
If the leaf turns yellow from the stem , then most likely the stem is rotting . If the leaf turns yellow from the stem, remove it immediately and look at what’s wrong with the stem. If it rots, then clean it and treat it with fungicides.
Causes of drying buds and flowers
The main reasons for the drying (withering) of flowers and buds:
1. Lack of light.
2. Lack of moisture and overdrying. If there is a lack of moisture, photosynthesis cannot proceed normally, the orchid cannot flower, and therefore drops its flowers.
3. Excessive sun exposure to the orchid and its flowers.
4. The orchid gets exposed to cold frosty air from the window when ventilating.
5. Pests.
How to make an orchid produce a peduncle (arrow) - step-by-step guide
The dormant period is a natural part of the plant's life cycle. It cannot bloom constantly, it needs to rest and gain strength. An orchid blooms at least 2 times per year. If it has good roots, powerful leaves, and there has been no flower stalk for more than 3 months, it’s time to think about proper care.
Here are the main reasons why an orchid does not want to release its arrow:
- Weakly or too heavily humidified air. Shoot development occurs at a humidity of 40-60%.
- Insufficient lighting. Light should fall on the orchid for 10-12 hours a day.
- Excessive watering during dormancy.
During the period of shoot development, the optimal air humidity is 50-60, or even 40%. Indicators should not rise to 70-80%. Otherwise, the flower stalks will not appear or will begin to turn yellow and fade.
Sometimes the flowering stem comes out, but does not grow or dries up. This indicates a lack of lighting. Provide the plant with diffused bright light up to 10 hours a day.
Do not try to please the capricious tropical plant by watering it several times a day. On the contrary, it is recommended to reduce the frequency of watering.