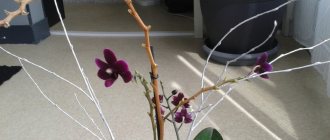
Dried peduncle of phalaenopsis
Knowing an orchid grower how to prune an orchid will help him enjoy flowering almost all year round. In home breeding, the phalaenopsis orchid is most often found, which significantly outperforms other species that require a period of rest and recovery. Although not everyone agrees that it is necessary to speed up the flowering time of these plants, since the continuous production of offspring exhausts the orchid. But whether or not an orchid blooms a second time is decided only by its owner.
How to prune an orchid correctly so as not to harm it
After flowering, the orchid is left with a long and ugly stem on which there were flowers. My hands are just itching to cut it off. But the arrow cannot always be cut. They decide whether to trim a flower shoot, focusing on its appearance and the type of orchid. After flowering, some plants go to rest and the peduncle dries out, others may bloom again. In the second, the shoot is not cut off as long as it remains green.
Signs that your orchid will soon need to be trimmed:
- the green arrow begins to turn yellow or brown, the purple one becomes dark pink;
- instead of a peduncle, a dry stick sticks out;
- The shoot has been green for 6 months, but the orchid does not bloom.
When caring for an orchid, there is no need to be in a particular hurry when trimming flower stalks. Depending on the type of plant, the arrow can be “disposable” or can act as a platform for repeated flowering. If the flower stem begins to dry out, it is allowed to dry completely and only then cut off.
Continued growth of the cut arrow of phalaenopsis
Is it always necessary to trim the shoot of a plant that has bloomed?
It depends on the type of orchid. Most orchids do not completely dry out their peduncles, but form new buds on them . It is better to cut such shoots only from the top, but if the arrow is completely dry, then remove it entirely.
This is not only a matter of aesthetics, but also protection from the possible proliferation of parasites on dry shoots and helping the plant, without unnecessary shoots it will be easier for it to develop green mass, and nutrition from the soil will not be wasted. Trim dead shoots if the plant is weak.
Pruning an orchid after flowering
Orchids in general try not to be pruned in the generally accepted sense, therefore, in the rules for caring for these plants, the term “pruning” usually hides the principles of pruning the peduncle. But this is one of the key points when breeding orchids. Knowing how to properly prune an orchid after flowering and what to do afterwards to prevent the plant from getting sick will help the orchid grower preserve the flower and speed up subsequent flowering.
Even if the orchid is a species that blooms once a year and the stem dries out after flowering, there is no need to try to pull it out. The peduncle is cut at a distance of about 3 cm from the rosette. At the same time, in the future it will serve as a “handle” for the plant when transplanting. As always, the most popular phalaenopsis and its hybrids stand apart from other orchids.
Due to the almost year-round flowering, phalaenopsis has its own rules on how to prune a faded orchid. For this operation, you can use regular scissors or, if your hand is steady, a sharp knife. But it is very easy to damage the leaves of a plant with a knife. Another option is pruning shears. Specially designed for cutting branches, the pruner causes minimal damage to plant tissue. For phalaenopsis, this nuance is especially important, since it is quite difficult to correctly trim a peduncle that has not dried out but is laying new buds. Scissors compress the stem, damaging internal tissues, at a fairly large distance from the cutting site. An infection can easily penetrate into a damaged peduncle. Secateurs cut according to a different principle.
Trimming the peduncle of phalaenopsis
Children's department
Finally, the long-awaited children have appeared, perhaps even several of them.
It is necessary to consider a budget option for separating and planting a phalaenopsis shoot. It will not require large expenses, but with this method the plant will be very comfortable and it will take root quite quickly.
Typically, shoots are formed from the upper bud on the peduncle
First you need to prepare the supplies for the procedure:
- for replanting you need a transparent pot or container, the bottom of which must have holes for ventilation of the rhizome;
- Styrofoam;
- pine bark;
- charcoal;
- tools must be pre-treated with disinfectants to prevent infection of young plants.
If there is no polystyrene foam, then pine bark will be enough. If it is not possible to purchase special pots, then you can use ordinary transparent plastic cups or small transparent containers - the main thing is that they have drainage holes.
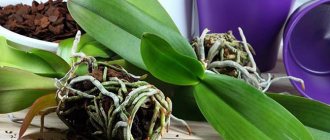
You need to cut off the shoot only when 3-4 leaves are developed on it. It will not be superfluous to wait for the roots to develop - there should be at least 2-3 of them. 5 cm long. Then you can begin to separate the baby orchid. If you delay replanting a little, the roots will become too long and it will be difficult to separate them without damaging them. It is better to postpone replanting if the roots of the children have not reached a length of 5 cm. They are still too weak and may not take root in the new place.
The procedure is carried out with a sharp knife or blade, very carefully, taking care not to damage the roots. If the baby is formed on a peduncle, it must be separated with a small piece of the mother plant. The edges of the cut must be treated with a fungicide or charcoal, which can be replaced with ground cinnamon powder. Then you need to dry it for a couple of hours. During this time, prepare the flowerpot.
The transparent container in which the phalaenopsis will be planted is filled with small pieces of polystyrene foam. The layer that will act as drainage should be about 3 cm thick. The foam will provide good ventilation for the rhizome at the bottom of the pot.
Pine bark is crushed into pieces up to 1 cm in size, then it must be doused with boiling water. This manipulation is carried out to destroy the larvae of various harmful insects that are invisible to the eye. Then the bark is poured into a container on top of the foam (up to half the container). The baby is distributed in the center, the roots are completely covered with the remaining steamed bark.
Subsequently, the young plant should be slightly deeper into the container; this is necessary for further free growth of the rhizome. You can't water it right away. It is better to do this after 2 or 3 days. During this time, the wounds will heal and the risk of infection will decrease.
You need to cut off the shoot only when 3-4 leaves are developed on it
It is possible that the rhizome will be a little long and will not fit completely into the container. Since phalaenopsis is an epiphytic plant, you should not be afraid of this. These roots will serve as aerial shoots and participate in the process of photosynthesis, like the leaves of a plant. In addition, the outer layer of the rhizome is designed so that it can absorb moisture from the environment.
It is important to ensure that the shoot stem and growing point remain open from bark and moss: this will prevent rotting when watering
What to do with the peduncle of phalaenopsis
The arrows of phalaenopsis in most cases remain green, and this causes concern among novice orchid growers. They cannot understand whether it is possible to cut the stem or whether they should wait until it begins to die on its own.
As a rule, phalaenopsis orchids are pruned immediately after flowering, but they do this if they want it to bloom again quickly. Having additional dormant buds on the shoot, the orchid begins to grow new shoots from them. In this case, the peduncle is cut 0.5 cm above the dormant bud. If you cut lower, the bud may dry out.
Since usually the peduncles of phalaenopsis continue to remain green, then, theoretically, they do not need to be trimmed. But in this case, the shoots grow and branch, because from the buds on the stem they form not new flowers, but new peduncles. It is difficult for a plant to maintain such structures, so how to prune an orchid after flowering is most often determined by eye and your own taste. Typically, pruning is done by two-thirds, leaving the plant a third of the stem for the next flowering. Cut off the peduncle with a disinfected tool.
Important! If the stem does begin to dry, there is no need to try to “save” it by cutting off the drying part. The plant simply decided to go on vacation. Moreover, even a drying peduncle still supplies nutrients to the flower.
When the arrow dries, you need to wait until it turns into a lignified “straw”, and only then remove it. In case of complete removal of the peduncle, you will have to wait several months until the phalaenopsis forms and grows a new arrow, but sometimes this is necessary for the health of the plant itself.
Caring for a trimmed orchid
Before pruning, in addition to tools, you need to stock up on products that will cauterize the cut site and prevent pathogenic bacteria from penetrating inside. Activated carbon, iodine, brilliant green, potassium permanganate or cinnamon are used as such agents. After the orchid is trimmed, the cut is lubricated with a disinfectant solution or drying powder is rubbed in. In some types of orchids, the peduncle is hollow inside. In this case, the cut must be sealed with beeswax to prevent water from getting inside or pests from entering. Getting rid of uninvited residents who have settled inside the stem is much more difficult than driving them out of the leaves.
Caring for an orchid involves more than just replanting and cutting the flower stem. When replanting, the dried and rotten parts of the rhizomes are cut off from the plant, leaving only the roots that have a green or gray appearance. But this may not be enough. It happens that an orchid does not bloom for several years, as it is overloaded with green mass. In this case, cut off excess leaves. And here it is especially important to know how to trim the leaves of an orchid. Improper pruning can destroy the plant.
Cut flower stalk of phalaenopsis
How to trim orchid leaves correctly:
- Always cut off the lower leaves.
- When starting pruning, the leaf is cut along the midline and torn to the stem.
- Gently tear off the halves from the stem with your hands.
- Do not water the orchid for several days, allowing the wounds to dry out so that the orchid does not rot.
Do the same with dried and yellowed leaves. If the leaf is green but flaccid, you should wait, perhaps it will gain elasticity. And if it does start to turn yellow, you need to wait until it completely dries and cut it off. Under the removed leaves, anything can be found: from young aerial roots to a new shoot that has begun to form.
Quick tips from experienced flower growers
- Buy orchids in transparent pots.
- The roots should be silver or green, as they participate in photosynthesis and are numerous. A different color of the roots and an unpleasant odor from the substrate are signs of rotting. This orchid does not bloom for long and dies quickly.
- Place the flower pot in the brightest place in the room - on the windowsill of a south or south-east window. Shade orchids at midday from direct sunlight.
- Do not change the location of the flower pot too often.
- If phalaenopsis does not bloom for a long time, place the plant in a room with a temperature of 16 to 18 ° C for 2 weeks.
- After trimming, sprinkle the cut area with crushed charcoal. This treatment will prevent contamination by bacteria and fungi and the spread of infection. Charcoal can be replaced with powdered stove ash or cinnamon.
- To water, immerse the pot with the plant in a container filled ¾ with water and leave for half an hour. Moisten every 7-10 days during the growing season, after 2-3 weeks during the dormant period.
- Add fertilizers to water for irrigation.
Plants must be provided with light, warmth and moisture, and protected from diseases and pests. Optimal conditions and proper care are the best things an owner can do to ensure regular flowering of an orchid.
Watch the video about what to do when the orchid has faded: