Having mastered the intricacies of propagating indoor or garden begonias, you can expand your flower garden without material costs and tedious trips to specialized stores. You just need to grow a young begonia bush from seeds, leaf cuttings or by dividing the mother tuber. Have you just recently started working with flowers and doubt your abilities? Listen to the recommendations of experienced like-minded people and enjoy your first successes. The following review will help you understand all the intricacies of the labor-intensive process.
General information
Almost any begonia can be grown from seeds, cuttings, part of a leaf, by dividing a bush or rhizome. And in industrial greenhouses, where the main goal is to obtain as many young plants as possible, the seed method is preferable. At home, things are a little different. For example, you are unlikely to be able to get seeds from decorative deciduous begonia. While growing a plant by leaf cuttings is as easy as shelling pears. Below we will consider the main methods of vegetative propagation of begonias at home.
Landing
There are two ways to grow tuberous begonia at home - by sowing seeds in the soil or using a tuber of an already mature plant.
When growing begonia from seeds, it is important where it will grow in the future. So, for example, if you plan to grow this perennial as a houseplant, then sowing the seeds should be done in December, and if you want to grow the plant in the garden, then you can sow the seeds for seedlings in early spring
The technique for growing begonia from seeds is as follows.
Granulated seeds of a certain variety are purchased. Peat tablets are used as a nutrient medium, which must first be soaked in warm water and placed in a container for seed germination. We place each individual seed on the surface of the peat tablet (on the small depression there) and sprinkle it with warm water; there is no need to bury the seeds in the soil. The container with peat tablets and sown seeds should be covered with glass or plastic wrap, and then placed in a warm place where there is enough light. Periodically, the film needs to be removed to allow fresh air to flow in and drip irrigation of future seedlings - it is important to ensure that the peat soil does not dry out. From the moment the seedlings emerge (this happens after 14-15 days), the first fertilizer from mineral components is applied dropwise, dissolving it in warm water in a dosage of 1: 4 of the recommended values. In the phase of the appearance of the third leaf of the seedlings, peat tablets can be planted in small containers with soil for further formation of the root system, while the film is removed for a longer and longer time, accustoming the plant to the temperature regime of the environment. After waiting until the young plant is strong enough, it can be planted in a small pot or transferred to the garden when it becomes warm, to a permanent habitat.
When planting a young begonia in a pot, you must remember that its volume should be 1-2 centimeters larger than the previous one. If you transplant begonia immediately into a large container, then you may not wait for flowering - the plant will devote all its energy to rooting in a large space for it.
To grow begonia from a tuber, a slightly different technique is used. Its essence is as follows.
Planting material can be purchased from specialized nurseries or dug up in the garden in the fall. All shoots must be removed from the tuber and placed in a container with soil, which is transferred to the basement with an air temperature of 8 to 10 degrees Celsius. In February, the tubers need to be placed in moist soil, where they will germinate at temperatures up to 20 degrees, good soil moisture and sufficient lighting. As soon as the buds of future shoots appear on the tuber, it is cut into pieces with one shoot each, and the cut sites are treated with charcoal powder and dried, thereby preventing putrefactive diseases. Now parts of the tuber with future shoots are planted in containers with moist soil, while deepening the tuber no more than halfway
If small leaves have already appeared, it is important to ensure that they do not come into contact with the soil, otherwise rot may develop on them, leading to the death of the plant. For 20 days, young shoots need to be looked after - moisten the soil and provide good lighting and warmth. After this time, the plants can be transplanted to their permanent place of growth.
At the same time, you must not forget to add mineral fertilizer to the soil for better rooting and growth of begonia.
When growing begonia from a tuber, you need to ensure that the soil is not waterlogged.
In addition, it is important to choose the right pot in terms of volume - it should not be too large or too small. It is enough that the new container is a couple of centimeters larger than the previous one
If you plant begonia in open ground, you need to immediately choose a place where it will be provided with good and uniform lighting, as well as protection from drafts and strong winds.
Cuttings
Any begonia with stems can be propagated by cuttings. The apical part or middle of the stem is suitable for this. Step-by-step guide to action:
- Using a sharply sharpened sterile knife, cut a ten-centimeter cutting with two or three pairs of leaves. Cut at an angle from where the leaves grow.
- The lower leaves need to be torn off, the upper leaves should be shortened by 2 times.
- Leave the cuttings for several hours so that the cuts dry, and then treat them with root.
- Prepare a container with a soil mixture of soil for begonias and sand (1:1).
- Use a pencil to make a hole in the soil and insert the cutting into it so that it goes underground to the leaves.
- Sprinkle with soil and compact well.
- Cover with half a plastic bottle.
- Root for about 4-5 weeks (during this time new leaves will grow on the cuttings).
- Now the begonia needs to be hardened, gradually accustoming it to life without a “protective flask”. To do this, remove the bottle daily, first for 10 minutes, then for 15, 20, etc.
- After 4 months, the new plant will produce its first flowers.
Rooted begonia cuttings
To increase the area for root formation, make an oblique cut on the stem begonia cuttings.
How to prepare cuttings for propagation?
Flower growers consider tuberous begonia to be a rather unpretentious plant. Propagation by cuttings in water usually does not cause problems if certain rules are followed. Before immersing the cuttings in water, treat them with growth stimulants, which also protect the plant from infections (Gumisol-N, Zircon). This will increase the chances of rooting, especially if a slightly weakened stem is used as a cutting.
This treatment prevents the process of rotting. When using growth stimulants, use only glass, porcelain or enamel dishes. These drugs are available in the form of solutions or dry mixtures. Cuttings of cuttings are dipped into the solution or dusted with powder. The duration of action of the drug is usually indicated on the packaging.
Root formation and propagation of begonia by cuttings in water will be more successful if vitamins C or B1 are added to the growth stimulator. Using vitamins alone will not give the desired effect. Approximately 50 mg of vitamin C or 20 mg of B1 are added to 1 ml of solution. One gram of dry preparation should be mixed with 50 mg of vitamin C or 10 mg of B1. Vitamins should be dissolved in a small amount of water before adding to the solution.
Growing from leaf pieces
An excellent method of propagation, especially for begonias that do not have a stem: Elatior, Mason's begonia, etc. Just one leaf is enough to produce new plants. We tell you how to properly root a begonia leaf into the ground:
The photo shows how to properly cut a begonia leaf.
- Using a sharp blade, cut off a healthy, elastic leaf and place it on a perfectly smooth cutting board. Working from the central vein to the edges, cut triangular pieces so that each has one or two veins. See photo.
- Place the triangles on the surface of the moistened sand or stick them with the bottom cut into the ground. Make a cap out of cling film and cover.
- Maintain humidity inside the plastic cap by spraying the inside of the improvised greenhouse from time to time with a spray bottle.
- As soon as young leaves appear, begin hardening, removing the cap first for 5 minutes, then for 10, etc.
- When transplanting a new plant to a permanent place, do not compact the soil around the planting. Just pour water around the root collar and that’s it.
Greenhouse for begonias from scrap materials
Advantages of this propagation method:
- begonia will not suffer from the loss of a single leaf;
- the technique does not require special skills and even a beginner can do it;
- one leaf produces 10 new plants;
- there are begonias for which leaf rooting is the only method of reproduction;
- unlike purchased seeds (dark horse), the leaf immediately gives an idea of the appearance of the future plant;
- By feeding nutrients directly from the leaf, the shoots will grow faster than from seeds.
Several leaf propagation options
“Breeding” begonias with leaves is the most economical way, because several bushes can be grown from one leaf plate.
Whatever method you choose, always use healthy, strong leaves.
It is believed that this method is used to propagate varieties whose leaves are pubescent on the underside. The method is also suitable for creeping varieties. Do not forget about species that have virtually no stems (Elatior, Masona) - for them such reproduction is the main thing.
Method 1: one leaf - ten bushes
In this case, the leaf is cut into several (up to ten) pieces. Use only the sharpest possible tool - a dull one crushes the plant tissue, which will not lead to anything good. It would also be a good idea to sterilize it (wipe it with a cotton swab dipped in alcohol).
Step-by-step “recipe” for reproduction:
- Cut the leaf so that at least 1 vein remains on each piece. Most often, the pieces are formed in the form of triangles.
- For each piece, prepare a small container (this can be a disposable cup, a cassette with cells for seedlings, peat tablets). The leaf is either laid on top of the soil with the pubescent part down (in order to lie tightly on the substrate, it should be pressed down on top with a pebble), or stuck in with a cut. The soil can be pure sand or a mixture of sand and peat.
- Form a greenhouse over the “pots”. For example, the cassette can be placed in a large transparent plastic tray with a lid, and cans or cut-off bottles can be placed on top of disposable cups. Many people use transparent bags.
- From time to time you need to let some fresh air into the greenhouse. In this case, the leaves need to be sprayed. This moisture will be enough for them - do not water them so that water does not stagnate in the “pots”.
- Three weeks later the leaf will begin to take root. This will be visible from the growing leaves. The time has come to harden the new plant: remove the greenhouse for 20-30 minutes (longer thereafter), allowing the plant to gradually adapt to the temperature in the room.
- Three months later, young begonias can be picked. Take “adult” soil. Do not compact it in the pot under any circumstances. And so that when planting the soil does not turn out to be too loose, the flower can be watered.
Method 2: whole leaf
You need 1 large leaf and 1 pot of approximately the same width.
An important point: the leaf must have a stalk (at least 7 cm long).
- Cut the leaf across the veins (cutting through each large one) and lay it on top of the soil, sticking the cutting into the ground. The soil must be well sprayed.
- Lightly press down on top with perlite or something similar.
- You need to form a greenhouse over it (there is nothing easier - throw a transparent bag on it, and you're done).
- It should be germinated on a sunny windowsill, in a warm place. Sometimes it is necessary to ventilate and spray.
- Young plants will appear in about 30 days.
When you see emerging bushes, you can remove the package.
As soon as the “guys” get stronger, you can dive them into disposable cups.
Method 3: leaf-cutting
The most elementary method, but also the least economical: 1 bush will grow from one leaf.
- Choose a leaf with a long stem.
- Place in a glass or shot glass with water (or better yet, “Kornevin” or succinic acid). And to prevent the cutting from rotting, you can also add charcoal (crushed wood or activated) to the glass.
- If you do see rot at the tip of the cutting, cut it off and replace the water.
- When you see the roots, you can transplant the leaf into a small pot with soil.
Seeing that the first leaves of a new bush are emerging from the soil, do not rush to cut off the old begonia leaf. It will continue to nourish the young plant for some time. When it gives up all its beneficial juices and dies off, then you will trim it (only carefully and with a very sharp knife, so as not to accidentally pull out the young “creature”).
Whole sheet
Don't want to bother with cutting and sprouting leaf triangles? So, especially for you, we’ll tell you how to propagate begonia with a whole leaf at home.
Any leaf with a stem (stem) is suitable for these purposes. Just cut the leg obliquely, deepen it slightly, and lightly compact the soil around it.
To get more escapes:
- make several slits in the sheet plate, lay it flat on the surface of the soil;
- press down with small pebbles (so the planting material will adhere more tightly to the soil);
- cover with glass and maintain soil moisture (moderately);
- When the shoots appear and get stronger, separate them and plant them in separate containers.
Without enough light, your efforts will be in vain. But, on the contrary, it is better not to get carried away with moistening the soil. Excessive humidity can lead to the development of fungus, rot, and mold.
Propagating begonias at home with leaves and cuttings has one significant drawback: the lower part is underground and timely detection of rot becomes problematic. As a rule, this leads to the death of some seedlings. To avoid such troubles, experienced gardeners propagate indoor or garden begonias using cuttings and leaves in water. After the roots appear, the planting material is planted in the ground.
Begonia propagation by dividing the plant
The method is suitable for all types and varieties, except for tuberous ones, although you can unscrew the “extra” shoot from them. The main thing is that the bush is healthy and well-grown.
By dividing the rhizome
Suitable for a group of decorative deciduous begonias. When transplanting from the underground part, shake off the soil and cut it into fragments so that each has at least one growing point.
Immediately plant in the substrate used for mature begonias. Water, cover with a transparent film, which is removed after a new leaf appears.
By shoots
The culture can be propagated by shoots that appear above the soil surface. They are released:
- rhizomes or tubers of different species;
- axils of a leaf buried in the substrate.
Reproduction does not have to be carried out during transplantation. The sprout, when it produces several good plates, can be broken out of the ground along with the roots. For this:
- take it by the base, plunging your fingers shallowly into the substrate;
- loosen and pull or twist.
If there are roots, plant them immediately in begonia soil. When the shoot breaks off without lower shoots, dilute the substrate with baking powder. Long branches or large leaves are shortened to reduce the load on the root. To be safe, cover with a transparent bag until the new plate is pulled out.
Care for it like an adult plant. Do not let it bloom until the begonia has completely entwined the ball.
The smaller the root of the division, the more you need to cut off the above-ground part when propagating.
Rooting a leaf in water
Treat the cut with a growth stimulator. Place in a glass jar with settled, lukewarm water and place in a well-lit place. In a couple of weeks the first roots will appear. Until they appear, do not change the water.
Begonia leaves take root in water
Rooting a leaf in water. Place the stem of the leaf in warm water and place it in a warm, well-lit place. Cover the container with a plastic bag on top and wait for the roots to grow. Then remove the bag and replant the sprout into the ground.
If during the rooting process the planting material begins to rot, take urgent measures:
- wash and boil the container;
- pour fresh water;
- clean the seedling from the affected areas;
- Treat the cut areas with activated carbon and leave in air for about 2 hours.
How to plant a tuberous species?
For propagation, healthy begonia tubers 2-3 years old are selected, where there are already buds or they are actively appearing. If shoots have already started, it is not recommended to divide it.
Procedure:
- Prepare wide planting containers with spilled soil.
- The tuber is cut with a sharpened knife into 2-4 parts, so that each has 1-2 buds.
- The cut is dusted with ash or crushed activated carbon for disinfection.
- Each fragment is planted in the ground, buried halfway.
- Cover with a transparent lid or film.
- Leave in a moderately warm place, protected from direct sunlight.
- When the sprouts reach a height of 7-10 cm, they are transplanted into small pots.
From the video you will learn about the propagation of begonia by dividing tubers:
Dividing the bush
The overgrown begonia can be divided into 2-3 plants.
Sequence of work, how to plant:
- adult begonia is well watered;
- carefully remove from the pot, remove old leaves and thick stems, wash the roots;
- using a knife, divide into parts so that each contains sprouts and roots;
- transplanted into pots of smaller diameter than the old one.
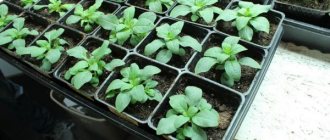
Growing begonia from seeds
Even a novice gardener can grow ever-flowering or any other begonia from seeds. But before you move on, familiarize yourself with the features of the technological process and some tricks that significantly simplify the task. Over time, experience will come, and all actions will come from the head.
In the photo you can see what begonia seeds look like
Description of the plant
A lover and connoisseur of exotic plants, the French intendant Michel Begon, when he organized a botanical expedition to the Caribbean, could not even imagine that his name would be known throughout the world centuries later. During the expedition, monk Charles Plumier discovered unknown plants, which he described and named in 1687 in honor of his patron - begonias. It was from this time that the cultivation of new and very beautiful flowers began.
Tuberous varieties of begonias were discovered in the mid-19th century, which served as an impetus for the development of hybridization. The result was a group of plants blooming with unusually beautiful flowers. Begonias have no classification; they can be conditionally divided into groups based on external features and root system.
Under natural conditions, begonias grow in South America, Africa and Asia. They are especially common in tropical countries with humid forests or a subtropical climate in mountainous areas.
Tuberous begonia is a perennial plant, usually herbaceous, but sometimes woody shrubs are also found. The plant has a fleshy, erect or creeping stem with pronounced nodes. It can reach a length of sixty centimeters.
Juicy and rather large leaves on the stem are arranged alternately and are most often heart-shaped. Begonia has a paniculate complex inflorescence and dioecious flowers. Various hybrids may have simple or double, wide-opening buds. The colors of the flowers are different: yellow and white, red in a wide variety of shades, with specks or a border.
The root system of this plant is weak, superficial, and therefore very sensitive to soil quality and watering. Begonia forms a tuber, which is a modified shoot that serves as a source of nutrients for it in the off-season. Despite the fact that this beautiful flower is widespread in our country, novice gardeners do not know how it reproduces.
Begonia can be grown from seeds. But this method is quite troublesome and time-consuming. Tuberous begonia propagated by cuttings will delight you much faster with its luxurious flowering. There are several ways to help cuttings take root faster. We will talk about this further.
Best time to sow
New tuberous begonias are obtained from seeds collected at the end of the growing season or using tubers. The first method is more labor-intensive, but it allows you to significantly increase the number of flowering bushes.
The best period for sowing begonias for seedlings is from mid-December to March. Various sources write that after 3.5-4.5 months from the emergence of seedlings, bush or ever-flowering varieties begin to bloom, and tuberous varieties bloom 3-4 weeks later. These are only conditional terms determined by the varietal characteristics of the plant, storage conditions of planting material, etc.
Practice shows that begonias begin to bloom 4–6 months after seed germination. Based on data obtained experimentally, you can choose the optimal time for planting begonia seedlings.
With a small number of plants or the presence of an equipped greenhouse, you can breed begonias in December-January. In winter, it dawns late and gets dark early, so artificial lighting plays an important role (at least 12 hours a day).
If there is insufficient lighting, begonia seeds are unlikely to sprout.
The optimal time for sowing is considered to be February, when the length of daylight hours increases and the need for artificial lighting of plants practically disappears (a month after the emergence of seedlings, phytolamps can be removed completely).
We bring to your attention a cheat sheet (adjust the dates according to the lunar calendar):
| Region | Recommended sowing period |
| Siberia, Ural, Len. region | In spring from March 14–16 |
| Central Russia, Moscow region | From early to mid February |
| Southern regions | In late January - early February |
If a young plant does not develop
Young begonia slows down due to poor care or hidden disease. If the flower is withered:
- it is taken out of the pot;
- replace the earth;
- cut off diseased roots;
- put back;
- spilled with a solution of phytosporin with a small dose of fertilizer for flowering plants.
If begonia has not developed before winter, then it is left alone until spring. In the warm season it will continue to grow; for a good growing season, it is fed in April-May.
Begonia is propagated vegetatively and by seeds, but the first option has the advantage. Propagation of a flower by shoots will preserve the repetition of the variety and decorative qualities of the new plant. The procedure requires choosing high-quality planting material and following simple rules for subsequent care.
Collecting seeds correctly
Begonia is a monoecious plant. This means that on one bush there are both male and female flowers. Leave some of the flowers on the plant and by mid-summer, seed pods will appear instead. Wait until they dry, acquire a brownish-golden hue, and cut immediately. Proceed carefully so as not to lose the planting material.
Start harvesting in late July - early August. If any of the removed bolls are unripe, place them on newspaper and leave them in a place protected from direct sun at +18 °C to dry.
Place the collected seed pods in separate bags labeled with the names of the varieties. Store bags of planting material in a dry, well-ventilated place.
Begonia box with seeds
Attention! Do not overexpose the boxes on the bushes. Otherwise, the shells will overripe, crack and small seeds will fall out.
Variety of varieties
The decoratively bright and varied tuberous begonia is represented by many varieties with different types, shapes and colors of flowers.
Variety Non stop
A royal variety with flowers more than 10 cm in diameter. Each individual flower is a double collection of petals into a large bright bud, of which there are quite a lot on a small plant of only 20-30 cm.
The flowers of this variety are of an unusual appearance - they are two-colored. The variety itself is represented by 12 different hybrids of white, yellow, pink, apricot and red.
Begonia Non Stop grows in the form of a bush with well-developed horizontal branches, the length of which is easily adjustable. Due to this, it is recommended for decorating various landscape compositions.
Odorant variety
Begonia Odorata is in the form of a herbaceous bush with spreading branches about 20 cm high. It has large double inflorescences with white and pink buds up to 9 cm in diameter.
Flowering time June-October. Well suited for interior decoration, as well as garden or balcony.
Variety Grandiflora
The plant is small, strewn with a large number of multi-colored pink-shaped large flowers (diameter reaches 20 cm).
The petals can be smooth or terry, which creates additional volume for the buds.
Increasing the quantity and quality of seeds
Flower growers who grow garden flowers from seeds for seedlings often complain about the low yield of garden small-flowered tuberous begonias. This is not surprising, since open pollination produces very few seeds. Moreover, when growing seedlings, about 25% of the planting material may not sprout.
The quantity and quality of seeds can be increased if begonias are artificially pollinated.
To pollinate, use a soft, sterile brush to transfer pollen from the stamen to the stigma of a female flower. After this simple procedure, the plant will produce three, four, or even six times more seed pods. In this case, the number of seeds increases 10 times.
Rules for caring for tuberous begonia
For all its external sophistication and beauty, this type of home begonia is absolutely unpretentious both in indoor and garden conditions.
Lighting requirements
Like any other plant, begonia does not tolerate direct sunlight, especially from 12 to 17 hours. If there are drops of water on the leaves of the plant, then burns may occur under the influence of the rays. The most suitable would be soft, muted light in the morning or evening hours.
Begonia does not tolerate direct sunlight
In indoor breeding conditions, additional artificial lighting using lamps may be required from the end of autumn and throughout the winter. At this time, the plant requires an extension of daylight hours to 12 hours.
How to grow begonia from seeds yourself
Follow the steps below to grow begonia from seed.
Selection of planting material
In order for planting seeds for seedlings to result in germination, and for garden or indoor begonia to bloom until autumn, you need high-quality planting material. Begonia seeds remain viable for up to 4 years, and those stored in the right conditions (+5–9 °C, humidity not higher than 70%) germinate after 6 years.
When sowing, it is important to consider the age of the planting material. If the germination rate of fresh seeds is about 95%, then only 70–80% of five-year-old seeds will germinate (and you will have to wait a long time for germination). Much depends on the variety. For example, the germination rate of tuberous small-flowered begonia rarely exceeds 40%.
Begonia has small, just microscopic specks of dust-seeds: just 1 gram can contain up to 90,000 pieces. Manufacturing companies pre-treat the seeds and place them in capsules with growth stimulants and fertilizers. And in any specialized store you can buy larger specimens ready for germination. But their prices are steep - you can pay up to 55 rubles for a package with only four seeds. While you will collect thousands of times more from your home plant (and completely free of charge).
Soil preparation
For sowing seeds at home, soil for begonias, sold in any florist department, is suitable. You can also prepare the soil mixture yourself by mixing high-moor peat, humus and sand (2:1:1).
The first immature shoots are very capricious. Too dry soil and waterlogged soil are equally destructive for them. For prevention, add a few tablespoons of agroperlite to each liter of soil mixture. This substance will prevent the soil from acidifying or drying out.
Soil for planting begonias
The soil in the container should lie evenly, the top layer should be sifted and then slightly compacted. Otherwise, microscopic seeds will simply drown in cracks and dimples, and this will have a bad effect on the process.
To prevent young sprouts from being damaged by fungus, water the soil with a pale pink solution of potassium permanganate, phytosporin or any fungicidal preparation.
Selection of capacity
Tiny seedlings emerge from tiny seeds, fully developing only at a certain distance from each other. In cramped conditions or too much space, plants will be equally uncomfortable, and this will certainly affect the survival of future begonias.
Pots for sowing
For growing begonias from seeds, a small plastic container with a transparent lid is quite suitable. For example, about 100 four-week-old sprouts will fit perfectly on an area of 10 cm².
The bottom of the container should have holes so that excess water drains and the roots breathe. The holes must be round, with a diameter of 5 mm. It is unlikely that you will be able to cut them out with a knife. It’s better to take an old metal knitting needle, heat it over a gas burner and, while it’s still hot, make as many holes as needed. As soon as the needle enters the puncture, rotate it from side to side. This will widen the holes.
How to propagate at home?
Indoor begonias are divided into root and tuberous. There are several ways to breed begonias:
- leaf;
- stem cuttings;
- tubers;
- seeds;
- dividing the bush.
For planting begonia seedlings, special purchased soil or prepared soil is suitable:
- they collect leafy turf soil from the forest, dry it and sift it;
- mixed with peat, sand and humus in a ratio of 2:2:1:1;
- The prepared soil is pierced for 10 minutes in the oven for disinfection.
It is recommended to add a little expanded clay to the mixture.
Begonia from seeds without soil mixing
Now we’ll tell you how you can grow begonia from seeds without soil mixture at home. Light peat tablets, protected from infections and enriched with growth stimulants and fertilizers, work well as a substrate for growing seedlings. Sowing seeds in them is easy, pleasant and profitable.
Fill the tablet with warm water, and after swelling, drain off the excess liquid. The side covered with non-woven material should be on top. Lightly fluff it with a match, add a couple of seeds.
When the time comes to transplant the sprouts into a separate pot, there is no need to remove the roots from the tablet. Just pinch off the weaker shoots and leave the strong ones. This is a nice bonus that protects the weak root system of young begonias from damage.
In one, even the smallest tablet (about 24 mm in diameter), several begonias can be sown at the same time. But over time, you will have to separate the roots of sprouted plants and the main advantage of this growing method will be lost.
How many days does it take for begonias to sprout from seeds? There are nuances here. Seeds planted at the same time can germinate at intervals of 10–15 days. Fresh planting material, sown correctly and kept in suitable conditions, usually hatches within a week. Three- or five-year-old “oldies” germinate on the 14th or even 20th day after sowing.
How to root and what can replace stimulants?
Before rooting, it is recommended to treat all parts of the plant with a stimulant to activate growth. In addition to chemicals, time-tested folk recipes will give a similar effect:
- A solution of half a tsp. honey in a glass of water. Soak the cutting or tuber in it for 5-6 hours.
- Infusion 1 tbsp. l. crushed aloe vera leaf in 1 liter of water, keep in a dark place for 5 days. Planting material is dipped into the liquid before planting in the ground, and the seeds are watered.
- A weak solution of kombucha is used for sowing, planting shoots, and for fertilizing seedlings.
Watering and fertilizing
A week and a half after germination, the begonia needs to be fed with 4-water calcium nitrate. Then, every half month, add any mineral complex containing all the useful microelements to the soil.
Watering seedlings
For the first 8 weeks, water the seedlings very carefully, without flooding the soil. Excessive watering can provoke the development of blackleg or other fungal disease. It is important to find a balance here, because drought is no less harmful for seedlings. That is why before watering you need to test the soil to determine its moisture content.
General rules for breeding flowers
Cuttings can be done in the spring during germination of tubers and in the fall before transplanting begonias from open ground. Depending on the time of year, some nuances of this process are determined.
So, before spring cuttings, begonia tubers should be removed from the wintering place , where they have stayed for at least 3 months, already in early January (read about how to properly preserve tuberous begonia in winter). Then place them in a container with soil and leave them for several days at room temperature, regularly watering them with water to restore water balance. In about a month, shoots will begin to appear, which can be taken from cuttings after the third leaf appears on them.
Read about what kind of plant ampelous begonia is, how it reproduces, and also about caring for it in our material.
Picking
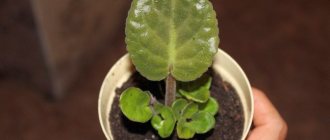
Over the entire period of development of begonia seedlings, not one picking is required, but two or more. The first time the manipulation is carried out after the appearance of 2-3 leaves (about 20 days from the moment of sowing). The sprouts are planted at a distance of 2 cm from each other.
After another 4 weeks, when the young plants have grown properly, they again require diving. This time, maintain a distance between specimens of 5–10 cm. At this stage, begonias can already be planted in separate peat pots. Dive correctly:
- On the day chosen for picking, water the seedlings generously. Do this in advance: if you plan to plant the seedlings in the afternoon, moisten the soil in the morning.
- Prepare one spacious container or individual cups.
- Lay down a layer of drainage, add soil, and make a hole in it.
- Carefully dig up the strongest seedlings with a wooden stick and, together with a lump of earth, immerse them in the prepared holes. The roots should lie freely, without creases or twists.
- Cover the seedlings with soil and water generously.
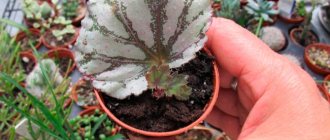
What soil is suitable for begonias?
Even if rooting was successful, transplanting begonias into soil with an irregular structure can lead to diseases and death of young plants. Roots obtained from leaves or cuttings are very weak, so they need light, breathable soil with sufficient mineral content. Flower shops sometimes sell specialized soil labeled “for begonias,” but it is not always ideal.
The correct substrate should consist of 2 parts of nutritious soil (chernozem, leaf humus), 1 part of coarse river sand or sphagnum moss and 1 part of loosening additives - perlite and vermiculite. These minerals can be added to the purchased mixture yourself, thereby improving its porosity.
7640.pf972c.840.jpg
Since begonia reacts very poorly to stagnant moisture, it is recommended to make the drainage layer in the pot not from expanded clay or other moisture-absorbing elements, but from pieces of polystyrene foam - through them, excess water will immediately flow into the pan, preventing rotting of the roots. Starting from 2-3 months of age, new seedlings can be fertilized with Potassium Monophosphate for abundant and long flowering.
razmnozhenie-begonii-deleniem-klubnya-foto-768×536.jpg
Watering the plants should be carried out so that the earthen ball does not have time to dry out completely, and it is advisable to spray the bushes themselves once a month with antibacterial drugs and growth stimulants to prevent diseases. With careful care, begonias will decorate your interior for many years with their colorful buds and lush tropical foliage.
Hardening
It’s time to harden off the two- to three-week-old seedlings of garden begonias. This is about a couple of weeks before landing in the main habitat. As soon as the air warms up enough, leave the seedlings near an open window (without drafts). When the begonias have more or less adapted, take them out onto the balcony first for half an hour, then gradually increasing the time of the air baths.
Keep seedlings away from other plants to protect them from infestation by aphids or spider mites. To prevent the development of fungal diseases, periodically spray begonias with antifungal drugs.
Possible problems and solutions
- The cut of the cutting began to rot in the water. The plant may have become infected with a fungal infection. It is necessary to remove the cutting from the water, cut off the rotten part, place it in a container with fresh water, into which ½ tablet of activated carbon is added.
- The shoots begin to turn black. This may be due to the fungal disease gray mold. It develops in a cool and damp room. To save young shoots, you should treat them with a fungicide, and regularly ventilate and heat the room.
- Begonia seeds do not hatch for a long time. Perhaps the reason for this is dry soil, or low room temperature. Measures should be taken: moisten the soil and increase the room temperature to +22-24°C.
- The seedlings stretch out, becoming long and thin. The plants clearly do not have enough sunlight. If possible, it is worth moving containers with seedlings closer to the light source.
- Leaves turn yellow and curl. Perhaps the plants do not have enough moisture or the room is hot. To improve the growth process, you should review the watering regime and lower the air temperature.
- Slow growth. Perhaps the young plant does not have enough nutrients in the soil, so it should be fed with fertilizers.
You can find out more about diseases and pests of tuberous begonia here.
Possible problems
The lack of timely, friendly shoots is usually explained by poor-quality planting material. But there are other reasons:
- the container is in a room that is too warm, which has led to the soil mixture drying out;
- at temperatures below +17 °C, seedlings will appear with a significant delay or rot;
- the seeds are covered with soil and they do not receive enough light necessary for germination.
As you can see, there is nothing difficult in growing annual or perennial begonia from seeds. With a minimum of effort, you get countless flowering bushes.
About diseases and pests
If you follow all the above simple rules of breeding and growing, begonia will be beautiful and healthy. The occurrence of any problems is a consequence of violation of the content rules, the causes of which are easy to detect and eliminate:
- when the soil dries out, the leaves will dry out;
- if overmoistened, the stems will rot;
- bright sun rays will cause white burns;
- falling of flowers and leaves is a consequence of hypothermia;
- with a lack of feeding, begonia becomes small both in terms of leaf blades and buds.
Like most gardening plants, tuberous begonias are prone to pests such as aphids, spider mites, scale insects and thrips. All of them are expelled with the help of insecticides.
When problems with humidity or light occur, spots and plaque may appear on the leaves due to diseases such as powdery mildew or gray mold. In this case, it is necessary to resort to spraying with fungicides with benomyl.
Compliance with the above rules for the care and cultivation of tuberous begonia will ensure the health and fragrance of this wonderful type of flowering plant.
The unpretentiousness and excellent decorative properties of begonia are good indicators for starting cultivation in any garden, plot or home.
In order to grow this queen, you do not need to be a landscape designer or have extensive gardening experience, you just need to love and cherish a flower. Care and all energy costs will return with unparalleled beauty and abundance of flowering.
Begonia attracts gardeners with its high decorative value, long flowering, and the ability to grow both outdoors and indoors. It is quite often used in landscaping balconies and loggias; it is used to decorate the main entrances of buildings, plant it in flower beds and decorate gazebos.
A flower in an apartment looks no less impressive, and it is suitable for any interior. The abundance of shapes and shades of this begonia, which can be successfully combined with other plants, is simply amazing.
Cuttings for dummies
Boris Borisov has been running his own YouTube channel since 2012. The talented florist is known for his creativity and unconventional approach to growing plants in the garden. Boris tells how to properly cut (propagate) begonia at home.
The gardener calls begonia an obstinate beauty and admits that he was not immediately able to tame the plant. Boris presents the ampelous begonia as an experimental specimen, adding that it is this particular variety that causes a lot of trouble during the propagation process.
Then Boris proceeds directly to cuttings, accompanying his steps step by step with comments, talking about the importance of pre-watering the mother plant (fill the cuttings and branches with moisture).
Using a sharp stationery knife, the gardener cuts several cuttings ranging in size from 6 to 12 cm, removing the lower leaves from them. Then the mother plant is removed for drying and subsequent fertilization with Bolifort (5 ml of product per 1 liter of water).
Boris recommends germinating cuttings in Fruto-Nanny baby water, assuring that rooting occurs much more slowly in ordinary water. He recommends using small dark glass bottles as containers and proceeds to the following steps:
- pours baby water into the bottles so much that the tips of the cuttings sink a couple of centimeters;
- Places 1–2 cuttings in each container;
- places the vials on a rack with 24-hour lighting (away from aggressive sunlight).
Having sent the cuttings to take root, Boris shows bottles with lush branches sent for germination three weeks ago. The root system looks great: well developed, fibrous, ready for transplanting into the ground. The florist repeats that such friendly rooting is the merit of special baby water enriched with minerals.
Boris added 300 g of perlite to 4 liters of soil for begonias and prepared several disposable plastic cups (drainage holes are required). Having filled the glass a third with soil, he places the cutting there, carefully straightens the roots and fills the soil almost to the brim. Lightly tamps and, placing the glass in the tray, waters generously. There is no need to water until roots appear on the transparent walls.
Care
After new leaves begin to appear on the shoots, the shelter must be removed. It is necessary to transplant the flower to a permanent location. The ideal conditions for a young plant to reproduce are as follows.
- The container for a new flower should not be huge. For starters, 710-810 millimeters is a sufficient size. There should be holes at the bottom of the pot to allow excess liquid to drain. It is better to use a ceramic pot rather than a metal one.
- Soil for this plant can be purchased at special flower shops. To prepare the soil yourself, mix 2 parts of turf soil and 1 part each of leaf humus, sand and peat. To prevent the root system of the flower from rotting, a drainage layer must be laid at the bottom of the container.
- Begonia needs to be well provided with light. But the hot sun can burn the leaves of the flower. Therefore, in the summer, you need to place the flower on the eastern or western windowsill.
Temperature
The normal temperature for the plant is considered to be room temperature, about 21-26 degrees. In winter, you need a temperature within 16-19 degrees. This flower requires high air humidity, but you should not spray the plant with water. Therefore, you need to move the container onto a stand in a tray with liquid. Stones can serve as a stand.
Watering
The plant should be watered abundantly, but should not be sprayed on the stems and leaves. You can water the flower through a tray; to do this, place the container in a container with liquid for 21-31 minutes. The liquid for irrigation must be settled and at room temperature. In winter, watering should be reduced, and tuberous varieties should not be watered at all at this time of year.
Top dressing
When flowering begins, you need to use complex mineral fertilizers and add them to the plant before the end of flowering time. Additional nitrogen fertilizer for the flower is not used. But if the plant becomes weak and lethargic, then nitrogen fertilizers can be used.
Transplanting and pinching
When spring comes, it is necessary to transplant the flower into a wide pot. But if the root system has grown quickly, and the plant has become crowded, then the transplant can be done at another period. Once the flower has been transplanted, it needs to be placed after some time in a darkened room. Then you need to form a bush. It is necessary to pinch the main shoots so that additional shoots are formed. It is necessary to remove weak branches and faded buds.
Popular varieties
There are several types of begonias that are grown everywhere:
- Royal, or rex. The most popular of the decorative deciduous trees. A plant with large (20x30 cm) heart-shaped leaves. They can be smooth or pubescent, and come in a variety of colors. Propagation of royal begonia by cuttings (stem and leaf) is possible. Popular varieties are Silver Greenheart (with silver leaves), Cartagena (dark, curled leaves, with pink or plum, silver spots), Hallelujah, Chocolate Cream, Evening Glow (with a crimson border on the leaves), Charm, November Cold, Black Fung ( leaves are red-black, with yellow veins twisted into a double spiral).
- Coral. A subshrub that, with good care at home, reaches one meter. The trunk is mostly bare, the leaves are large, oval, green, with whitish specks. The flowers are collected in elongated inflorescences of a beautiful coral color. Popular varieties - President Carnot, Lucerne.
- Ever-blooming. The most beautiful representative of the begonia genus. It is a low, 50-60 cm, bush with small leaves and flowers collected in large inflorescences. Flowers usually die quickly, but are immediately replaced by new ones. In this case, the cycle can continue for many months, and if good lighting is provided, the bushes will bloom in winter. Most often, ever-flowering begonia is propagated by cuttings. We'll tell you how to root it correctly a little later. Popular varieties are Amber, Carmen, Orange, Bikola, Fuchsividnaya.
- Elatir. A beautifully flowering ornamental plant without stems or shoots. At home, it is propagated mainly by leaves. Representatives - Louise, Rose, Renaissance.
- Ampelnaya. Varieties with creeping shoots and a wide variety of flowers - simple, double and semi-double. Propagation of ampelous begonia by cuttings is the most logical option. Other methods will be more labor intensive. Popular varieties are Christy, Gail, Katie, Roxana.
Peculiarities
Begonia is native to the tropical forests of South America, Asia and Africa. The plant is rich in species diversity and has more than 900 species. There are deciduous-decorative, reed, shrub and beautifully flowering species of this flower. Begonia has different shapes (drop-shaped, round, elongated), leaf colors (red, black-reddish, silver, with complex patterns, pinkish-green, purple, gray). Petals can have the following colors: yellow, snow-white, cream, orange, red, pink and purple.
When and what tubers reproduce by division
Germination of cuttings allows you to obtain new indoor plants with full preservation of the hybrid characteristics of the mother specimen. The division of tubers begins on the eve of their planting in flowerpots after winter rest. The success of the procedure largely depends on the correct choice of planting material.
The tuber of propagated begonia must meet the following requirements:
- Excellent tuber turgor;
- The presence of two or more growth points;
- The kidneys are quite distant from each other;
- No damage whatsoever.
It is equally important to correctly determine the growth points of the awakening tuber. Experienced gardeners divide it into two or three parts
Finer division of the tuber is impractical.
Small parts of planting material contain insufficient nutrients to safely withstand the rooting time.
It makes sense to start dividing if the tuber has two or more equidistant buds.
The most favorable time is considered to be the awakening of the apical buds of the tuber. The beginning of sap flow and swelling of the buds indicate the plant’s readiness for rapid growth, which significantly increases the percentage of successful rooting
It is important not to delay time so that green shoots do not have time to sprout from the buds