Gloxinia will not be able to continue to delight with flowers if it does not rest in due time. Florists call such a rest a period of rest. Other Gesneria houseplants also go into hibernation. Therefore, transplanting gloxinia after hibernation worries many people involved in breeding this flower.
Rest time is genetically programmed into gloxinia. Rest is needed in order to accumulate strength for future flowering. To rest, the flower needs to create appropriate conditions. Even the slightest disturbance associated with temperature, lighting, watering, or air humidity can destroy gloxinia.
Gloxinia after flowering - what to do with the plant
Experienced owners of green spaces can tell you how to care for gloxinia after flowering. During this period, you need to properly prepare the plant for wintering. This procedure consists of several steps that must be completed so that the tuber safely survives a long hibernation.
Trimming
It is not recommended to trim the rosette immediately after the last flowers have faded. It is necessary to maintain metabolic processes in plant tissues, thanks to which nutrients are transferred from the leaves to the tuber.
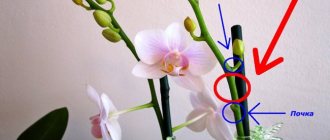
Subsequently, the shoots will begin to wither on their own, and then you need to cut off the rosette, but leave a small stump 2 cm high. As a result, when it also dries out, it must be carefully unscrewed from the tuber.
Important! If you prune gloxinia immediately after flowering, this will stimulate shoot growth, which will significantly weaken the plant. In young seedlings, the rosette is maintained throughout the winter. This is due to the fact that their tubers are not sufficiently developed and are not yet able to survive the winter without additional nutrition.
Therefore, it is impossible to cut off the above-ground part of them, otherwise they will never come out of hibernation
This is due to the fact that their tubers are not sufficiently developed and are not yet able to survive the winter without additional nutrition. Therefore, it is impossible to cut off the above-ground part of them, otherwise they will never come out of hibernation
In young seedlings, the rosette is maintained throughout the winter. This is due to the fact that their tubers are not sufficiently developed and are not yet able to survive the winter without additional nutrition. Therefore, it is impossible to cut off the above-ground part of them, otherwise they will never come out of hibernation.
In this case, you need to provide the plant with proper care, which consists of a 12-hour daylight hours and regular watering.
Regenerative feeding
What else needs to be done when gloxinia fades? Before the plant goes into hibernation, it is necessary to restore the spent energy. To do this, it is recommended to fertilize with potassium fertilizers. This will allow the tuber to fully ripen and stock up on nutrients that will be needed for 3-4 months of hibernation.
Experienced gardeners recommend using potassium monophosphate for this. To prepare a nutrient solution, you need to dissolve 5 g of the product in 2 liters of settled water. After this, mix thoroughly until the components are completely dissolved. Water the plants with the resulting liquid at the rate of 150 ml per 1 pot.
Important! Fertilizers with a high nitrogen content cannot be used during this period, as they stimulate the growth of the above-ground part, which negatively affects the immunity of gloxinia. Restorative fertilizing is applied once, immediately after removing all faded buds, but in the presence of leaves. Restorative fertilizing is applied once, immediately after removing all faded buds, but in the presence of leaves
Restorative fertilizing is applied once, immediately after removing all faded buds, but in the presence of leaves.
Drying of the rosette is a sign of gloxinia preparing for hibernation
Preparing the plant for hibernation
Caring for gloxinia after flowering at home also involves observing certain maintenance conditions. Starting in September, the flower pot needs to be moved to a less lit place. In this case, the temperature should be lowered to +15 degrees. When kept in such conditions, watering should also be reduced to once a week.
All this together stimulates the process of wilting of the rosette and prepares the plant for the upcoming hibernation.
If this is not done, then some varieties of gloxinia may continue to grow. As a result, the shoots stretch, the rosette becomes deformed, and the plant loses its decorative effect. All this weakens the flower and may cause a lack of flowering next season.
Important! Gloxinia, like many tuberous plants, requires a long cool dormant period to form buds.
Can this be done during flowering?
During the flowering period of gloxinia, its bush seems very voluminous and decomposed. Some inexperienced gardeners may feel that the plant is cramped in the pot, but this is a wrong assumption.
Important! Under no circumstances should flowering gloxinia be replanted; manipulation can be carried out after the flowering period.
It will lose all its flowers and buds, and untimely intervention in the plant’s nutritional process can lead to the complete death of the tubers.
Transfer
Gloxinia should be replanted regularly, because the old soil is not suitable for it after a year of growth. She needs fresh and fertile soil
When replanting, pay attention to where the bottom of the tuber is so as not to plant it upside down. Typically the underside is more convex, smooth and rounded, while the upper side has a slight indentation. To prevent the plant from rotting tubers, it is necessary to place a drainage layer in the planting container
To prevent the plant from rotting tubers, be sure to place a drainage layer in the planting container.
For it you can use:
- Pebbles.
- Styrofoam.
- Expanded clay.
- Pieces of ceramics.
This layer occupies 1-2 cm. The substrate is poured on top and not compacted too much; it should be quite loose. Make a hole in the center of the pot and place the tuber there. Then it is sprinkled with earth on its sides so that 2/3 of its height is in the ground. That is, the top of the tuber remains open. This must be done because the leaves of the flower appear earlier than the roots.
Then you need to create a microgreenhouse. To do this, place a transparent bag over the pot and place it in a bright and warm place. Thanks to this, moisture is maintained, so watering is not necessary. The ground should be slightly moist, even a slight drying of the top layer of soil is acceptable.
Ventilation should be carried out; for this, once a day you need to remove the bag for 15-20 minutes. When the first leaves appear, close the bag only for the night, and after 2-3 days, remove it altogether.
After the tuber germinates, at first, watering should be done carefully, in small portions, so as not to flood it. After all, the root system is not yet developed enough
It is important to remember that after planting, gloxinia develops the above-ground part faster than the roots.
The depth of planting of the nodule is of great importance. It must be completely in the substrate. If the top remains uncovered, this part may become rotten, thereby causing damage to the plant.
4-6 weeks after transplantation, fertilizing begins so that the plant develops healthy and fully blooms. Fertilize gloxinia with Kemira Lux. This powder fertilizer is diluted as follows: 1 coffee spoon per two liters of water and then watered onto moist soil 2-3 times a month. Growing, caring for and replanting gloxinia at home is not entirely easy, but if you follow all the rules of care, you can enjoy its magical flowering.
Priming
The soil used for growing violets is suitable for planting gloxinia. It is advisable to add a baking powder to the soil - vermiculite, perlite, sphagnum moss. At home, you can prepare your own mixture for planting.
To do this you need to mix:
- 3 parts of land from under any deciduous tree, except oak;
- 3 parts peat;
- 2 parts sand.
To make the soil as useful as possible, it is worth adding 200 grams of humus for every 5 liters of soil. This maneuver will enable the gardener to do without additional gloxinia subcortex for a long time. Disinfection of the soil is also considered an important step; this can be done with a purchased product Maxim (1 ampoule per 2 liters of water).
Good drainage plays an important role in planting gloxinia. Suitable for this purpose are polystyrene foam, expanded clay, crushed stone chips. The higher the pot, the higher the level of drainage, up to 1/3 of the total volume of soil.
Diseases and pests
Late blight is a fungal disease that appears when water stagnates in the pan, soil is too dense, excess air humidity, and also at low temperatures during the growing season.
Fusarium is also a fungal disease that appears when there is excess moisture, lack of water and fertilizers. The leaves wither, curl, and turn brown. It is worth treating the plant with fungicides and replanting it in fresh soil.
Gray rot. Its development can provoke waterlogging of the soil. The stem begins to turn black, and a gray coating and brown spots appear on the flowers and leaves. It is advisable to remove the affected areas of the tuber, and treat the rest with fungicides and replant them in new soil.
Quite rarely, but it happens that gloxinia is attacked by pests such as:
- Spider mites appear on syningia if the air in the room is sufficiently dry and there is a lack of moisture. For prevention, increase the humidity in the room and isolate the infected plant from the rest. Treatment is carried out with acaricides, and the soil is treated with drugs such as Temik or Aldicarb.
- cyclamen mite. If you notice deformed, thickened leaves covered with a layer of dust, then this particular pest has visited your plant. For treatment, it is recommended to use acaricides against ticks.
Planting or transplanting a gloxinia tuber (step by step)
Towards the end of February, gloxinia tubers wake up. This is exactly the time when they need to be replanted or planted in a new flower pot. There is also an active sale of gloxinia tubers and seeds in stores. But there are no flowering plants there yet.
Sometimes I allow the next awakening of a gloxinia tuber in the same pot without replanting. The plant itself will tell you when it needs to be transplanted into new soil.
We leave the gloxinia to grow in the same pot
In front of me is a pot in which a young gloxinia sprout has appeared. This indicates that the tuber overwintered safely and began to sprout.
The velvety leaves of young shoots seem perfect
It is important not to spoil them by pampering them in the warmth and pampering them with feeding. It is more correct to create Spartan conditions for them by moving the pot on the windowsill closer to the glass
And in order to prevent the plant from getting too cold, I place the pot with it on a foam stand (for example, on a packaging trough or on any foam block).
Here are pictures that clearly show how a young shoot of gloxinia grows. Until recently (in winter), the tuber was not even visible.
I wrote about how it feels during the dormant period in the article “How to preserve a gloxinia tuber in winter?” At the end of February (sometimes later) his awakening begins, which cannot be missed.
The price of a mistake is frail, elongated shoots (at best) or the death of the plant from drying out of the tuber (at worst).
Transplanting (planting) gloxinia in a new container
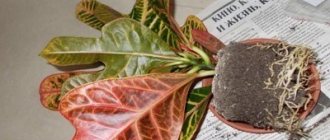
This year I bought new gloxinia tubers. Terribly shaggy due to remnants of old roots. First of all, the tubers had to be “shaved”. Tear off some of the dried roots with your hands, and cut some with nail scissors. The sawdust and shavings in which the purchased tubers were stored were shaken out and removed with tweezers.
Tubers prepared for planting should be as bare as possible (almost like a potato tuber) and strong, not flabby. I heard and read that it is possible to confuse where the top of a tuber is and where its bottom is. In order not to plant gloxinia upside down, you need to leave the part of the tuber on top where there is a small depression. At the bottom there will be a more rounded and sometimes convex part.
Those tubers sold in stores usually already have tiny sprouts or the beginnings of sprouts. Therefore, there are no problems.
It is better to plant such tubers in moist soil and water it as it dries. Then there will be a gradual return to life. It’s hardly worth working on tubers that are completely unviable.
Unless, of course, these are particularly valuable plants.
When planting tubers, it is better to take smaller pots. The bottom part is occupied by drainage. I use expanded clay or charcoal, which remains after sifting wood ash. The depth of the drainage layer allows you to regulate the volume of the pot to some extent.
Some amateur gardeners leave the crown of the gloxinia tuber above the soil level. I almost completely cover it with soil, but do not cover the shoots. This imposes a number of obligations on me: when watering, you cannot soak the upper part of the tuber.
It is worth mentioning what the soil mixture should be. First of all, loose and nutritious. I add hydrogel granules to it so that there are no problems with drying out. It is advisable to take into account one “cute” detail: the soil, for the first time increased in size from the swollen hydrogel, noticeably rises and tends to crawl out of the pot. It has to be either lightly compacted or all excess removed.
At the very end, you need to sign the variety and place the pot with the newly transplanted (planted) gloxinia on the windowsill. As soon as a strong sprout appears, the pot can be moved closer to the glass.
Source
Step-by-step instruction
Let's look step by step at how to properly transplant gloxinia.
- Before burying the tubers in new soil, they need to be treated against rot and fungus. To do this, they are immersed in a fungicidal solution for 30 minutes. You can take “Fundazol”, “Fitosporin” or dilute potassium permanganate so that the liquid acquires a rich pink tint.
- In order for the plant to develop roots faster, the tuber is soaked for 24 hours with diluted Kornevin (5 grams of powder per 5-liter bucket).
- When starting to plant directly, you need to determine where its bottom side is and where its top side is, so as not to plant it “upside down.” The upper part has a recess, and the lower part is convex and smooth.
- To plant, make a small hole in the middle of the pot and place the tuber in it. They bury it so that the crown with the sprouts protrudes out. This is necessary for the unhindered development of leaves, which germinate earlier than the roots.
- Watering after planting should be done carefully, avoiding liquid getting into the center of the tuber and onto the sprouts, so that the “new growth” does not begin to rot.
- Greenhouse conditions must be created for the transplanted plant. To do this, put a bag (transparent) on the pot and place it in a warm place with plenty of light. In this way, humidity is maintained in the container. There is no need to water the gloxinia at this time - you need to make sure that the soil is slightly moistened. If the top layer of soil dries out, it's okay.
- The improvised greenhouse should be ventilated once a day, removing the plastic cap for 20 minutes.
- When leaves form, close the pot only at night, and after a couple of days remove it completely.
- Water the young sprout in small portions so as not to oversaturate the undeveloped roots with moisture.
Possible difficulties
Quite often, gardeners are faced with problems growing gloxinia. Here are some possible difficulties and their solutions:
- If suddenly your plant begins to stretch out, then a lack of light or an excessive amount of nitrogen fertilizer is affecting it.
- If synningia begins to grow more slowly and the flowers begin to curl, then the problem is a draft, cold wintering, abundant watering or low air temperature.
- The leaves turn yellow - excessive watering or lack of nitrogen fertilizing.
- If you water gloxinia with too hard water, it can cause chlorosis of the leaves.
- Direct sunlight negatively affects the foliage, leaving burns on it.
- Curling leaves indicate that the room is dry and hot.
- If the flower lacks phosphorus, the leaves turn red.
- The lack of flowering may be due to excess nitrogen fertilizing.
If you properly care for your Brazilian beauty, she will delight the eye with a bright and rich bouquet.
Gloxinia with its appearance can enliven the interior of any room. This is possible thanks to flowers that are shaped like gramophone pipes and come in a variety of colors. To keep your green pet happy for a long time, it needs to be replanted periodically - most often this is done at the end of winter.
Further care
To quickly adapt the plant to a new container and stimulate its flowering, it is important to provide proper care. Experienced flower growers recommend following the following rules:
- Water the gloxinia moderately, carefully distributing the water throughout the pot and avoiding stagnation.
- Ensure the indoor air temperature is within +22… +24 °C, avoiding short-term changes above +28 °C and below +18 °C.
- Make sure there is sufficient lighting for the flower for 10-14 hours.
Note! Direct sunlight is harmful to gloxinia and can cause burns, so the light should be diffused.
After proper transplantation, the flower produces many buds
Even an inexperienced gardener can cope with a gloxinia transplant. Following the described planting and care rules will help maintain the health of the flower and help it bloom.
Preparing for transplant
When moving a flower from one pot to another, it is important to first find out how to transplant gloxinia correctly. Compliance with basic requirements will avoid many problems
Choosing a pot
When choosing a planting container for gloxinia, it is important to take into account the characteristics of the root system of the flower. The roots spread out to the sides of the tuber, so it is recommended to select a low but wide pot. The depth of the pot should allow the drainage layer needed by the flower to be placed in it
The depth of the pot should allow the drainage layer needed by the flower to be placed in it
Of all materials, it is better to choose ceramics
The depth of the pot should allow it to accommodate the drainage layer needed by the flower. Of all materials, it is better to choose ceramics.
Important! Before planting, the container should be washed, dried and disinfected.
The flower feels most comfortable in a low, wide pot.
Selection and preparation of soil
The soil for indoor gloxinia needs to be light, loose, air- and moisture-permeable. Its acid value must be neutral so as not to provoke rotting of the tubers. Of the universal ready-made mixtures, soil for violets is most suitable.
You can prepare your own soil mixture from sand, leaf and peat soil in proportions 1:2:2. The soil should be disinfected by heat treatment.
Drainage
Delicate tubers of flowering gloxinia require a drainage layer. The following components can be used for it:
- expanded clay or pebbles;
- ceramic shards;
- Styrofoam.
If you choose a pot that is too deep, the height of the drainage layer will help compensate for this disadvantage.
Tuber preparation
Preparing gloxinia for moving to a new pot begins with a thorough inspection of the tubers. Dry roots are removed from them and washed in water, removing any remaining soil, after which it becomes possible to assess the condition of the tissues.
Any parts of the tubers that look unhealthy are removed with a sharp, disinfected knife. The sections are sprinkled with crushed activated carbon or any fungicide. The tuber treated in this way is left in the open air until the next day.
Note! It is recommended to wrap root tubers that look lethargic for 3 days in a damp cloth so that they are saturated. If at the time of transplantation the tuber still has not sprouted, but looks healthy, it is placed in a plastic bag with peat soil and left in a sufficiently warm and lighted place. If at the time of transplantation the tuber still has not sprouted, but looks healthy, it is placed in a plastic bag with peat soil and left in a sufficiently warm and lighted place
If at the time of transplantation the tuber still has not sprouted, but looks healthy, it is placed in a plastic bag with peat soil and left in a sufficiently warm and lighted place.
Leaves hatch within 2 weeks
Vessel selection
For the successful growth and development of gloxinia, the pot should be 4-6 centimeters wider than the tuber being planted.
Reference. The height of the pot should accommodate a maximum of 2-3 centimeters of drainage and a layer of soil in which the tuber will be completely placed and it should not peek out.
When you transplant from one pot to another, remember that there must be a sufficient amount of soil between the drainage and the tuber for the growth and development of the plant's root system. The shape of the pot for growing gloxinia does not matter much. It is important to comply with the height requirements so that the leaves of the plant do not fall down and touch the surface on which the pot is placed. It is better to make the drainage higher than the delicate plant will begin to die from unwanted contact with surrounding objects.
Fuchsia propagation
There are several options for propagating fuchsia:
- Cuttings
- Seed propagation
- Propagation using leaves
Propagation of fuchsia by cuttings
The propagation period for fuchsias by cuttings occurs in February-March, less often in August-September, for those varieties that grow slowly. The length of the cuttings is about 5-7 cm, they take root in a preferably loose medium: it can be sand or water. After 20-25 days, roots will form, which means you can transfer the seedlings into pots at 7-9 cm. The soil mixture must contain sand, humus, leaf and turf soil. The proportions should be the same.
To get a lush, luxurious bush, you need to plant cuttings in such a way that there are several in one pot. The young ones will bloom the same year.
Propagation of fuchsia by seeds
When propagated by seeds, artificial pollination is necessary for their maturation. By mixing different varieties of fuchsias yourself, you can get many new hybrids that will delight the eye with their bright, beautiful shades.
Propagation of fuchsia by leaves
Propagation of fuchsia at home using leaves involves the following scheme: you need to tear off the stems in tandem with the most developed leaves and place them in loose soil no deeper than 1 cm. Then they can be covered. A plastic or glass lid is suitable for this. In order for them to grow well, they need to be sprayed every day. The water should be boiled and warm. As soon as small rosettes appear at the very base of the stem, you can begin replanting into small pots.
The main purpose of reproduction is to increase the number of plants.
Rules for cuttings at home
Cuttings are one of the most common and easiest methods for propagating flowers. The method is based on the fact that when the apical cutting is cut and rooted, it forms a new tuber, and the old tuber, in the absence of a growth point, produces new shoots. Another advantage of this method is that the rooted plant can bloom in the same year.
Propagation of a plant by apical cuttings is used to rejuvenate the plant if it is sick, stretched out or does not want to fall asleep. Because when the plant is no longer young (more than 2 years old), its tuber needs rest. In this case, we cut off the apical cutting, re-root it and reduce watering of the mother plant. Thus, gloxinia will go into hibernation.
Attention: Indoor and greenhouse plants can be propagated from apical cuttings at any time of the year. However, gloxinia should be provided with an acceptable temperature of 20-25 ºС, as well as sufficient lighting. If there are no such conditions, then it is better to propagate it in spring or summer
If there are no such conditions, then it is better to propagate it in spring or summer.
If waking up time is delayed...
Sometimes it happens that the plant does not wake up on time. The question arises of how to awaken a gloxinia tuber and prepare it for transplantation.
As a rule, nodules should remain dormant for at least three to four months annually. Deadlines may vary. The most favorable time is in the autumn and winter months. If a healthy nodule does not want to wake up, novice gardeners often experience a state of panic. Should you worry? No, because each plant has its own sleep period. When the time comes, gloxinia will delight you with shoots.
Why can't nodules wake up?
Genetically, Gloxinia has a time for sleep, because in its homeland of Brazil it sleeps when the rainy season stops from autumn to the end of January. There are many reasons that lead to the fact that the flower does not awaken on time:
- in winter the storage was dry or damp;
- Unripe tubers were sent for storage.
How to seat?
Gloxinia can be propagated and planted in five ways:
petiole
- To grow a flower from a leaf, you need to take one leaf from the bottom of the plant in June-July.
- Place the leaf stalk in a container of water so that it is immersed in water by 1.5-2 centimeters.
- Do not change the water, but add it periodically.
- Soak the leaf in water until young roots form on the cuttings.
- After this formation, plant the young shoot in the ground to a depth of 2-3 centimeters. For better rooting, cover the cutting with a glass jar or plastic bag.
Watch a video about the propagation of gloxinia by leaf cuttings:
Stem cutting
Cut off the lower lateral shoot with several leaves from an adult gloxinia. Place it in a container of water until roots form, as in the case of a leaf. After the roots appear, plant the plant and root it by creating a greenhouse effect using glass or a bag.
Leaf
- At the very base of the rosette, cut off the sheet.
- Cut the leaf blade from the back side across the protruding veins in thickened places.
- Place the sheet on moistened soil and press the cut points into the soil.
- Create a greenhouse effect using film.
- In the places of the cuts, roots will soon appear, and then small nodules, which then need to be planted according to the standard pattern.
Read more about gloxinia leaf propagation here.
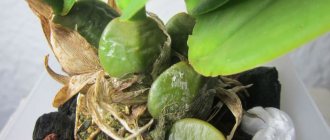
By dividing the tubers
- Only large tubers that have two or more shoots are subject to division. It is cut with a knife so that there is a sprout on each part.
- The sections should be sprinkled with charcoal and dried for 3-5 days.
- Plant in moist soil, just like whole tubers.
Seeds
The seeds of the plant are formed through artificial pollination. On the second day after the bud blooms, you need to transfer the pollen to the flower using a small brush. Seeds ripen in boxes within 2 months. Gloxinia seeds are moistened and covered with glass until young shoots form. 2 weeks after germination, the glass is removed and the seedlings are exposed to light.
We talked in more detail about how to grow a flower from seeds in this article.
There are a number of rules for caring for gloxinia at all stages of its growth and development.
Growing temperature
This indicator may vary under different conditions:
- at the stage of tuber germination, the temperature should be − +25°C;
- after rooting - +18оС - +22оС;
- at the early stage of the growing season - not lower than + 18 ° C;
- during the active growing season - from + 22 °C to +25 °C.
Air humidity
Gloxinia feels good at air humidity of 50%, not lower. If it is not possible to organize such conditions, then the acceptable limits of this indicator are 70-80%. To increase humidity levels, place the pot with the plant on a tray:
Do not spray the above-ground part of the plant, as the gloxinia will get sick, brown dry spots will appear on the leaves and it will die.
Watering
When watering, it is recommended to use only soft water (rain, melt, boiled, filtered). Water from a tray or along the edge of the pot so as not to get on the plant. Water for irrigation should be 2-3 degrees warmer than the air temperature. 30 minutes after watering, the remaining water should be drained from the pan.
Description
Gloxinia is a perennial herbaceous stemless or short-stemmed plant with fleshy shoots up to 25 centimeters in height. The leaves are large, dark green in color, velvety to the touch, slightly pubescent in appearance, which is why they appear matte and dull.
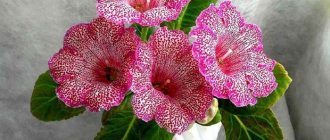
The leaves are regular ovoid in shape and can reach 20 centimeters in length. The flowers are large, the buds look like bells. The flower, like the leaves, is velvety. The edge of the petals is corrugated. Flowers can reach 8-12 centimeters in diameter. The colors of such bells can be varied; the flowers also come with a border along the edge of the petals or with speckles. The stems are short, spreading into an umbrella inflorescence, each flower on a separate peduncle.
On a note. The flowering period is from March to June; up to 40 flowers can bloom simultaneously on one plant.