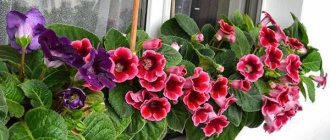
Gloxinia (botanical name - Sinningia beautiful) is a tuberous perennial plant of the Gesneriaceae family with bell-shaped flowers of a wide range of colors and velvety fragile leaves. With proper care, your pet blooms twice a year, delighting you with beautiful delicate buds.
Planting tubers is one of the ways to breed gloxinia. Let's look at 5 useful tips on how to do it right.
Which pot is suitable?
The roots of this tuberous plant develop horizontally, so for gloxinia they choose pots that are wider than they are tall .
The size of the container should not be too large so that excess wet soil does not become a source of fungal infections. It is best if the diameter of the pot is only 4-6cm larger than the diameter of the tuber.
To ensure breathability, you should choose a ceramic planting container without a continuous layer of glaze .
Watering gloxinia
For irrigation, soft water at room temperature is used. Chlorinated tap water must be settled. You should not water the flowers too much. If there is an excess of it, the tubers rot, especially in the autumn-winter period.
Osteospermum for seedlings: 5 useful tips for growing a flower
To saturate the leaves, stems, and root systems with moisture in the hot season, instead of watering, you can use trays of water placed next to the flowers.
Gloxinia is a bright living decoration of our homes. It is not picky and does not require much concern from us. She needs the soft diffused light of the sun, the gentle warmth of the window sills, deep rest with the onset of winter, fertilized soil and kind caring hands capable of growing such a miracle.
Gloxinia flower: planting and care at home
Optimal soil
Basic soil requirements for gloxinia: moisture and air permeability, nutritional value, slightly acidic reaction and sterility .
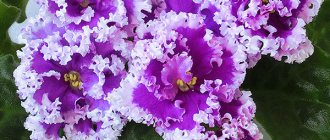
A suitable soil mixture can be purchased at a flower shop - this is soil for violets , related to gloxinias.
Options for self-prepared planting substrates:
- Planting gloxinia in vermiculite - one part of peat and leaf soil with half of sand or vermiculite;
- one part of turf soil, humus, sand and two parts of leaf humus.
Before planting, the prepared soil must be sterilized .
Tuber: diagnosis, preparation
A tiny sprout that appears from the upper recess of the tuber in February or March, less often in January , signals readiness for planting.
The tuber is completely freed from old soil and the remains of dried roots from the previous season. They carefully inspect, identifying even the slightest signs of damage, rot or mold. If such damage is found, the affected areas are removed , the injured areas are sprinkled with charcoal powder and allowed to dry for 24 hours .
If the tuber is limp, wrinkled in moistened (but not wet) vermiculite for the same period . The advantage of such a substrate is its guaranteed sterility, sufficient moisture capacity and environmental friendliness. If the sprouts are barely noticeable, you can completely cover the tuber with vermiculite. Formed sprouts should be left on the surface.
A tuber that does not germinate for too long should be awakened . To do this, it is carefully inspected, possible damage is removed, washed and placed in a plastic bag, at the bottom of which there is a handful of damp, light soil. Tie this bag tightly and place it in a very light and very warm (24 to 26 degrees) place. Sprouts appear in about two weeks.
Tubers completely ready for planting and immersed for 20-30 minutes in a solution of fungicide or potassium permanganate , making sure that the antiseptic does not get on the tender sprouts. You can also carry out pre-planting treatment with a root formation stimulator .
How to plant tubers
In February-March, the tubers germinate. They are removed from the ground and cleaned of old roots and soil particles. Then they are disinfected for about half an hour in a weak solution of potassium permanganate. The detected rot is cut off with a sharp knife, and the cut is sprinkled with crushed coal.
The tuber is planted in the ground and lightly sprinkled with soil, leaving the sprouts exposed. Expanded clay or foam is poured onto the bottom of the pot for drainage. Overmoistening of the soil leads to rotting of the tuber, so watering must be done carefully with a small amount of water.
If there is little planting material, potatoes can be cut into several slices with a sprout on each, treat the cuts with charcoal and plant in pots, covering them with bags. It is important to choose the right pot - it should be 3-5 centimeters larger than the tuber.
Soil level
The prepared soil mixture is poured onto the drainage layer and the tuber so that it is covered with soil only two-thirds of its height .
A feature of the development of gloxinia is the advanced growth of leaves - the roots grow noticeably later. Therefore, you need to water the planted tuber moderately and carefully, especially making sure that water does not fall on the rosette of young foliage.
When a short stem is formed, add soil so that it covers the tuber with about a centimeter layer.
Read more about how to care for gloxinia at home.
Disinfecting the soil before planting a flower
When preparing the soil for planting, it must be disinfected. Popular methods:
- Exposure to cold. The container with soil must be placed in the freezer for several days. After which the container is defrosted, the soil is watered, left for several days and frozen again.
- Using boiling water. This helps eliminate a large number of harmful organisms. The container with the substrate must be thoroughly poured with boiling water and covered with plastic wrap.
- Hot air treatment. It is rarely used, but also gives positive results. To disinfect, the soil is heated in the oven.
- The use of special drugs such as manganese, Fitosporin.
After the substrate has been disinfected, it can be used to plant gloxinia in pots.
Steam treatment of soil
Important! During the period of heat treatment, beneficial organisms are also damaged, so it is important to use complex fertilizers in a timely manner.
Photo
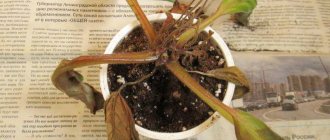
Next you can see a photo of Gloxinia planting:
The process of growing gloxinia cannot be called easy and problem-free, so it is important to know the basic rules of care. On our website you will find articles on how to propagate a plant and a detailed description of possible diseases and pests.
Soil requirements for gloxinia
The soil for the flower should have good air permeability. Regular oxygen supply will reduce the risk of fungal spores. The plant prefers slightly acidic soil rich in nutrients. Often, for rapid growth, a special mixture for indoor plants is purchased.
Growing Gloxinia
Important! In order for the plant to bloom profusely, the soil must be sterile and contain a large amount of peat. Sterility reduces the risk of diseases, and peat allows air to pass through and does not retain much moisture.
What kind of plant is this?
A plant of the Gerseniaceae family native to America. Gloxinia was named in honor of the botanist and doctor B.P. Gloxina. However, it has another name - Sinningia, in honor of the breeder who was breeding it, V. Sinning. It is grown only as a houseplant or greenhouse plant.
A small compact bush with large bell-shaped flowers. The leaves are quite large, oval in shape, with a velvety surface, in various shades of green. The flowers are simply amazing with their colors. There are not only colors: white, yellow, pink, red, purple, brown, as well as various combinations of them. But there is also a pattern on the petals: specks, an ornament reminiscent of lace, a wide edging of the petal of a different color. The root system is in the form of a tuber.
Description of the species
Gloxinia is a popular perennial flower of the Gesneriaceae family . The name comes from Latin and means “bell.” This name is very appropriate, since gloxinia flowers are very similar to fluffy bells. Gloxinia flowers come in a variety of colors and shades. This flower is persistent and strong. It is classified as a tropical plant. This flower needs a lot of light.
The plant is very finicky and lack of light will affect its growth and productivity. Normal growth requires 12 to 14 hours of light. The scientific name of the flower is Gloxinia Sinningia. It is a perennial tuberous plant with a short stem and thick, dark green, velvety leaves. The flower is very popular and attracts many with its appearance.
Top dressing
Gloxinia is fed once every ten days. Fertilizing begins when the plant breaks dormancy and shoots develop from the tuber. Stopped in mid-August. Fertilizers are applied an hour after the main watering along the edges of the pot, avoiding contact with the leaves and growing point.
You can prepare plant food yourself . To do this, take 10 liters of water:
- 10g. simple superphosphate;
- 0.1g. ferric chloride;
- 0.004g. copper sulfate;
- 0.07g. boric acid;
- 10g. potassium chloride;
- 4g. ammonium nitrate;
- 5g. magnesium sulfate;
- 0.05g. manganese sulfate;
- 0.008g. zinc sulfate.
Self-preparation of soil, its composition
If you don’t have ready-made soil, you can prepare it yourself:
- leaf humus - 2 parts;
- meadow chernozem - 2 parts;
- peat-1 part;
- gray river sand - 1 part.
Reference! The optimal acidity of the substrate is from 6 to 7 pH. If the soil is acidic, the growth of gloxinia will slow down, and buds will appear rarely.
Read about why gloxinia does not bloom and how to make it produce buds in our material.
The soil can be mixed with a hydrogel, which works like a sponge. During watering, moisture is absorbed and swells. And then, as the surrounding soil dries out, it gradually releases what it absorbed. It comes in the form of small granules and is sold as a dry concentrate. To use, add water or complex fertilizers and wait several hours. The resulting jelly-like pieces are mixed with soil at a ratio of 1 to 2.
You can add humus or rotted manure to the mixture - 50 g per liter of finished soil.
Selection options
Gloxinia is a fastidious plant . Let's figure out what kind of soil is needed for this plant. For its normal and proper growth, nutritious soil, moderately saturated with oxygen, is necessary. The soil should be loose, soft, nutritious and breathable. The flower prefers nutritious soils that will provide a sufficient amount of microelements during the flowering period. The future fate of your flower depends on the correct choice of soil. It is important to choose and select the correct soil composition. The health of your plant, its fertility and further development depend on it.
This indoor flower prefers nutritious soils that will provide a sufficient amount of microelements during the flowering period. For favorable growth of this plant, it is necessary to take a mixture of soil: - one part of deciduous soil; -one part – peat soil; - half of the part is sand. To loosen the soil, I take rotten sawdust. They serve as an excellent loosening agent and at the same time nourish the soil.
IMPORTANT : Do not over-moisten the soil. This can lead to rotting of the tuber and its further death. Soil acidity should be 5.5 – 6.5 pH. With higher acidity, the plant dies.
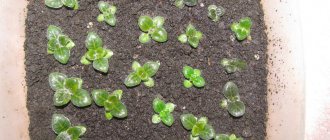
Growing Gloxinia from leaves
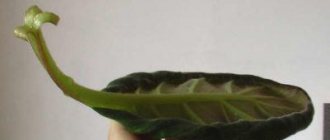
Gloxinia can be propagated by the leaf method. The entire sheet or part of it can be used. Both methods are quite acceptable for obtaining young plants. It is better to root the leaves directly in the soil, but it is also possible in water. From an adult plant, horizontally cut off a leaf with a stem of at least 3 cm. Place the cutting in a glass with clean water and a charcoal tablet. When a small tuber appears at the end of the stem, plant it in soil or a peat tablet. We pack in transparent film to create a greenhouse climate.
In order not to bother with replanting, the cutting or parts of the leaf should be planted directly into the substrate. They are deepened into the soil by 1 cm and watered abundantly. The container is again sealed with film. Greenhouses do not require ventilation or regular watering. After a month, the plants are opened and left at room temperature. To prevent the shoots from stretching out and developing normally, it is necessary to provide them with maximum lighting.
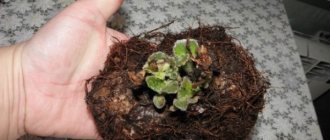
Growing gloxinia from leaves is not always successful. It happens that babies don’t appear for several months. To speed up the process, we break off the rooted mother leaf at a distance of 1 cm from the formed tuber. We moisten the soil in the cup, create a greenhouse and place it in a well-lit place. Several children can grow from a leaf at once. When the young gloxinias have grown enough, we carefully separate them and transplant them into separate containers. The mother sheet should not be thrown away. He may well give birth to the next generation of children. You just need to pour fresh soil into the pot, water it and cover it with cellophane.
Air humidity
Air humidity should be in the range of 70-80%, but gloxinia feels good even at a lower humidity of 50%, however, even lower humidity is undesirable, the plant develops poorly, growth slows down and deformation of the leaves occurs. The edges of the leaf blade are bent downwards.
To increase air humidity, you can place the plant on trays with wet expanded clay, moss, water, but gloxinia itself cannot be sprayed because brown, dry spots form. However, away from light and drafts, gloxinia tolerates water treatments very well. At night, you can take it into the bathroom, spray it or wash it with warm water and leave it there with the doors closed and the lights off until the water on the leaves has completely dried.
The importance of choosing the right size
It is better not to plant small tubers in containers that are too wide. This will lead to the fact that gloxinia will increase its root and leaf mass, postponing flowering for a long time (you can find out more about why gloxinia does not bloom and what to do about it here).
In a pot with a diameter of less than 9 centimeters, gloxinia will feel cramped , there will be little soil and it will often dry out.
Due to the lack of sufficient space, the plant may begin to wither and shed its leaves.
Regulating soil acidity
You cannot plant flowers in soil with high acidity; the pH value should not exceed 6-6.5. In an acidic environment, plants are inhibited and may die. Dolomite flour is used to lower the acid level. This is, in fact, ordinary limestone, ground into flour. Add it in small portions, depending on the indicators.
Advice! Acidity indicators are available in specialized stores. With its help, it is easy to determine the acid level and eliminate the problem in time.
If the buds begin to fall off without opening, the lower leaves turn yellow and fall off - this is also a sign of low acidity, which means the plant lacks phosphorus and nitrogen. In this case, eggshells help. It is thoroughly washed, dried, and pounded in a mortar. Add little by little, no more than 10 g per 0.5 kg of soil. It is effective to water the ground with a solution of wood ash: 1 teaspoon per 2 liters of settled water.