Step-by-step instructions for growing gloxinia from seeds
Gloxinia from seeds at home grows no worse than adult plants that are sold in flower shops.
But one of the main problems is that not all seeds usually germinate. How to prepare the soil for planting
The first thing to do is select the soil. Seeds can be sown in ready-made soil mixture, or you can prepare it yourself.
The right soil for gloxinia:
- earth (it is best if it is collected from an area under a birch or pine tree);
- peat soil;
- fine drainage (expanded clay or small pebbles are suitable)
Mix all ingredients to obtain a homogeneous mass. Pour drainage into the bottom of the container, and then fill with soil. Before planting the planting material, the soil is calcined in the microwave or oven for 1 hour. Thanks to this measure, all harmful microorganisms will be destroyed. Instead of the usual substrate, you can grow seedlings in peat tablets.
Advice! To make the soil more nutritious, you need to add a little wood ash to the soil mixture.
Step by step landing procedure
The most important part of growing gloxinia at home is sowing the seeds. Before gloxinia is planted with seeds, the soil is sprayed with a spray bottle. It should be a little damp.
Sowing seeds
Then the seeds are scattered on the surface. You can sprinkle them with a thin layer of soil. The main condition is that the planting material cannot be buried.
Important! Cover the containers with cling film or glass and put them in a warm, sunny place. The glass must be removed regularly to allow the soil to breathe.
If you don’t do this, the soil will begin to become moldy, and then nothing will grow. As the soil dries, water it with warm, settled water. When the first sprouts appear, the glass is immediately removed. If you do not remove it and leave the container in the sun, the sprouts will get burned and die immediately
The glass must be removed regularly to allow the soil to breathe. If you don’t do this, the soil will begin to become moldy, and then nothing will grow. As the soil dries, water it with warm, settled water. When the first sprouts appear, the glass is immediately removed. If you do not remove it and leave the container in the sun, the sprouts will get burned and die immediately.
Sprouts should appear 14-90 days after sowing. If more than three months have passed and the seeds have not yet hatched, then the planting material has been spoiled and nothing will sprout.
Watering rules and humidity
When growing gloxinia at home, special attention should be paid to humidity and watering. Frequent overdrying of the soil, as well as its constant waterlogging, negatively affects seedlings
It either may not rise at all, or will quickly die.
In order to properly grow seedlings, you must always monitor the soil. As soon as it dries, you need to water it again, but do not allow it to become waterlogged. It is enough that the top layer of the substrate is moistened.
What do seedlings look like?
Fertilizing and soil quality
In order for the flower to bloom, gloxinia seedlings are regularly fed. The first time fertilizing is done after the third picking. You can fertilize with Kemira Lux. 1 tbsp. l. Dilute fertilizers in 2 liters of warm water. You can also use the preparations Baikal-1M, Stimovit, Energen as a top dressing.
There is no need to feed the seedlings until the last picking, since fresh nutrient soil is used for replanting.
Important! Seedlings need to be watered every 10 days. Gloxinia is picky about the composition and quality of the soil.
Loose, oxygen-saturated soil is best suited for planting. It should also be sufficiently breathable. The plant prefers nutrient-rich soils
Gloxinia is picky about the composition and quality of the soil. Loose, oxygen-saturated soil is best suited for planting. It should also be sufficiently breathable. The plant prefers nutrient-rich soils.
Particular attention should be paid to acidity. Optimal values – 5.5 – 6.5 pH
If the acidity level is higher, the plant will die.
How to plant correctly?
Now let's consider the question of how to properly plant a tuber of such an indoor flower as gloxinia
As mentioned above, it is important not to miss the period of tuber awakening, which begins at the end of February. Its sign is the appearance of new shoots
Step-by-step instructions will help you understand how to plant tubers.
Step-by-step instruction
- Clean the tuber as much as possible from old dried roots, leaving the largest threads. Then new ones will grow from them.
- Determine where the bottom and top of the tuber are, so as not to plant it upside down (a small depression is located where future sprouts appear - this is the top, on the opposite side there is a bulge - the bottom, this side should be planted in the soil).
- Check the tuber for damage or rot; to do this, you can wash it. If damage is present, carefully cut them out and treat these places with charcoal or treat them with a mixture of fungicide and “Kornevin”, leaving the tuber to dry for 24 hours. This surgery will help heal the damage.
- We are preparing the place. We place 1-3 cm of polystyrene foam drainage at the bottom of the pot and pour the prepared soil on top.
- We make a hole in the soil and place the tuber there.
- Fill it 2/3 full, leaving the top of the tuber on the surface so that the soil does not get on the sprouts.
- Water the soil around the tuber. Make sure that water does not get on the top of the tuber, where there is a concavity.
- After some time, when the tuber sprouts grow, it can be sprinkled with fresh substrate.
If you plant a dormant tuber, there is a high probability that the plant will die due to its inability to absorb moisture and nutrients before shoots and roots begin to grow.
The normal resting period for gloxinia is considered to be 3-4 months (you can find out about the peculiarities of wintering gloxinia here). However, some plants take longer to start a new growing season.
How to wake up a tuber if it does not show signs of activity for a long time?
The washed, inspected and dried tuber is placed in a tightly sealed bag and a slightly damp peat substrate is added. The closed bag is left warm (under diffused sunlight or a phytolamp)
It is important to remember the light and temperature required for normal plant development (see above). After about 14 days, drops appear on the inner surface of the film, and the tubers have buds ready to grow
This indicates that it is ready to land.
We invite you to watch a video about planting gloxinia tubers:
How to plant seeds?
- Seeds are planted on the surface of moist and loose soil. There is no need to bury them in the ground. There is no need to choose any special substrate. You can use peat tablets.
- The soil must be sterilized.
- It is preferable to have a shallow container with a soil layer of up to 3 cm, since the seedlings dive several times during the growth process.
- After the seeds are evenly distributed over the soil, they are sprayed with a spray bottle and the container is tightly covered with film so that moisture does not evaporate and placed in a warm, bright place.
After 7-10 days, small sprouts begin to be visible on the soil surface. Further actions are regular watering and, if necessary, picking.
Read more about how to grow gloxinia at home from seeds here.
We invite you to watch a video about growing a flower with seeds:
Tuber division
Reproduction of gloxinia by dividing the tuber is considered dangerous. It can only be used for large (at least 6 cm in diameter) and healthy specimens that have several growth points.
You cannot divide a rotten, inelastic tuber.
If successful, flowering will begin faster than using other methods.
There is a high risk that all parts of the tuber will die.
The tuber is divided after the end of the dormant period before planting in the ground. This should be done after the emerging shoots reach 1.5-2 cm.
There should be a growing point on each part of the tuber.
The cuts are sprinkled with charcoal, and the tubers are placed in pots with soil and kept under film until the first leaves appear. The tuber cannot be buried completely; the growing points must remain above the ground.
After dividing, I plant the tubers in vermiculite in transparent plastic cups. I move them into permanent pots only after making sure that the “division” has begun to develop and give roots. Inga Vasilyeva, Ryazan. 15 years of experience in growing tuberous domestic flowers.
For tubers to germinate, the room temperature must be at least 18°C. Watering is moderate, preferably through a tray.
Step-by-step instruction
For planting you need to prepare:
- a shallow and wide container for seedlings with drainage holes;
- translucent sealed cover or film;
- soil from one part of coniferous soil and deciduous soil containing peat, which will provide the root system with the necessary elements;
- regular or granular seeds;
- expanded clay gravel for drainage;
- spray;
- paper;
- a needle.
Algorithm of actions:
Fill the bottom of the container with drainage so that a layer 1 cm high is formed. Level it.
Spread the soil on top of the expanded clay gravel in a 3 cm layer and compact it lightly. It can first be disinfected in the oven at a temperature of 150 degrees and allowed to cool.
Spray the soil generously with water from a spray bottle.
Fold a sheet of paper in the middle and sprinkle seeds on the fold.
Distribute them over the top layer of soil, dropping one seed at a time with a needle.
Slightly deepen the seeds by spraying them with a spray bottle at a distance of at least 40 cm.
Cover the container with a lid or transparent film with small ventilation holes.
When and how to plant?
So, it is better to plant collected or purchased material in the first half of February. But in addition to the seeds themselves, you also need to take care of the following.
- The right dishes. The container should be shallow, quite wide, and must have a tight-fitting lid, which, if necessary, can be replaced with cling film or a piece of clean transparent glass. You can also use special peat tablets. In this case, a container with a tray is prepared for them, in which they are installed, and the germination of the seeds itself is carried out in this case without soil.
- Now about the soil. You can sow seeds either in ready-made substrate mixtures, or you can make it yourself. The best soil is collected under a pine or birch tree and, of course, as far from the road as possible. But only such a substrate should be disinfected in an oven at a temperature of 150 degrees for 1 hour and only after it has completely cooled can it be used in the future.
- Drainage. To sow gloxinia at home, its presence is not necessary. But if desired, you can use clean and small pebbles.
Now we will take a closer look at the step-by-step guide describing how to properly sow the seeds of this beautiful flower at home.
- First, pour a layer of drainage onto the bottom of the container and level it.
- Next, lay the soil heated for 1-2 minutes and spray it with a spray bottle. The substrate should be moist, but not too wet.
- Now the seeds are laid out on the surface. The easiest way is to pour them into a landscape sheet folded in half and then, using a regular needle, carefully lay them out on the surface of the soil. Seeds should be sown only without deepening.
- Now cover the top of the container tightly with a lid or glass and leave at room temperature.
It is very important that before the first shoots appear, the container with the crops is in a warm room and with good lighting. Watering the seeds regularly is necessary so that the surface of the substrate does not dry out.
Gloxinia seeds urgently need high humidity and good lighting. You can use both wick irrigation and irrigation using a spray bottle.
If sowing is carried out in peat tablets, then they are soaked in warm water and placed quite tightly together in prepared containers with pallets. Next, 3 seeds are planted in each capsule and the planting is tightly covered. Here watering is carried out through a tray.
To learn how to grow gloxinia, watch the following video.
Reproduction by leaf fragment
When gloxinia is propagated by a fragment of a leaf, rooting is carried out in a substrate or in a peat tablet.
Each fragment is planted in a separate cup and kept in a greenhouse.
To turn a leaf into planting material, it can be divided in 3 ways:
- along the central vein;
- cutting the sheet crosswise into strips 3 cm high;
- dividing the sheet into 3 parts so that each of them can be conveniently buried.
It is important not to confuse the top and bottom of the fragments. They are determined by the direction of the veins.
Pieces of gloxinia leaf are dried and rooted according to the same principle as a whole leaf.
Care from germination to adult flower
It is necessary to provide the correct conditions for the plant:
- Temperature within 20-25 degrees. No drafts or sudden temperature changes.
- Air humidity should be above average. The plant at all stages of development does not tolerate spraying. Therefore, you need to protect it from dry air during the heating season by placing the pot in a wide tray with water. Place the pot on a stand so that the bottom does not come into contact with water.
- Lighting should be diffused and continuous, for 12-14 hours a day. Therefore, gloxinia requires additional artificial lighting.
Next, you must follow the care rules:
- Watering. We have already talked about watering seedlings. An adult plant is watered so that the top layer of soil dries out between waterings. For irrigation, it is necessary to use settled soft water at room temperature, or 2-3 degrees higher. The safest method of watering is through a tray.
- Feeding. They begin to fertilize gloxinia as soon as flower stalks and bud buds appear. Do this 2-3 times a month at equal intervals. The plant needs complex fertilizing with mineral fertilizers. Suitable compositions for flowering plants. You can learn more about the rules for watering and feeding gloxinia from this article.
- Rest period. For gloxinia, it is necessary to change the conditions during the dormant period. It comes in the fall, after flowering has completed. The plant needs watering less and less, the flowers fade, and the above-ground part of the plant begins to die. For the winter, the upper part of the plant is removed, the tuber is either put in a pot in a dark, cool place at 10-15 degrees, or dug up and stored in a bag of sand and peat on the refrigerator door. The tuber in the pot continues to be watered 1-2 times a month so that it does not dry out.
- Spring awakening. In the last days of February, the tubers are removed from storage and planted again in the ground. Before this, you need to hold the tuber moistened with water in a warm, bright place until sprouts appear. Then it is planted in the ground at 2/3 of the height. After the sprouts get stronger and grow, the soil is added to the root collar.
- Prevention of diseases and pests.
Compliance with all care and maintenance measures is the most important preventive measure. Most diseases appear due to improper watering, high humidity and inappropriate temperature. Insect pests attack plants that are exposed to dry and hot air. Pests are destroyed with insecticides, and diseases are treated based on the situation. - Trimming. Gloxinia does not require formation, but many species bloom in two stages per season. Between them it is necessary to cut off all flower stalks and most of the leaves. Afterwards, when the stepsons appear, remove the excess ones, leaving only 2-3 strong shoots.
You can learn more about caring for gloxinia at home here.
Features of culture
Gloxinia, like any other potted plant, has features that will have to be taken into account:
- the above-ground part dies off after flowering ends;
- there is a period of rest;
- pre-winter preparation includes fertilizing with fertilizers, but without nitrogen;
- an adult plant requires a large pot;
- if the plant does not have enough light, then it is necessary to take care of additional illumination with a phytolamp to prolong flowering.
Gloxinia
Family planting conditions
If you need to grow several varieties, then each variety must be sown separately.
- Seeds must be poured into a pre-prepared lid or matchbox to make them convenient to take.
- A toothpick or thin stick needs to be moistened with water. Thus, it is very easy to pick up each gloxinia granule.
- Next, you need to lower the seed onto the surface of the soil without embedding. The same should be done with the remaining seeds. So plant all the granules in a row.
- After sowing the seeds, the patches must be covered with either film or a lid.
- It is necessary to water the ground before planting so that the seeds do not fall into the ground. After all, deepening even by at least 0.5 cm can sharply reduce the possibility of seedlings appearing. If tablets were used, it is no longer worth watering; the moisture that the peat humus tablets absorbed should be enough for cultivation.
- Place the patch on the window to create greenhouse conditions for the plant. Additionally, you can use table lamps.
- The seedlings should germinate in 2-3 weeks. You should not open the lid before the first shoots appear, so as not to disrupt the normal conditions for growing seeds.
It is necessary to control:
- Humidity of soil and air in the container. If necessary, lightly spray with clean boiled water. The water temperature should be slightly above room temperature.
- Lighting. The level of illumination cannot be changed. If necessary, to reduce the temperature from the lamps, you can raise the lamps higher. This way the brightness of the lighting will not decrease.
As soon as the second leaf appears, it is necessary to gradually accustom the seedlings to room conditions: humidity, temperature. Namely, start ventilating the greenhouse, thereby hardening the gloxinia.
Vegetative method
If the gardener already has an adult plant, then you can resort to a more reliable and proven propagation method - propagation by leaves, cuttings or tubers.
When propagated by leaves:
- The smallest leaf is selected or a large one is taken and divided with a sharp knife along the veins into segments, while the petiole is shortened to 2 cm.
- The cuttings are planted in separate pots filled with light, damp soil mixture.
- The containers are placed in plastic bags to create greenhouse conditions.
- After a month, when the exotic plant takes root, the protection begins to gradually be removed, which allows the flower to adapt to new living conditions.
Planting gloxinia with seeds
When gloxinia is sown with seeds, the plant germinates without any problems. But for this you need to meet some conditions:
- prepare the correct substrate;
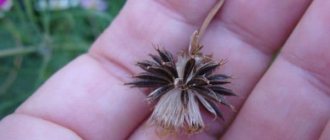
- prepare seeds;
- correctly lay the planting material;
- create conditions for the growth and development of sprouts.
If everything is done correctly, the seedlings will be ready for planting at the right time.
How to prepare the soil for planting
It is possible to grow high-quality seedlings from seeds provided that a suitable substrate is available. Features of container preparation:
- Take a box 5-8 cm high and a piece of glass that will cover the entire area of the container.
- Place a layer of expanded clay on the bottom of the box. It is enough to fill the container with this material to 1 cm.
- You need to pour a peat mixture on top of the expanded clay. Its layer should be about 2 cm.
- Then the soil is well moistened with a spray bottle.
Soil preparation
Step by step landing procedure
Proper planting of seeds guarantees good germination. Step-by-step sowing algorithm:
- Seeds need to be soaked in a special solution to accelerate growth.
- Transfer the material to a paper towel and wait until it dries completely.
- Place the seed on a sheet of paper. Fold the canvas in half lengthwise and distribute the seeds evenly over the surface of the substrate.
- There is no need to sprinkle them with soil. It is enough to spray the surface well with water again. Each seed will fall into the ground on its own to the required depth.
- The top of the container must be covered with glass and provided with round-the-clock illumination. Growing is carried out without ventilation, so you should not lift the glass.
Note! If purchased seeds are sown in a shell, they can be laid out manually
Planting seeds
Watering rules and humidity
After about 1 week, the first gloxinia shoots will begin to appear. You can remove the glass and put away the phytolamp. Now the main task is to constantly spray the sprouts with a spray bottle. For normal cultivation, it is enough to do such irrigation every 3 days. This will maintain the humidity suitable for the plant.
Fertilizing and soil quality
Initially, you need to sow the seeds in a peat mixture that is rich in nutrients. Then the plant is picked 3-4 times (and the container is changed the same number of times). Each time a new substrate is used, so there is no need to feed the plants. The first feeding is done 40 days after the last transplant. To do this, you can use complex fertilizers in the amount specified in the instructions.
Sowing time
Calculate the sowing time so that by the time dormancy sets in (mid-September-October), gloxinia has time to grow, bloom and develop a tuber. Mid-February is the last date for planting seeds in the ground. From this moment on, the flower will have time to go through all stages of development and go into hibernation. Gloxinia blooms 6-7 months after the sprouts appear. Sowing crops earlier will always be better. But this is done provided that it is possible to provide the seedlings with adequate lighting.
Cold period
Considering the characteristics of gloxinia and how to care for this plant, it is worth noting that it needs complete rest during the cold period. This allows you to accumulate strength before the exhausting period of flowering. You should be prepared for the fact that the ground part of the flower completely dies with the onset of cold weather. If you do not know about this feature of gloxinia, it may scare you. But this is a normal process for this plant.
It is important to maintain the right conditions during the dormant period so that the roots do not die during the winter. In the spring, when the temperature begins to rise, gloxinia will send out its shoots again, preparing for the flowering period
Make sure that the temperature drops gradually. Do not allow sudden changes, as this will negatively affect the condition of the gloxinia root system. The first thing you need to do when the above-ground part of the plant completely dies is to stop watering the soil. During this period, gloxinia needs a minimum amount of moisture. Also avoid applying fertilizers.
Dried stems are carefully cut with a clean and sharp tool. You only need to leave small cuttings that will protrude above the surface of the soil in the pot. After this, you need to keep the soil dry. It must be permeable to air. Therefore, in August-September you need to loosen it a little. This must be done carefully so as not to damage the root system.
Next, the pot is transferred to a cool place. It should be dark enough here so that the plant does not wake up at the wrong moment. A place under the bathroom is suitable if your apartment is not very hot in winter. The pot is taken out onto the balcony if it is insulated. Even in severe frost, the temperature should not be below 11 °C.
To prevent the soil from becoming completely dry and lifeless, water gloxinia once a month in winter. But you don't need a lot of moisture. Therefore, do not flood the plant. It is enough to just slightly moisten the soil. At this stage, this is quite enough for a dormant gloxinia. It can be transplanted in this state into a larger pot. It is best to do this in the first month of the year. You can also update the substrate, making the soil more nutritious.
It happens that in winter gloxinia produces a small shoot. This is explained by the rather high temperature in the room where you left the pot with the dormant plant. If the root is strong, this is not a problem. Remove the shoot so that it does not take away the gloxinia's strength.
What kind of plant is this?
A plant of the Gerseniaceae family native to America. Gloxinia was named in honor of the botanist and doctor B.P. Gloxina. However, it has another name - Sinningia, in honor of the breeder who was breeding it, V. Sinning. It is grown only as a houseplant or greenhouse plant.
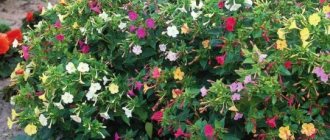
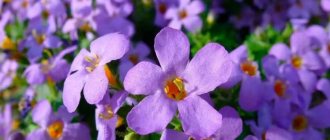
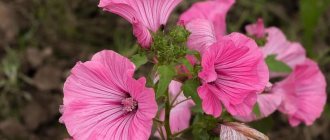
A small compact bush with large bell-shaped flowers. The leaves are quite large, oval in shape, with a velvety surface, in various shades of green. The flowers are simply amazing with their colors. There are not only colors: white, yellow, pink, red, purple, brown, as well as various combinations of them. But there is also a pattern on the petals: specks, an ornament reminiscent of lace, a wide edging of the petal of a different color. The root system is in the form of a tuber.
Cuttings
Gloxinia cuttings are rooted in the same way as leaves and their fragments. To guarantee success, they should be taken only during the budding period.
But most gardeners resort to propagating gloxinia by cuttings only if they want to use the material left after pruning.
It is carried out after the first flowering or if the gloxinia has stretched too much from lack of light.
In such a situation, the cutting may not take root, so it is preferable to use peat tablets.
You can see how gloxinia is cut in the video below.