Propagation of royal geranium by cuttings
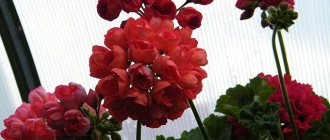
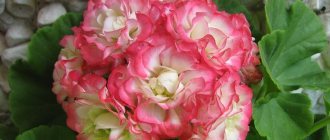
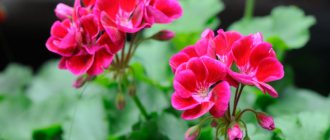
Queen, queen, queen of Pelargosh - this is how flower growers lovingly call the royal large-flowered geranium. Created by German breeders, it attracts attention and makes you fall in love with it:
- emerald green pubescent leaves;
- huge, from 15 cm in diameter, inflorescences that do not rise from above, like other pelargoniums, but cover the entire bush with a cloud;
- generous flowering from March to October;
- the diversity and uniqueness of varieties, color shades and flower shapes.
You can propagate a queen growing at home all year round. Pruning broken or thickening shoots, thinning and pinching during flowering, preparing adult geraniums for winter rest, shortening the tops in February - all operations provide material suitable for stem cuttings.
Growing conditions for royal geranium
Typically, garden and indoor geraniums are clear contenders for the title of the most unpretentious and undemanding indoor plant. But their royal relatives love attention and care. If a gardener is tormented by the question: “Why doesn’t the royal geranium bloom next to the lush caps of bright zonal varieties?”, it is not the plant that needs to be blamed, but itself. Obviously, the culture is not entirely satisfied:
- lighting;
- selected watering mode;
- room temperature;
- the presence of a draft;
- how pruning is carried out;
- soil quality or pot size.
To care for royal geraniums at home, it is important to create conditions in which the plant would be comfortable throughout the year. This type of pelargonium:
- does not tolerate drying out of the earthen clod;
- does not do well in excessively wet dense substrate;
- it quickly stretches out and loses its decorative appearance without the proper amount of light, but it is also uncomfortable under the staring direct rays.
Without additional shading on the south window, geranium leaves and flowers are at risk of burns and rapid wilting. The optimal location for royal geranium is east or west. But even here in winter, it is better to illuminate the plants with phytolamps, extending their daylight hours to 12–14 hours. This measure will allow you to maintain the compact shape of the bush without deep pruning.
Properly chosen temperature conditions contribute to good health and lush flowering of geraniums:
- In the summer months and spring, when the growing season is active, royal geranium flowers are kept at a temperature of 22 to 25 °C.
- In winter, development slows down somewhat, so plants need cooler air. In order for the royal geranium to set buds and prepare for the next season, it needs a temperature of 12–16 °C.
Plants react poorly to heat. In a too warm room, a green pet will slow down its growth, and some varieties stop developing altogether and refuse to form flower buds.
Aftercare
In order for new plants to delight you as much as the mother plants with their brightness and beauty, several care conditions must be observed. Let's take a closer look at each of them.
Light
Royal pelargonium loves sunny places . If you place the pot close to a source of natural light, then you will enjoy long and abundant flowering. You can even place it on a south-facing window sill, but you just need to make sure that sunburn does not form on the leaves.
In winter, the plant needs to be illuminated additionally, since due to lack of light the stems stretch too much.
Temperature
In summer, the temperature in the room should not be higher than 24 degrees . In the winter months, royal pelargonium needs to be provided with a period of rest; for this, the temperature should fluctuate in the range of 12-15 degrees.
If this is not followed, the plant will not bloom. The same thing can happen if it is overheated or if you place the pot in a draft.
Watering
The watering regime should be plentiful and frequent , because royal pelargonium is a water drinker. However, you should not flood the flower either. Between waterings you need to let the top layer of soil dry out a little.
Attention! Based on experience, experts also advise pouring water not into the pot itself, but into its tray. You should not use water directly from the tap; the water should be well settled.
Humidity
Pelargonium is not one of those flowers that requires constant irrigation of the leaves . She does not like water getting on the leaves and inflorescences.
Fertilizers
Fertilizing should be done in spring and summer during the flowering period. It is best to use fertilizers with a high content of potassium and phosphorus, then flowering can be extended for several weeks. They should be applied once every fourteen days.
How to properly obtain cuttings from large-flowered geraniums?
Material for cuttings of royal pelargonium is obtained with the arrival of spring and until mid-summer. Cuttings are harvested either during the formation of the bush or during the first pruning. In the first case, it is allowed to leave shoots for propagation throughout the year, and in the second - only from spring and the first half of summer.
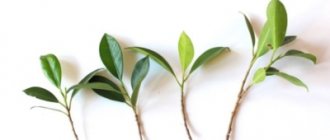
Cut the cuttings slightly below the level of the internodes. The cut is made at an angle of 45 degrees. Take a sharp tool. To prevent infection of the plant, it is recommended to pre-treat the blade. Shoots should not be broken off. This will damage the pelargonium. The length of the cutting depends on the variety of geranium. If the mother plant belongs to a dwarf variety, shoots approximately five centimeters long are separated. Ten-centimeter ones are taken from large specimens. All existing flowers and leaves are completely torn off from the cuttings. Some types of royal pelargonium, grown for several years, have quite long shoots. To collect planting material from such plants, the cuttings are simply cut to the required size, that is, each is cut into pieces of 5-10 centimeters.
What difficulties might you encounter?
Propagating geraniums at home is not difficult, but it is still worth remembering some aspects. Sometimes pelargoniums are affected by diseases and pests. The main problems when growing geraniums:
- Yellowing of the lower leaves due to lack of moisture.
- Redness of the edges of the leaves when the plant freezes.
- Darkening of the shoot at the base when affected by the black leg. Unfortunately, such a plant cannot be revived.
- Exposure of the stem due to lack of light.
- The appearance of gray mold on the leaves due to excessive moisture.
Home grown geranium
Growing geranium at home is not difficult, the main thing is to choose the right time, choose a more convenient method of propagation and the right substrate. In this case, you can grow a real beauty on the windowsill, which will be a true decoration of the house.
Cuttings of geraniums according to the lunar calendar. Step-by-step cuttings of pelargonium
1. First you need to take a well-sharpened knife, disinfect it with alcohol and very carefully cut the stalk, its length should be at least 5 centimeters. The cut should be made at an angle of 90 degrees to the stem, however, some gardeners advise cutting geraniums at an angle of 45 degrees so that there is a larger area for the roots to appear.
The cutting must have at least two or three leaves, otherwise the cutting may not gain a foothold in the ground, and may ultimately die in new extreme conditions for it. It is necessary to remove every flower arrow and bud from the cuttings. Housewives want to see young pelargonium blooming as soon as possible, but the right time for this has not yet come. If you leave the buds on the cutting, it will begin to waste energy on blooming flowers, and it will not have enough energy to take root. Practice shows that 90 percent of flowering geranium cuttings die after some time when planted.
2. Cut pelargonium cuttings should be placed in a shaded place for about two hours so that the cuts dry well and are covered with a film. After this time, the sections must be covered with crushed activated carbon or the drug “Kornevin”.
3. Planting cuttings of pelargonium. Prepared cuttings are most often planted in plastic cups. At the bottom of these cups, you need to use a knife to make several holes for drainage, through which excess water will drain and the soil will be ventilated.
Next, you need to pour soil into the cups. You can take universal soil and mix it with vermiculite and sand. It is necessary to moisten this soil thoroughly. To kill all harmful microbes and organisms in the substrate, you can pour boiling water or a weak solution of potassium permanganate onto it. You need to wait for the soil to cool, then stick the cutting into it about 2-3 centimeters deep. There should be no leaves on the part of the stem that goes into the ground, and if there are any on the cutting, they need to be removed.
There is no need to cover the planted geranium cuttings with anything. However, if the leaves begin to turn yellow, the plants can be covered with a transparent plastic cup or glass jar. After a couple of days, the leaves should turn green again, after which the container can be removed.
A newly planted cutting does not need to be watered frequently, since it does not yet have roots, so it does not need abundant moisture. But the soil must not be allowed to dry out, because if the soil dries out, the cutting will also dry out. You need to water little by little, so that water does not get on the leaves and stem.
4. Within a few weeks, roots will begin to appear on the cutting. How to determine that they have appeared? If the cutting was planted in a transparent plastic glass, the young roots will be clearly visible there. In addition, the appearance of roots will be noticeable by other signs: new leaves will appear on the cuttings, which will gradually increase in size, this is a good signal that the young plant has taken root and is developing well.
Main conclusions
Thus, having considered the variety of methods for propagating royal pelargonium, we are convinced that everyone can find something suitable for themselves. Let's remember a few basic recommendations :
When cutting or dividing from a bush, before planting in a permanent place, it is necessary to achieve the appearance of the first roots. When sowing seeds before burying, it is necessary to damage the hard shell so that the first shoots appear more quickly.- Choose a pot that is small in relation to the plant. We make drainage holes in the bottom.
- An important point is the choice of soil. Royal pelargonium prefers loose soil consisting of deoxidized peat, sand and a sufficient amount of mineral fertilizers.
- Please note that not in all cases there is a need to create a greenhouse effect.
When rooting cuttings in the ground, do not cover the planting with a glass jar. But when sowing royal pelargonium with seeds, the situation is quite the opposite. To speed up the first shoots, it is worth covering the tray with a lid or plastic bag. Here you need to periodically ventilate the soil.
Compliance with the conditions for proper selection of soil, pot and further care will allow you to grow a beautiful flower that will decorate the windowsill of a city apartment or country house.
How to propagate a plant?
Best time
The most favorable period for propagation of royal geranium depends on the chosen method . So, it is better to start cuttings in August - September, and plan to plant seeds in the spring.
Let's consider each type of breeding of royal pelargonium separately and in more detail.
Methods
Cuttings
The best way to propagate this type of pelargonium is cuttings. The favorable period for this is August-September. Take the apical cutting of a royal pelargonium plant with 2-3 internodes. Only the bottom leaf on the cutting is cut off, and the rest are saved .
Rooting of cuttings is carried out in the spring, or shoots obtained from pruning in August are planted. It is important that the air temperature is no higher than +25 °C.
How can you root cuttings? There are 2 ways to do this:
- Place the prepared cuttings in a container of water. In order for royal pelargonium to produce more root shoots, experts advise adding a few drops of a root growth stimulator, in the dosage specified by the manufacturer. Caring for shoots that are rooted in water is a little easier.
- Another way to get high-quality planting material:
- Dry the cuttings for 2.5 hours;
- plant in a substrate consisting of peat and sand or special soil for geraniums and pelargoniums.
Do not moisten the soil at the planting stage. The pot with the earth mixture and cuttings does not need to be covered on top with a glass jar or bag. Then a rare watering regime is established. After 3 weeks, when rooting is complete, it is necessary to pinch the central bud of the young plant, this will ensure its branching.
Feeding can begin after another 2 weeks. Then you can transplant the plant to a permanent place.
Below is a visual video about cuttings of Royal Pelargonium:
Dividing the bush
This is the least troublesome method for those who own a large adult royal pelargonium. This method is advisable to use for planned transplantation. Small parts with a sufficient root system are separated from an adult plant and compressed into a separate container .
Seeds
To obtain it from seeds at home, it is necessary to mechanically pollinate the flower. The seeds grow in a capsule, which is a pointed pod. When it is ripe, it bursts.
To collect seed material, the most beautiful and powerful buds are left on the mother plant during the flowering period. It is better to cut off the rest so that the plant does not waste energy.- After the seeds are completely dry, it is necessary to select the largest ones.
- Then you need to leave the collected material in a weak solution of potassium permanganate for 4 hours or damage the thick skin manually, and then sow it into a shallow container filled with a light, damp substrate.
Below is a visual video about planting Royal Pelargonium with seeds:
Landing in a permanent place
After you have received the seed using one of the above methods, it is important to properly prepare for the planting procedure .
- First, choose a pot. Remember that royal pelargonium does not like large spaces; because of the space, it begins to grow a root system and side shoots, which leads to a long period without flowering (read about why royal pelargonium does not bloom here). Therefore, opt for a small pot. It is more important to check for drainage holes at the bottom.
- Secondly, the degree of its beauty and attractiveness depends on the soil in which royal pelargonium grows.
Royal geranium prefers soil that is neutral or slightly alkaline. Reference! The soil should be structural; it is best to take a mixture of peat and sand, adding a little ash. A drainage layer must be placed at the bottom; this can be brick chips, pieces of foam plastic or expanded clay.
When is the best time to perform the procedure?
The choice of time of year for propagating royal begonia depends on the intended method:
- Cuttings.
The most suitable period for cuttings is from August to September. It is during this period that the plant is pruned after flowering, and the cut shoots can be used as planting material. Dividing the bush.
For propagation of royal pelargonium by dividing the bush, the recommended time is late spring - early summer: it is during this period that the plant is in the active growing season, so it can easily withstand any manipulation.
Sowing of seeds is usually done in March. It is possible earlier, but then the seedlings will need additional lighting with a phytolamp.
What could go wrong?
Pelargonium royale is very sensitive, so some problems may arise when growing geraniums :
- Cuttings, like seedlings grown from seeds, can be attacked by a fungal infection. Therefore, it is important to monitor humidity. It is better to grow each plant in a separate container and immediately destroy all infected specimens.
- Are the leaves withering and hanging like a rag? You have filled the geranium. You need to stop watering.
- Are the leaves turning yellow and drying out? You are not watering enough. Perhaps only the top layer is moisturized. It is best to water through a tray.
- Is the plant withering away? Check to see if your geranium has been attacked by pests, then insecticides will help you.
- In order to fully bloom, the plant requires a supply of all the necessary nutrients, so 2 weeks after picking, the seedlings can begin to be fed with fertilizer for flowering plants. It is better to start feeding rooted cuttings with the onset of spring in early March.
