The orchid can rightfully be considered one of the most exquisite and sophisticated ornamental plants. The flower has earned the love of many fans thanks to its unusual structure and variety of shades. If there are no living beautiful orchids in the house, you can easily make one from artificial materials. Foamiran orchids do not require daily care, but they bring a lot of pleasure to their owner.
Preparing for the creative process
To create a white orchid with your own hands, you will need the following materials: white foamiran, wire No. 24 or No. 26, light or dark green tape, several cotton swabs, a piece of cotton wool, glue (PVA, second glue-gel, “moment crystal”) , acrylic paints, crayons or dry pastels, orchid texture, thin brush, tweezers, scissors and iron.
Preparing patterns for work
You should start working by preparing templates from cardboard, according to which you will cut out parts from foamiran. Our patterns are an exact copy of the elements of a real Phalaenopsis orchid.
When you carefully examine the flower, you probably noticed that the lower inflorescences are much larger than the upper ones. The patterns also come in different sizes: large (M) and small (S). On one branch, as a rule, there are 2-3 small flowers (S), 3-4 large ones (M) and 2-3 buds. The pattern for the buds is designated No. 4, it also has sizes M and S. Pattern No. 5 is cut out in size 6x6 mm with teeth on opposite sides. For convenience, copy our patterns and proceed to the main work.
Mastic modeling: basics
At first glance, creating figures from mastic seems to be a difficult task, requiring certain skills not only in cooking, but also in needlework. Looking at the photos of cakes decorated with beautiful flowers, indistinguishable from real ones, it’s hard to believe that you can do the same with your own hands.
Orchids made from mastic are very similar to real ones
However, nothing is impossible if you have the desire and patience. Besides this, you will need:
- mastic;
- food colorings;
- tools for working with mastic;
- knife.
When buying tools for working with mastic, take also special molds that can be used to cut out petals.
You can easily prepare mastic at home from available products. We offer you several recipes.
Note! Mastic is an edible product, and orchids made from it will not only decorate baked goods, but also serve as an additional delicacy. Therefore, choose only fresh ingredients.
Philippine mastic
This snow-white mixture molds very well. For it you will need:
- 900 g powdered sugar;
- 10 tablespoons of water;
- 10 g gelatin.
Soak the gelatin for an hour, heat in a water bath and cool. While it is still liquid, add powdered sugar, stirring the mixture thoroughly.
Instant gelatin can simply be dissolved in hot water and, after cooling, mixed with powder. You can prepare this mastic in advance as it keeps well for a week in a closed container.
From marshmallows
Novice confectioners appreciate this mastic recipe for its simplicity. The mixture turns out delicious, in addition, you can add lemon juice instead of water and even a drop of flavoring.
You will need:
- 1.5 cups powdered sugar;
- 1 cup marshmallows;
- 2 tablespoons of water.
- Melt marshmallows in the microwave
- Place in a special bowl, add water or lemon juice, and place in the microwave for another 30 seconds. During this time, the marshmallow will puff up. Remove and stir until smooth. If you don't have a microwave, melt the marshmallows in a water bath.
Marshmallow is one of the most suitable materials for making mastic. - Gradually add powdered sugar, sifting it through a sieve. Mix thoroughly. The mass should become elastic, but not tight. For greater elasticity, you can add half a teaspoon of butter to this mastic.
- While the mixture still sticks to your hands, roll it in powdered sugar and wrap it in cling film. Place in the refrigerator for 30 minutes.
If you want to get colored marshmallow fondant, use food coloring. Add liquid dyes during mixing (reducing the amount of water), and gel dyes to the ready-made mixture.
These are the simplest and most common mastic recipes. In fact, there are many more of them.
Preparing parts from patterns
Lay out white foamiran in front of you. Transfer the prepared patterns onto it and cut out the parts with scissors. For one flower you will need the following supplies:
- according to pattern No. 1 (lip) - 1 pc.,
- according to pattern No. 2 (side petals) - 1 pc.,
- according to pattern No. 3 (sepals) - 1 pc.,
- according to pattern No. 4 (bud) - 1 pc.,
- according to pattern No. 5 (part of the lip - “chair”) - 1 pc.
For beginners in working with foamiran, we recommend that you outline the pattern with a needle or awl so as not to leave pencil marks. Fold the cut out parts of the plant as in the photo.
Experiments with foamiran
Charming orchid flowers made of soft, plastic foamiran look very beautiful. This material is more voluminous, stretches easily when heated, and products made from it are very “real” and textured.
With the right colors, a little perseverance and artistic skills, you can create a spectacular gift for your loved ones.
White orchid lip tinting
Using an applicator and dry crayons, apply bright yellow or purple pigment to the lip (pattern part No. 1). Tint the workpiece on the reverse side with less bright colors, which will give the element a translucent effect.
Tint the “chair” blank (pattern part No. 5) purple on both sides in the same way and place it in the middle of the lip.
Apply specks of acrylic or oil paint to the lip using a thin brush. Receive: the back side is tinted, the front side is stained.
Note!
DIY feeder - step-by-step instructions for creating a feeder + detailed diagrams with photo reviews- Do-it-yourself rugs - TOP 120 simple patterns with master classes on how to make them yourself + photo reviews of finished rugs
- Do-it-yourself dolls: a master class on making a beautiful doll. Simple instructions with photo examples of ready-made options
How to save a finished bouquet
Many people are interested in whether it is possible to extend the life of an exotic flower in a bouquet and how to do it. In order for a tropical flower to feel comfortable, it is necessary to provide it with the proper conditions. So, at average air temperature, the humidity level in the room should be in the range of 50–70%.
It is recommended to spray the plants daily with a spray bottle. Use warm, settled water.
Tropical flowers do not like to be in a draft or indoors where sudden changes in air temperature are possible.
An orchid used as an element of a floral composition sooner or later begins to fade. You can refresh the plant a little and slow down the process of its death using simple procedures:
- shorten the flower stem daily;
- add a small amount of special fertilizer to the water, which can be bought at any flower shop;
- Immerse the bouquet in water at room temperature (the duration of this procedure is no more than 10 minutes).
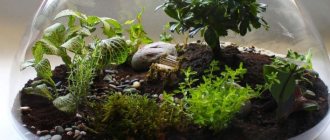
Few people know that an orchid can not only decorate a home greenhouse, but is also often used to create floral arrangements. Whether it will be a bouquet or a floral florarium is up to you. But such a gift will definitely make an incredible impression and will be remembered for a long time.
Similar articles
A flower with a unique aroma or orchid Vanilla
What types of orchids can be found in nature?
Special flowers for a celebration or a wedding bouquet of orchids
Short-lived beauty or a review of blue orchids
Formation of side lobes
To shape the elements of the orchid inflorescence, heat the iron by setting the thermostat to the second position. First, shape the buds by placing the piece on the surface of a heated iron for a few seconds. As soon as it heats up, immediately remove it from the surface of the iron in the shape you need.
We attach the side petals to the iron one by one. We apply the first, protect the second from the hot surface. We quickly press the warm petal onto the mold to get a textured print. Then we apply the second one, and protect the finished one. We also press the heated second one onto the mold to obtain an impression.
Finished petals with veins must be slightly pulled by the edges and with your fingers, form indentations in the center to give a natural effect. The petals will look like in the photo of hand-made orchids.
Weaving
This section will discuss a step-by-step master class on weaving an orchid from beads.
Leaves
You need to weave 10 leaves: 4 small leaves, 7 centimeters long, 3 medium leaves, 9 centimeters long, 3 large leaves, 9 centimeters long. The increase occurs due to the addition of arcs.
- A 20 centimeter wire is taken and a small ring is made at one end.
- 20, 25 and 30 green beads are strung on a wire.
- Then the remaining beads are collected onto the working end. Turns are made from it around the main axis, in total there should be 6 turns on each leaf.
- After completing each revolution, it is necessary to connect the row with the main axis using a wire. The connecting wire should be smaller than the main wire.
- After turning and securing the last row to the axis, the end of the remaining wire is hidden, and its excess is cut off.
- The rest of the leaves are made in the same way.
Little bud
- A thin wire is taken and three green beads are placed on it. The other end is wrapped around the wire to secure them. Then we make two turns around with 10 and 18 beads.
- The second petal is made in the same way.
- The bead is placed on the wire of both petals and hidden in the middle between the petals.
- You need to weave 2 more buds.
Big bud
The large bud is made of green, white and pink beads. Colors are taken randomly.
- According to the algorithm described above, only with three turns, not two, petals are made. The proportion of different colors of beads is at the discretion of the master.
- From the upper end of the petals you need to leave 5-7 centimeters of wire and connect the petals to each other using them.
- A bead is placed on the resulting axis of 3 petals and covered with petals.
- The petals curl together.
- You need to weave 2 more of these buds.
Stamen
- A large bead and 26 yellow beads are placed on the wire.
- The ends of the wire must be wound together 3 times at the base of the bead.
- Then 5 beads are placed on both ends.
- Then 21 beads are placed on them and a loop is made. The pestle is ready.
- 4 yellow beads are placed on the wire and a round loop is made from them. Then you need to make another turn around. The ear is ready.
- In total you need to make 7 pestles and 14 ears.
Flowers
- 6 white beads are strung on a wire.
- The working thread makes one turn around 17 white beads. Then another 4 turns are made with a constant increase in the number of beads. The excess wire is cut off and the ends are hidden. The round leaf is ready.
- 8 beads are placed on the base (you need to take beads of several red and pink shades).
- The first turn of 23 beads is made. Then 1 more bead is placed on the main end. In total, you need to make 4 such turns with a constant increase in the number of beads. With these extra beads you can create a sharp petal.
- To make the tongue you will need two shades of red. 3 beads are placed on the wire. One turn of 7 beads is made. Then 3 more circles with increasing intensity.
- The center is slightly pressed inward to give the shape of a petal.
- In total, you need to make 7 reeds, 14 sharp and 21 round petals.
- 2 round and 2 sharp petals are combined from a pair and connected to each other.
Shaping an orchid lip
We form the lip by placing the entire workpiece facing the hot surface. After which the workpiece will take the shape you need under the influence of heat. Before it cools down, you need to make a groove with your fingers and pull the antennae, as in the photo.
Note!
- DIY satin ribbon bows - step-by-step instructions for creating unusual bows + detailed diagrams with photos
Do-it-yourself furniture restoration: step-by-step master classes on restoration at home (120 photo ideas)
- Do-it-yourself rack: step-by-step instructions with photos and descriptions on how to make an unusual rack
For the logical conclusion, it remains to fix the “chair” in the center of the lip (oval on pattern No. 1). Take the blank, form a fold parallel to the teeth, and glue the element onto the lip. If necessary, tint the “chair” in a more saturated color and paint the teeth yellow.
Assembling an orchid inflorescence
Collecting an orchid inflorescence is simple. First you need to create a column. To do this, take a little PVA glue and apply it over the entire fleecy surface of a cotton swab. Then immediately dip this edge in starch, shaking off excess to obtain a velvety surface. Let the glue dry and cut the edge of the stick to about 8mm long.
Take the wire, make a loop on one side and coat it with glue. Place the prepared velvety head onto the glued loop. Allow the column to dry for a secure fit.
Using fast-acting gel glue or instant glue, glue the lip, side petals and sepals to the column.
To bring the flower to life, apply a little glue to the lip wings and fix them on the surface of the side petals, leaving the column in the very center. And your handmade artificial orchid will be almost as good as the real one.
Material selection
There are a lot of materials for implementing this idea in the modern world of decor and handicrafts, as well as types of this unique, excellent flower.
An orchid sprig can be made from beads, fabric, paper, foamiran, satin ribbons, felt, and even from such simple materials as cotton pads or threads.
Before you start making an artificial orchid, you need to carefully study the structure of this unusual flower by looking at a photo, or a live original, and most importantly, choose a specific type of orchid and decide on the color and shape.
Assembling orchid buds
To form buds, take a wire with a loop on the edge, wrap cotton wool around it in the form of a bud. Wrap the wire under the bud with tape in the form of a stem. Wrap the cotton wool bud in the blank according to pattern No. 4, gluing all the petals together.
Note!
Corrugated paper flowers: TOP 100 photos of ready-made options + instructions on how to make them yourselfDIY family tree: instructions for creating a family tree + DIY design ideas
- Do-it-yourself sun lounger: photos with instructions for creating sun loungers + detailed diagrams of the stages of work
The resulting buds need to be slightly tinted with yellow pastel with dark green shadows and red pigment. To set the tint, take hairspray and spray the buds with it.
Assembling the peduncle
At the last stage of work it is necessary to form a peduncle. To do this, wrap the wire under the flowers with green tape 0.6 cm wide.
Then wrap the connected two buds down 4 cm, bend the stem to the right side and tie a small flower to it 4 cm down, then bend the stem to the left and wrap another one.
Next, we attach another small one and move on to attaching 3-4 large flowers. Then we thicken the winding of the peduncle and lightly tint it with dark green crayons or paint.
The creative process is complete! Place the finished sprig in a beautiful vase or in a pot you made with your own hands especially for your orchid!