The main methods of vegetative propagation of dendrobium
Vegetative methods of propagation using parts of the mother plant are called vegetative. For dendrobium orchids there are three such methods:
| Way | Description | Efficiency |
| Detkovaniye | On mature shoots-pseudobulbs of dendrobium, under certain conditions, children can be formed - young offspring that have their own root system and are capable of taking root and developing when separated from the mother plant. | The survival rate of dendrobium children after separation is excellent. Flowering of rooted children can occur within the first year after planting. |
| Cuttings | Cuttings are made from old pseudobulbs and placed in a greenhouse. After a few weeks, they get babies and plant them in a pot. | The survival rate of children obtained from cuttings is good. However, the cutting process itself is lengthy and is not always successful. |
| Dividing the bush | With strong growth of dendrobium, the bush is divided along the rhizome into equal parts, in each of which several pseudobulbs remain. | The survival rate of the divisions is excellent. Flowering can occur within a few weeks after division. |
Thus, any method of propagating these orchids can give a positive result. Therefore, the choice will depend only on the circumstances. If a dendrobium variety is prone to abundant baby production, there is little point in cutting cuttings. If the orchid is reluctant to bear children, you can try cutting it. Dividing the bush is suitable for old adult specimens.
Important! Propagation of dendrobium by dividing the bush can also be considered rejuvenation. Usually, both divisions, after being freed from dead parts, quickly begin the growing season.
Dendrobiums propagated vegetatively bloom quickly enough. On separated children, the first flowering is not very abundant, but as new growths appear, its quality increases.
Rules for transplanting at home
To figure out how best to transplant Dendrobium nobile, you need to find out its habitat. In its natural environment, it grows on trees, its roots catching on cracks in the bark. It turns out that the roots of this orchid are always visible; they absorb moisture directly from the air, which in the tropics is characterized by high humidity.
From this information it is clear that the roots of the flower grow very quickly. In this regard, the orchid tends to grow. It must be replanted in time, using a larger pot.
If the plant grows and develops well, but the pot has become noticeably small, then you can simply transplant the flower into a new container using the “transfer” method:
- soak the earthen lump, but do not remove it;
- place a drainage layer in the new pot;
- place the plant together with an old ball of earth;
- fill the remaining space with substrate, add pieces of charcoal.
This method helps preserve the earthen ball along with the orchid’s already familiar habitat. The advantage is that adaptation will be much easier.
If the dendrobium has not been replanted for a long time, or the soil is depleted, then it is advisable to completely renew it. This procedure is necessary for the further development of the flower.
How to prepare Dendrobium nobile?
Preparation before transplantation includes purchasing a high-quality pot and a special substrate. Main characteristics of the new pot:
- it is desirable that it be made of transparent plastic;
- must have drainage holes;
- transmits light well;
- be larger in size than the pot in which the flower is currently growing.
Before transplanting, the dendrobium must be thoroughly watered so that the earthen ball becomes softer and can be removed more easily.
What time should I choose?
The following rules apply when choosing a transfer time:
- you cannot replant an orchid during flowering;
- do not disturb the dendrobium in the hot season (the exception is the poor condition of the roots, when replanting is needed for rescue);
- the best time is spring.
Attention! The timing of transplantation depends on the condition of the plant. Evaluate how much the roots have grown, what is the condition of the substrate? If there is reason for concern, then it is better to replant the plant, regardless of what time of year it is.
What kind of soil is needed?
The substrate for orchids is the basis of life. Without it, the growth and development of tropical beauties is impossible. Today in flower shops you can buy ready-made mixtures for orchids, which are also perfect for dendrobium. Under no circumstances should ordinary soil be used.
Soil preparation is an art. But many gardeners decide to prepare it themselves. The substrate must consist of:
- crushed pine bark;
- coconut flakes;
- sphagnum;
- fern roots;
- coal
Features of reproduction during flowering
Replanting is an excellent reason for propagating an orchid. You can immediately divide the bush or plant the children. But what if the orchid blooms? Experts do not recommend disturbing the flower at this time.
Neither the method of dividing the bush nor cuttings will work (because when propagating dendrobium for cuttings, we use the pseudobulbs of the plant immediately after flowering). There is only one thing left to do - wait for the flowering to complete!
Method 1: separating the children from the mother plant and planting
This method of reproduction is the simplest. The main thing in this case is to separate the baby from the mother plant as carefully as possible. The step-by-step procedure is as follows:
- sharp scissors with thin blades are wiped with a cotton swab moistened with alcohol;
- the blades of the scissors are carefully inserted under the base of the child, and the cut is made;
- cuts on the mother plant and on the baby are treated with green tea, cinnamon or crushed activated carbon;
- The baby is placed in a prepared pot or glass with holes, and its roots are sprinkled with substrate.
It is very important to wait for the baby to develop its own roots before separating. There should be at least 2 of them, about 5 cm long. Such an offspring will easily take root in a separate glass.
Tip #1. Experienced gardeners plant baby dendrobiums in a dry substrate. The first watering is carried out only on days 3-5. During this time, the cut has time to heal well, and there are no problems with rotting of the root neck of the baby.
Some orchid lovers plant several children at the same time in a common pot, tying them in a bunch. This is done to make the first flowering more decorative. As the plants grow, they are divided into separate pots.
Soil and container
To grow dendrobium orchids, you can buy soil or prepare it yourself from 1 part crushed moss, 1 part pine bark, a small amount of charcoal and peat. The main thing is that the substrate is breathable, then there will be no stagnation of water and root rot in the pot. The choice of container for planting an orchid depends on the size of the seedling; it is advisable to use ceramics.
To find out how to choose a ready-made substrate for dendrobium in the store and how to prepare it yourself, read here.
Method 2: dendrobium orchid cuttings
Dendrobium orchids have one small drawback. Being sympodial orchids, they grow in width and form new pseudobulb shoots. At the same time, the old ones gradually age and lose leaves. “Bald” pseudobulbs reduce the decorative value of the bush, so gardeners try to cut them out. It is these cut out old shoots that become cuttings.
In order to provoke the appearance of children on cuttings, it is necessary to prepare a greenhouse:
- take a plastic container with a lid;
- lay a thick layer of damp sphagnum moss in it;
- make several small ventilation holes in the lid.
After this, the cuttings are laid on top of the moss, sprayed with Epin-Extra solution and covered with a lid. The greenhouse is installed in a warm, bright place and ventilated daily.
The awakening of the kidneys and the appearance of children is a long process. For 3-6 months, you will have to take care of the greenhouse every day, monitor the temperature, lighting and humidity, and prevent mold from cuttings.
When the babies finally appear, you need to wait for their roots to form, and then separate them from the cuttings. Planting of offspring grown in this way is done in the same way as those obtained directly from the mother plant.
Separation of the baby from the cutting is carried out in the same way as during normal propagation by babying - using sharp scissors.
Possible problems
Transplanting a dendrobium orchid at home does not always go without complications.
So, in particular, many owners forget that the roots of the flower are very fragile - they are easy to break. To prevent this from happening, handle them with the utmost care.
Be sure to monitor the condition of the foliage of the transplanted orchid - it will be the first to signal problems:
- in a flower that lacks light, it is too dark;
- those standing in the sun are pale.
Healthy plates have a rich green color.
Otherwise, no special difficulties should arise if you adhere to the watering rules described above.
Important: do not disturb the flower during the recovery period - try not to move it or even touch it again.
Method 3: propagation of dendrobium by dividing the bush
Dividing an old bush is the most effective way to propagate dendrobium. It has only one drawback - as a result, you can only get two young specimens. However, they will already be adults, completely independent, will quickly begin to bloom and will not require special care.
If a dendrobium bush has six or more shoots, it can be divided. This is done like this:
- the orchid is removed from the pot and freed from the old substrate;
- dry parts of the roots are removed with scissors;
- the plant is cut along the rhizome into two equal parts;
- The sections are sprinkled with ground cinnamon.
Next, the divisions are placed in pots and sprinkled with dry substrate. They are kept without watering for a week, after which normal care can be resumed.
Processing and drying of sections on the rhizome is strictly necessary. If this is not done, the process of rotting of the orchid's root system may begin.
Rooting cuttings
- The cuttings are pre-treated with charcoal.
- Then 2 cuttings are placed in a plastic bag with moistened sphagnum moss.
- The resulting greenhouse is ventilated every day, moistening the moss if necessary.
- After 2 weeks, fresh roots should appear. Then it’s time to plant the cuttings in pots.
Reference . Relocating a flower to a larger pot if the soil is still suitable should be done by transshipment. In this case, the earthen lump is soaked and not completely removed; in a larger pot, the voids are filled with fresh soil. The substrate remaining on the roots allows the orchid to more easily tolerate replanting.
Caring for planted dendrobium children
If there are usually no problems with divided bushes bearing fully mature shoots, then the children will require special supervision at first. Their care must be organized in accordance with the following conditions:
| Condition | Peculiarities |
| Temperature | Children cut from the mother plant can immediately be kept in the usual temperature range - from +17 to +240C. Scions obtained from cuttings will require hardening. For them, the air temperature must be lowered gradually. |
| Humidity | Air humidity should be between 50-70%. The soil should not be over-moistened. Children need to be watered so that the substrate remains slightly moist, but does not become waterlogged. It is also impossible to overdry - in dry bark the growth of the root system will not go well. |
| Light | At first, children need to be slightly shaded from the sun. It is better to install artificial light or place them on a western window. |
Feeding should begin no earlier than the baby shows the main sign of rooting - active root growth. Fertilizers are used in half the dose.
It is better to plant children in small containers. In them it will be easier for them to master the volume of the substrate, and rooting will take place faster.
Diseases
Only with proper care does a flower bloom
Due to improper care, these indoor flowers often get sick and are affected by harmful insects.
Fusarium wilt
The most dangerous and common disease is fusarium. Its causative agent is a fungal infection. Parasitic microbes penetrate deep into the tissues of leaves and stems of plants, affecting the vascular system. As a result, the plant begins to wither sharply, wither and die.
Causes of the pathogen:
- saline soil;
- frequent waterlogging of the soil;
- watering with cold water;
- An increased peat content in the soil promotes the development of pathogenic microflora, including fungus.
The affected flower is quarantined. Resuscitation is carried out as follows: rotten and withered parts are cut off with a knife and treated with iodine or brilliant green. After this, the plant is generally treated against fungus with Fundazol or Benomyl.
Sticky drops on the foliage
The reasons for the appearance of sticky droplets on plants can be different:
- not regular watering;
- excess nutrients in the soil;
- self-defense from harmful insects.
There is another reason why sticky drops appear on orchid leaves - it is possible that this is a product of the vital activity of parasites. If a molting moth sticks to such Velcro, the appearance of a disease such as powdery mildew cannot be avoided.
First, a light powdery coating will appear on the foliage, then the leaves turn black. Plants infected with powdery mildew are treated with insecticides - Actellik or Aktara.
The opinion of flower growers on the vegetative propagation of dendrobiums
If we put propagation by division aside as a special case, we can compare the effectiveness of hatching and cuttings of dendrobiums. Flower growers who have tried both methods have their own opinion on this matter:
“I have several dendrobiums in my collection, so after pruning there are always a lot of shoots left that are a pity to throw away. Even though I get enough babies directly on the trunks, I still always try to plant cuttings for germination. Comparing the methods, I can say that the babies from the trunks themselves are stronger and more durable than those from the cuttings. In any case, for me they take root in 99% of cases, and from cuttings - only half. Perhaps the problem is limited nutrition (what will they get out of the cuttings?) and greenhouse conditions. As soon as the babies come out of the container into the air, they immediately begin to slow down and fall out” (Svetlana, Jurmala).
Varieties
The most famous line of hybrids based on Nobile is named after the Japanese breeder - Yamamoto hybrids.
Let's look at the most popular Greeks.
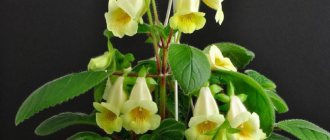
Yellow Song (D. nobile Yelow Song Canary)
The height of the bush is 40 cm, the flowers are single-colored, bright yellow, 6 cm in diameter. The lip is rounded, funnel-shaped, with wavy edges and an orange spot. The aroma is fruity and floral .
Fancy Angel (D. nobile Fancy Angel Lycee)
With a delicate lemon aroma. The stems are 30 cm high. The flowers are velvety, about 6 cm in size. The color of the petals is white and lilac. The lip is white, with a lilac edging and a yellow spot in the center.
Spring Dream (D. nobile Spring Dream Apollon)
Plant height 45 cm. The flowers are white, diameter 5-6 cm, with a large yellow spot on the lip. Petals with wavy edges. The aroma is fresh, fruity and herbaceous .
Expert advice on dendrobium cuttings
Indeed, offspring from cuttings are generally weaker than those grown by the “mother”. To reduce the percentage of lunges after transplanting into pots, you need to cover them with a transparent cap for some time, gradually accustoming them to unstable temperature conditions.
When cutting cuttings, you may encounter another interesting nuance, which expert flower growers write about:
“The container with cuttings should not be refrigerated or kept at a low temperature. It's not just about the risk of mold. Even if the conditions are sterile, at a temperature of +150C and below, not babies, but flower stalks may emerge from the buds of the cuttings. Of course, such “blooming” will not be complete, and the cutting will have to be thrown away. Therefore, containers must be kept warm – from +20 to +250C.”
Yu. Korbun, gardener, landscape designer
Pests
In addition to diseases, this indoor flower also has pests that can not only slow down growth and prevent flowering, but also lead to the death of the indoor flower:
- Thrips. They attack first the upper, then the lower side of the leaves. Thrips-infected foliage takes on a grayish or silvery tint. If timely measures are not taken, the leaves completely fall off. Insecticides are used for therapeutic treatment.
- Shield. These are insects that resemble brown plaques. They settle on the surface of leaves, dig into their tissues and suck out the juices. First the foliage turns yellow, then dries and falls off. Treatment is carried out with Actellik solution and soap solution.
- whitefly A microscopic moth that settles on the underside of leaves and lays eggs there. Parasites suck sap from plant leaves, as a result the leaf turns yellow, then turns black, dries out and falls off.