Flower growers usually propagate the variety of flowers they like, including hydrangeas. This plant tolerates manipulations with the root system well and takes root well in a new location.
Let's talk about how to divide hydrangea in the fall and what types of this plant can be propagated in a similar way. We will also talk about choosing a place, features of planting and care at first. How successful the idea will be depends on these moments.
Is it possible to divide hydrangeas or not?
There is an opinion among novice gardeners that hydrangea cannot be propagated by division. This statement is true only for weaving and tree-like forms. Shrub hydrangea can be divided and transplanted to a new location without much difficulty. The survival rate will be high.
For propagation in this way, it is more correct to choose a hydrangea that is 4–5 years old. If you choose younger plants, they will turn out to be thin bushes - there will be few renewal buds formed on the rhizome. Hydrangeas aged 6 or more years do not tolerate transplantation well and have difficulty recovering from damage to the roots.
How to propagate hydrangea by cuttings: selection of planting material
When choosing hydrangea cuttings, gardeners take several criteria as a guide:
- The condition of the cortex is taken into account. Completely lignified branches have difficulty putting out roots, while young ones quickly produce root buds.
- The location of the cuttings is taken into account. Basal shoots take root 3 times better than lateral shoots and are less susceptible to diseases. Preparations selected from the sunny side take root worse than shady shoots.
- A month before the collection of planting material, the mother bush is stopped fertilizing with nitrogenous agents, since a high concentration of this element accelerates the decomposition processes in the cuttings.
- Inspect the condition of the foliage. Branches with small leaf blades take root faster. In this regard, large leaves are cut in half.
- Planting material is cut only from a healthy flowering bush no older than 10-12 years.
Selection of planting material - Not least important is the preparation time. Experts recommend pruning in the morning, since at this time the plant is maximally saturated with moisture.
- The shoots are no more than a year old.
Growing hydrangea from cuttings is quite simple. To do this, select planting material that meets the following characteristics:
- size no more than 15-20 cm in length;
- thickness no more than 7 mm;
- the presence of short internodes;
- pronounced growth buds;
- at least 4 developed buds.
Similar criteria are taken into account when selecting garden and indoor planting material. In this way, it will not be difficult to obtain several specimens of indoor hydrangeas, caring for them at home is no more difficult. House bushes grow more restrainedly, unlike garden ones, but you can admire the flowering from the end of April.
Timing for dividing hydrangeas
Large-leaved hydrangea is replanted and divided in the fall; other types of this shrub plant are propagated in the spring. The order of work will be the same, the only difference is the specific timing. If in the spring the bush is divided before the sap begins to flow, then in the fall - after the foliage turns yellow and withers.
The exact timing depends on growing conditions. Flower growers in Central Russia begin this work in mid-September, trying to finish before the 20th–25th. In the southern regions, in some years, hydrangea can be propagated by dividing the bush until mid-October, and in northern latitudes it is best to finish the work before the end of the first ten days of September or in August.
A sure-fire way to find out the optimal timing for propagating hydrangeas is to ask your neighbors who grow these flowers about them. An experienced gardener knows what surprises the weather can bring and how they will affect fragile bushes.
It’s good if at least 2 weeks pass from planting to a permanent place until the first frost.
Timing for harvesting cuttings
The timing of cuttings directly depends on the planting material. For propagation in late spring (from May to June), young growths are suitable - the tips of shoots no more than 10-15 cm long. A similar rule applies when propagating spirea by cuttings. From late June to early July, shoots with a woody base are selected for rooting. In summer they are better suited for planting. In autumn, material with bud ovaries is used. It takes root better than others in substrates and produces abundant roots. On some cuts, flower ovaries can ripen and produce abundant color even at the rooting stage.
Cutting shoots
The optimal time for harvesting is spring. It is at this time that the active movement of sap along the trunks begins. Hydrangea shoots receive the maximum amount of nutrients in spring. In this regard, the regenerative potential of the cutting and the chances of rapid growth of the root system increase.
Instructions for dividing hydrangeas in autumn
Of the many garden flowers that can reproduce by division, hydrangea is the most unpretentious in this regard. Even a novice gardener can divide a bush into sections.
There are two ways to dig up a plant: in dry or wet soil. The second option is chosen by those who are unable to remove the bush along with a lump of earth. If you water the flowerbed abundantly, it will be easier to get the hydrangea, but in this case some of the roots will be damaged. Working on dry soil helps to better preserve the root system, which is why it is preferable.
Step-by-step instruction:
- Separate the lump of earth with hydrangea from the rest of the area. To do this, drive a shovel into dry soil to a bayonet depth, 20 cm away from the bush.
- Using a shovel as a lever, lift the bush along with the lump of earth. You can hold it near the base by the stems, but do not pull.
- Place the bush together with the lump at an angle. In this position, almost no weight will be transferred to the roots, their integrity will not be compromised.
- Wash off the soil with water from a hose. The better this is done, the better the inspection will be.
- Carefully remove roots damaged by rodents and diseases.
Now the hydrangea can be divided. The size of the new bush can be any, but it is important that each specimen has at least two renewal buds. From a 5-year-old hydrangea, up to four divisions are obtained.
If the bush has grown greatly, there is no need to dig it up. To obtain a division, the gardener only needs to slightly dig up the roots on one side to gain access to them. Next, with one hand, the stems are tilted, with the other, a part of the root along with the stems is separated with a sharp small spatula. The excavated soil is backfilled and compacted. In this way you can take 5 or more divisions from a bush.
When dividing a bush and removing dead or damaged roots, each cut must be disinfected. To do this, it is coated with crushed charcoal.
Layerings: how to root correctly
Another way to propagate hydrangea is to form cuttings. This method is good when the main shrub is young and has not reached large sizes.
The essence of propagating hydrangea by layering: the outermost young shoots are pressed close to the ground and secured in a small hole using a metal bracket or other fastener. A small incision is made on the part of the shoot that will be grounded. This will allow it to take root faster. The top of the hole is sprinkled with earth and watered.
Important! You need to water the cuttings very often so that the soil is always moist. Otherwise, the shoot will simply dry out and not form a new bush.
Preparing the site and planting hydrangeas
The plant must be planted in the ground immediately after separation. Therefore, planting pits are prepared in advance. The place for them is allocated in light partial shade, protected from drafts and strong winds. Areas near tall bushes or fences are ideal.
The soil should be fertile, loose, with good moisture capacity and breathability. If possible, you need to check the acid reaction, it should be at 5.5 pH. If necessary, you can do liming, but then the hydrangeas can only be replanted the next year.
A special soil mixture is prepared for hydrangea. The best option can be found in the table.
| Component | Ratio |
| Garden soil (you can use the soil dug when preparing the hole) | 2 parts |
| Humus (rotted for more than a year) | 2 parts |
| High peat | 1 part |
| River sand | 1 part. |
There is another composition that is used on soils with an insufficiently acidic reaction. To prepare it, mix sand, high peat and turf soil in equal parts, then add 1-2 pieces of spruce needles per 2 kg of mixture.
Holes for hydrangeas are dug 40 cm deep and 50 cm in diameter. If group planting is planned, it is necessary to maintain a minimum interval between plants - 120 cm. Some spreading species require more free space - up to 250 cm between bushes. In this case, there will be no competition for nutrients, and the hydrangea will be able to develop normally.
Work progress:
- Fill the hole with the prepared soil mixture.
- Place the separated bush in it so that the root collar is slightly above ground level.
- Fill the hole with the remaining soil and compact the soil.
Now all that remains is to water the plant generously so that the soil settles and fills all the voids.
If you can’t plant a hydrangea after dividing it in a new place, you can put it in the shed after wrapping the roots with a damp cloth. In this form, the bush can stand for a day, so planting can be postponed to the next day.
The best season for plant propagation
To propagate hydrangea, various methods are used. For each of them there is an optimal time of year:
- layering can be propagated in the spring, when there are no leaves on the shoots, and in the fall, when the plant enters the dormant phase;
- It is advisable to divide the root system into parts in the spring; if this fails, the division is postponed to the last ten days of August - early September so that the fragments take root in the new place;
- seeds are sown from mid-February to the end of March;
- You can propagate hydrangea by cuttings at any warm time of the year; for planting in summer and spring, plastic, semi-lignified or green cuttings are used; in the fall, the gardener has lignified shoots at his disposal;
- basal shoots are dug up and replanted in early spring or after autumn leaves fall.
Meeting the deadlines and choosing the right propagation method will help the shrub adapt more easily and quickly to a new location.
Reproduction methods used in autumn
Autumn is a good time to grow garden crops. Hydrangea seeds are used in breeding to develop new varieties. At home, obtaining bushes from seeds takes a long time: at least 5 years pass from sowing the grains to the appearance of inflorescences. With this method of propagation, the varietal characteristics of the mother plant are not preserved.
Hydrangea bushes, unlike lilacs or berry bushes, produce few offspring, so this reproduction option is rarely used in amateur gardening. Most often, in the fall, new plants are obtained by dividing the bush, cuttings, or using layering. Before you get started, it’s worth learning everything about the traditional methods of autumn propagation of shrubs. Let's take a closer look at how you can propagate hydrangea from cuttings in the fall. This is the most common way to obtain new seedlings. Photos and videos will help you understand the intricacies of the process.
Reproduction by offspring
In order for the procedure to be relatively painless for plants, the young shoot must be located at a great distance from the mother bush. Prepare a hole in advance for transplanting the bush. The soil under the bushes and in the hole is thoroughly moistened. Around the offspring - first with a shovel, then with your hands - the soil is carefully removed. Using a clean knife, quickly cut off the shoot from the root of an adult bush and immediately plant it in the prepared hole. After a couple of years, the grown bush is planted in a permanent area.
Propagation of hydrangea in autumn by dividing the bush
Propagation by dividing the bush into fragments is the easiest way to propagate hydrangeas available to the amateur gardener. This option is usually used at the beginning of the summer season, so that young bushes have time to take root and withstand the winter cold well. If the bush is divided in the fall, the fragments are covered especially carefully for the winter. Often the division method is used to rejuvenate adult plants. In order not to damage the root system of the base and obtain high-quality planting material, it is important to follow the sequence of actions and perform them carefully.
How to properly divide a bush
The selected bush is completely dug up. The rhizome is washed with water and inspected. The root system of healthy shrubs that do not have damage is cut into fragments with a clean, sharp knife (the number of fragments is equal to the number of buds formed on the roots). The cut areas are carefully treated with brilliant green or charcoal powder. Mature overgrown bushes are not dug up. They carefully dig up the soil around them, cut off part of the plant and cover it with soil (then the mother plant is watered).
The cut fragment is planted in a new place in stages:
- in a shaded area, holes are prepared into which a mixture of peat and light soil is poured;
- cut off parts are planted in well-moistened soil without deepening the root collar;
- water again and mulch with cut grass, coconut substrate or chopped bark.
Planted bushes are shaded for 3 to 5 days.
Reproduction of hydrangea in autumn by layering
The procedure is carried out after leaf fall. Choose powerful lower shoots on young mother plants. Shallow (no more than 0.15 m) grooves are made under them, which are filled with nutritious soil and watered thoroughly. Several shallow oblique cuts are made on the lower part of the selected shoots to speed up the emergence of roots. The branches are then placed in the grooves so that the cuts touch the soil. Sprinkle with soil, water and pin to the ground with metal or wooden staples. The top of the branch is not covered and is directed perpendicular to the surface of the earth (you can carefully tie it to a peg).
Make sure that the cuttings do not dry out, otherwise the roots will grow slowly. In the spring, each bud will sprout. When the shoots reach 10 cm, hilling is carried out to stimulate the formation of adventitious roots. A year after planting, when the mother bush has flowered, the cuttings are carefully dug up and cut into pieces. Young seedlings are planted in a shaded area.
Autumn cuttings: advantages, disadvantages, features
This option for growing flowering shrubs involves the use of woody shoots. Branches covered with hard bark take a long time to take root. Gardeners consider the duration of rooting to be one of the disadvantages of this method. The peculiarity of autumn propagation is the long-term cultivation of planting material indoors.
At home, prepared cuttings are planted in separate containers. In the spring, the grown seedlings are moved to a permanent place. The autumn type of cuttings has the following advantages:
- during the active summer season, the gardener does not always have enough time and energy to observe the development of shoots; in winter it is easier to do this;
- With this method you can easily obtain the variety of hydrangea you like, since the planting material retains the varietal properties of the original plant;
- by spring, rooted cuttings produce strong seedlings that take root well in a permanent area;
- All types of shrubs can be propagated in this way.
In autumn, propagation of hydrangea using cuttings is easy. This method is reliable and affordable, which is why it is popular among gardeners.
How to propagate hydrangea by cuttings in the fall
In order for strong shrubs to grow from planted cuttings, it is important to choose the right time for planting and follow the rules for caring for seedlings. Let's take a step-by-step look at how to properly take cuttings from a garden crop in the fall.
Timing of cuttings
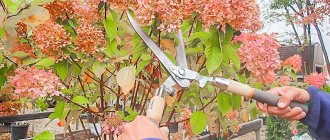
Lignified cuttings are harvested from the second half of September to the first half of October, when the bush begins to enter a dormant state and the branches are pruned. Regular removal of branches that thicken the bush increases the splendor of flowering and improves the development of hydrangea. As a result of the procedure, a lot of high-quality planting material appears. Cuttings are taken early in the morning or in cloudy weather, when the air is filled with moisture. This helps to avoid burns at the cut site and accelerates the formation of roots on the workpiece.
Preparation of cuttings and their processing
Usually in the fall, plant debris and cuttings of shoots are burned to prevent the spread of diseases and to tidy up the garden. But by pruning a hydrangea, you can get a lot of good cuttings. The preparation of the material should be approached responsibly, since the condition and appearance of the flowering plant depends on this. Follow the rules:
- the cuttings are cut on the day of planting and placed in water so that they do not dry out (if the procedure is postponed, the cuttings are placed in water completely, but soaked for no longer than four days);
- To harvest planting material, use annual branches of bushes, the age of which does not exceed 9 years (the top is cut off);
- cuttings with large buds and small leaves take root faster;
- fragments of lateral branches take longer to take root, so they try to use parts of basal branches for cuttings;
- a cutting suitable for the reproduction of a strong seedling includes at least three nodes; the diameter should be no more than 0.5 cm, length - 0.13 - 0.2 m.
A knife or pruning shears is disinfected with a product containing alcohol. The selected branch is cut into 2 or 3 parts. On each workpiece, a cut is made obliquely from below, straight from above, at a distance of 10 - 15 mm from the node. Remove the lower leaves, leaving the petioles; The top leaves are cut in half. This will help direct the flow of nutrients to root formation.
Preparing the soil mixture
Hydrangea cuttings develop well in a slightly acidic substrate (pH = 5), especially for varieties with pink, white and red flowers. Hydrangea is classified as a calcephobe plant that does not tolerate liming. Growing shrubs in an alkaline environment leads to chlorosis. An air-permeable nutrient soil mixture is prepared from the following components:
- leaf soil - 2 kg;
- humus – 2 kg;
- sand – 1 kg;
- peat – 1 kg.
You can use a ready-made substrate for azaleas or a mixture of equal parts of garden soil, sand and pine needles. For looseness, vermiculite is added. The soil is mixed well and placed in separate containers. Hydrangeas are often grown in clay pots, containers or boxes, with holes made in the bottom and drainage laid in a thick (at least 3 cm) layer.
Planting blanks and their germination
The lower cut of the prepared blanks is treated with any root formation and growth stimulator (Heteroauxin, Zircon or Kornevin). The drug can be replaced with aloe juice - a natural remedy that stimulates plant development (1 teaspoon of the substance dissolves in a glass of water). The upper cut is placed in a pink solution of potassium permanganate for 30 minutes or lubricated with brilliant green. Then perform the steps step by step:
- the top layer of soil is compacted and moistened, holes are made in it (depth - 3 - 3.5 cm);
- planting material is immersed into the holes at an acute angle; if they are planted not in separate pots, but in a box, make sure that the distance between the workpieces is at least 5.5 cm;
- the soil under the planted cuttings is sprayed;
- the resulting “school” is covered with a film, a cut plastic bottle or glass jar (holes are made on the film for ventilation);
- the structure is installed in a warm place (the thermometer should not fall below +23℃).
Daylight indoors in winter should last up to 12 hours. The cover is regularly removed from the seedling to ventilate and water.
Caring for hydrangea after division
Dividing a hydrangea bush in the fall has a significant advantage over doing work in the spring. Almost no maintenance is required for the transplanted bush. Only in the dry months do you need to water the young bushes once a week so that they grow better.
Hydrangea does not like waterlogging; in such an environment its roots quickly rot. To prevent trouble, no more than 10 liters of water should be poured under each bush. There is no need to carry out any other work until spring.
If autumn turns out to be dry, you can water the plant once every 2-3 days.
Cutting method
Using the cutting method, from an 8-10 cm cutting, with proper care, you can get a luxurious hydrangea bush, all covered with stunning flowers.
The productivity of this method is obvious, since we can get many viable seedlings from one mother bush. Both summer and autumn seasons are suitable for cuttings.
But only cuttings of hydrangea in the fall means growing seedlings in pots at home. In winter, planting material requires painstaking care and only in the spring, rooted and strengthened seedlings are transplanted into open ground.
Is it possible to root hydrangea from a bouquet and get a young bush?
Some people try to root hydrangeas from a bouquet.
However, experienced gardeners believe that this is very problematic. To fully propagate a bush in this way, planting material must be prepared correctly, following a number of recommendations. But even with a competent approach, the likelihood of success is minimal.
Hydrangea is a popular ornamental crop that is distinguished by its beautiful flowering. Therefore, the plant is often used in landscape design. To achieve success in growing a crop, you need to properly care for it. To propagate a plant independently, you can use different methods. Most often, gardeners use cuttings. However, it is also permissible to use division of the bush or propagation by layering, suckers, or seeds.
Reproduction methods
If you choose the optimal time and conditions for the propagation of hydrangia, the young bushes will quickly take root. Propagating hydrangeas is not easy. This requires knowledge, patience, attention and time.
The following methods will help with autumn plant propagation:
- cuttings in September;
- dividing a bush with good protection before winter frosts;
- layering in early autumn;
- young shoots (babies).
It is better to grow hydrangea from seeds in the spring. This method requires more care and effort. But even an inexperienced gardener can cope with other methods.
How to take cuttings from different varieties?
Each type of hydrangea requires a special approach when propagated at different times of the year. Let's consider the nuances of propagation of the main varieties.
Paniculate
This species is thermophilic and requires an appropriate attitude:
- You need to cut the paniculata beauty in the summer. Green or semi-lignified cuttings cut from young side branches growing on the sunny side are suitable for this.
- New bushes should be planted near a fence or building to protect them from the wind.
- Cover the young plant for the winter.
tree-like
Tree hydrangea tolerates cold well and has good germination from cuttings. It is preferable to cut this variety in the autumn-spring period, but it is also allowed in the summer. In order for cuttings to quickly take root, they must meet the following parameters:
- Be half or completely lignified.
- Taken from the middle of an annual branch.
The cuttings collected in the fall will have to be rooted at home on the windowsill. To do this, place them in a container with the green end up, cover with glass and care for them as usual when sprouting.
large-leaved
The peculiarity of cutting large-leaved hydrangea lies in the preparation of cuttings. This variety grows best from completely lignified shoots. Therefore, use winter cuttings as described in the article or proceed as follows:
- In the fall, on a warm sunny day, open the bush, covered for winter, and cut powerful, healthy branches at right angles.
- Wrap the plant again for the winter.
- Divide the shoots so that each has two pairs of buds.
- Fasten into bundles of 10 pieces each.
- Place in a cool, dark place on a layer of sand. If there is no such place, you can lay them on the site directly on the ground. To do this, pour about 10 cm of sand, place cuttings on top, sprinkle with sand again and cover with covering material in several layers. You can use old material that is unsuitable for other purposes. Cover the entire cache with film on top and securely fasten it so that it does not fly apart.
- In spring, germinate the saved cuttings according to the general scheme.