Gloxinia is very popular among floriculture lovers, as it does not require special care and pleases the eyes with unusually beautiful inflorescences. However, beginners who decide to have this decorative miracle on their windowsill are probably wondering how gloxinia reproduces. Planting a tuber, cuttings and seeds - in all these ways you can get a beautiful plant.
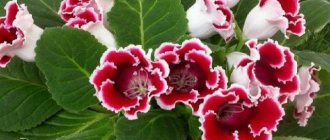
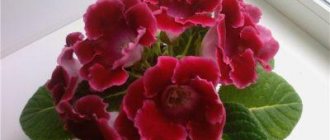
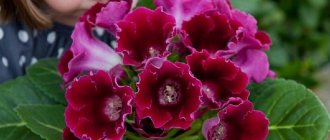
Flowers are the decoration of any room. Gloxinia, the planting of which requires special care, will rightfully take pride of place on the windowsill. Another name for this plant appears in botanical reference books - beautiful siningia. The representative of the flora received its name for its very beautiful appearance: green leaves, pubescent with fibers, and flowers in the form of large bells of bright red, blue, pink and purple.
Quite simple care gives inexperienced gardeners a chance to have this beauty in their room. Let's talk in detail about how to grow gloxinia from a tuber.
Features of choice
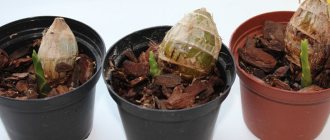
Appearance and size are the main criteria when purchasing. Tubers must be free of rot and mold. Elastic, dense to the touch, up to 5 cm in diameter - these are the most suitable for planting in the soil. At the top of the tuber there is a depression where the buds are located. They look like small tubercles. It happens that the nodules put up for sale have already sprouted, and then the buds look like furry little sprouts.
Varieties
In home floriculture you can find two types of indoor plants:
- Gloxinia regal.
- Gloxinia is wonderful.
The first type has a dark purple hue of flowers, but sometimes others are found with mixed colors.
The second variety has many hybrid forms of different shades - up to almost black. Each variety has its own name.
Time to plant
There is no need to delay landing. This can be done immediately after the dormant period, at the awakening stage, until the sprout has grown large. If you miss time, the shoots will stretch and turn pale due to a lack of chlorophyll. The time of bud appearance depends on the conditions under which the tubers are kept in winter. Gloxinia wakes up in February-March. Sometimes a flower can awaken in May. If by this time the tubers have not come out of hibernation, then they can be “awakened”. This is necessary when the flower has been in a pot all winter. Placed in a warm place, with good lighting and watered soil, siningia will sprout. It is important not to overwater the tubers, otherwise they may rot.
Winter dream
The life cycle of gloxinia is divided into 2 periods:
- growing season - lasts from early spring to late autumn - the plant blooms and reproduces;
- dormant state - the flower falls asleep for 3-4 winter months. Its stem and wilted leaves are cut off. The tubers are left in a pot with soil and stored at a temperature of 12-15 degrees in a dark place, or dug out of the ground, placed in a plastic bag with sand and put in the refrigerator. During the winter, the soil is moistened several times.
An adult plant needs rest so that it can accumulate strength and wake up in the spring vigorous and healthy. Young, fragile plants, on the contrary, will not be able to survive a long rest, so they are still watered and fertilized. They keep growing.
Preparing for landing
Gloxinia babies are stored in shavings and sawdust in winter. Often the tubers are covered with old dried roots. Therefore, before planting, they need to be cleaned as much as possible - carefully tear them off or cut off all the threads of the roots with nail scissors, leaving the largest ones. The tuber should be as bare as possible. And new ones will grow from the largest roots.
It is necessary to determine where the bottom of the tuber is and where the top is, so as not to plant it upside down. In the place of future sprouts there is a small depression. There is a bulge on the opposite side of the tuber, which needs to be buried in the soil. You should make sure that there are no rotten spots, rot, or various damage on the seedling. If there are any, you need to carefully cut them out and sprinkle these places with charcoal. As an option, it is appropriate to treat the cut with fungicide and Kornevin powder, having previously mixed them. After such treatment, it is advisable to dry the tubers for about a day. These operations will allow you to revive damaged seedlings.
How to propagate a plant?
How to propagate a plant correctly? This can be done in 5 ways, which are described below.
Cuttings
The easiest way to propagate gloxinia is from cuttings . Leaf cuttings take root very well and quickly produce new roots.
Procedure:
- a leaf with a small petiole of 1-1.5 centimeters is cut off from an adult healthy plant;
- root the petiole in a mixture of peat and sand in a 1:1 ratio;
- cover this planting with glass or film to create a greenhouse effect;
- The seedlings need to be ventilated once a day.
After 3 weeks, young tubers form, then the plant can be fully opened and transplanted to a permanent place of growth.
Watch a video about cutting gloxinia:
Tubers
For propagation in this way, only a healthy tuber from an adult plant is taken . Procedure:
- a large tuber must be cleared of soil residues;
- Use a sharp knife to divide the tuber into parts, so that each part contains a separate shoot;
- cut areas should be dried with wood ash;
- Each resulting piece of root must be planted in a separate pot, like a full-fledged tuber.
Important : Do not water such a plant for the first 3 days.
You will find instructions for planting gloxinia with tubers and seeds in a separate article.
We recommend watching a video about the propagation of gloxinia by dividing the tuber:
Peduncles
A peduncle is a shoot of a plant without leaves that bears a flower. This method of propagating gloxinia is considered the most difficult, since the peduncle may not take root for a very long time or may not take root at all.
Procedure:
- cut off the peduncle with the stem about 3-5 centimeters;
- place the shoot in a container of water so that it is immersed in the liquid by 1.5-2 centimeters; water will need to be added periodically;
- wait for young roots to appear on the peduncle;
- plant the young shoot in the soil to a depth of 2-3 centimeters.
Leaf
Procedure:
cut off the sheet at the very base of the rosette;- cut the leaf plate from the back side across the protruding veins in thickened places;
- place the sheet on moistened soil and press the cut points to the soil;
- create a greenhouse effect using film or glass.
In the places of the cuts, roots will form over time, and then small tubers will form . They can be planted in separate containers, like full-fledged adult tubers.
There is also a method for rooting leaf cuttings:
- in June-July, take one leaf from the bottom of the plant;
- place the petiole in a container with water so that it is immersed in the liquid by 1.5-2 centimeters; water will need to be added periodically;
- keep the leaf in water until young roots form on the cuttings;
- plant the young shoot in the soil to a depth of 2-3 centimeters.
More information about the propagation of gloxinia by leaves is described here.
We recommend watching a video about the propagation of gloxinia by leaves:
Seeds
The procedure for planting a plant from seeds:
- from November to February you need to sow seeds in a mixture of leaf soil, peat and sand in a ratio of 1:1:1;
- do not bury the seeds, but only lightly sprinkle them with soil;
- place the container with the seeds in a bright and warm place, periodically spray the soil with warm water from a spray bottle;
- To create a greenhouse effect, cover the crops with film and ventilate periodically.
Sprouts appear after 14-20 days. Young plants with 2-3 leaves can already be transplanted into a separate permanent pot .
We recommend watching a video about propagating gloxinia by seeds:
Restoring a dried tuber
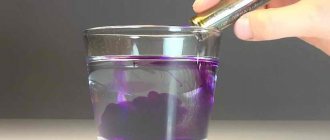
There are drugs that help stimulate the immune system of plants. They are also able to eliminate the stress of flowers and start their root system to grow. You should prepare a solution from the drug “Epin” or “Zircon” in this way: add 10 drops of the product to 200 ml of boiled and settled water. The tubers need to be soaked in the resulting solution for a day. After this treatment, the flowers can be safely planted in the soil.
Another way to revive gloxinia babies is appropriate. Vermiculite (a layered mineral), often used in floriculture, should be moistened with water. Place the whole tuber in it if there are no sprouts yet. If shoots appear, you need to carefully dig them in, but so that the sprout remains on the surface. You should not pour the mineral with plenty of water; it is enough to keep the vermiculite moist, otherwise the tubers may rot. A couple of days will be enough for the seedlings to restore their elasticity by absorbing water from pebbles saturated with useful substances. By using these techniques, you can avoid the risk that gloxinia will die - planting a tuber will end in failure. Now let's talk about soil requirements.
Oh, these flowers! Gloxinia: planting and care
To grow a healthy plant, the soil must be light, loose, permeable and well saturated with air. And it should be based on peat. Such soil will reliably protect the flower from excess water and rotting. You can purchase ready-made soil or make it yourself. The substrate consists of peat, sand and leaf soil (proportion 2:1:2). Before planting gloxinia as a tuber, the earth mixture must be calcined in a dry frying pan or baking tray in an oven. If you have the desire and opportunity, you can irrigate the soil with the “Maxim” preparation, making a solution at the rate of 2 ml per 1 liter of water. After processing, you need to let the soil dry.
When and how to plant?
So, it is better to plant collected or purchased material in the first half of February. But in addition to the seeds themselves, you also need to take care of the following.
- The right dishes. The container should be shallow, quite wide, and must have a tight-fitting lid, which, if necessary, can be replaced with cling film or a piece of clean transparent glass. You can also use special peat tablets. In this case, a container with a tray is prepared for them, in which they are installed, and the germination of the seeds itself is carried out in this case without soil.
- Now about the soil. You can sow seeds either in ready-made substrate mixtures, or you can make it yourself. The best soil is collected under a pine or birch tree and, of course, as far from the road as possible. But only such a substrate should be disinfected in an oven at a temperature of 150 degrees for 1 hour and only after it has completely cooled can it be used in the future.
- Drainage. To sow gloxinia at home, its presence is not necessary. But if desired, you can use clean and small pebbles.
Now we will take a closer look at the step-by-step guide describing how to properly sow the seeds of this beautiful flower at home.
- First, pour a layer of drainage onto the bottom of the container and level it.
- Next, lay the soil heated for 1-2 minutes and spray it with a spray bottle. The substrate should be moist, but not too wet.
- Now the seeds are laid out on the surface. The easiest way is to pour them into a landscape sheet folded in half and then, using a regular needle, carefully lay them out on the surface of the soil. Seeds should be sown only without deepening.
- Now cover the top of the container tightly with a lid or glass and leave at room temperature.
It is very important that before the first shoots appear, the container with the crops is in a warm room and with good lighting. Watering the seeds regularly is necessary so that the surface of the substrate does not dry out.
Gloxinia seeds urgently need high humidity and good lighting. You can use both wick irrigation and irrigation using a spray bottle.
If sowing is carried out in peat tablets, then they are soaked in warm water and placed quite tightly together in prepared containers with pallets. Next, 3 seeds are planted in each capsule and the planting is tightly covered. Here watering is carried out through a tray.
To learn how to grow gloxinia, watch the following video.
Choosing a pot
The root system of a plant is formed in such a way that the roots grow in breadth rather than in depth. Therefore, when choosing a container for growing a flower, you need to pay attention to wide and shallow pots. It is in them that gloxinia will grow correctly. Planting a tuber in such a container is the key to successful breeding. Containers are selected depending on the size of the seedling: the more nodules, the larger the pot. But even here you need to know when to stop, otherwise the foliage system will develop to its maximum in a huge pot.
Do you want to know how to plant gloxinia as a tuber so that the flowers are large and bright? To do this, you should not place a small seedling in a container that is not the right size. Otherwise, there is a danger of flooding with excess water. The flower will develop a root and leaf system, and the bells themselves will be small. Large tubers can be placed in containers from 10 to 15 cm in diameter. For little ones, 8-9 cm is enough.
Gloxinia coming out of dormancy
The appearance of the first buds on the tubers indicates the moment when gloxinia wakes up . Immediately after their appearance, the tuber must be planted in fresh soil.
Transplanting gloxinia after hibernation is necessary to renew and disinfect the soil, enriching it with the required fertilizers.
The transplant occurs in the following sequence:
- First, the tuber should be washed under running water and placed in a strong solution of potassium permanganate for 15-20 minutes.
- Damage to the tuber is removed and the resulting cut is covered with charcoal.
- The finished tuber must be dried for 24 hours and then planted in new soil prepared in a pot, deepening it by 2/3. Place the pot on the sunny side.
It should also be noted that the pot for gloxinia should be wide and low, because the root system of the plant grows in width and not in depth. The soil for replanting can be taken the same as for planting seeds.
But you can make some changes in the form of adding vermicompost or manure - 200 g per 5 liters of soil. In this case, the soil no longer needs to be fertilized.
If you did not add manure or vermicompost, then start feeding the plant a week after planting.
My gloxinias have woken up!
Gloxinia: propagation by tubers
If you follow the recommendations and advice of experienced craftsmen, lush gloxinia will grow, and planting the tuber will be successful. First of all, drainage made of expanded clay or polystyrene is laid on the bottom of the flowerpot. The layer height is 1-2 cm, this is enough for small pot depths. Soil is poured on top, which must be left uncompacted and rather loose (so that gloxinia grows better). Planting a tuber is as follows: you need to make a depression in the center of the ground and place it there with the convex side into the ground, carefully sprinkle with soil. It is necessary to do this so that 1/3 of the tuber remains above the soil. The earth needs to be moistened.
In order for gloxinia to grow faster, the tuber must be planted in a suitable microclimate. You need to create a greenhouse effect; to do this, put a plastic bag on the pot and place the container in a warm, lit place. This will maintain soil moisture and no watering will be required. The bag must be removed every day for 20 minutes to ventilate the soil. When the first leaves appear, the bag should be left only in the dark, and then, after a few days, the pot with gloxinia should not be covered at all.
Watering the future flower at first should be very careful, literally drop by drop. Be sure to ensure that water does not get on the plant. In this simple way, gloxinia grows lush from a tuber and produces beautiful flowers in the first year. With good and proper care, there is a chance that soon there will be a large flower garden on the windowsill.
Some experienced gardeners believe that propagating a flower from a tuber is the least attractive method of propagation, especially if the seedling is large and has to be cut in half. In this case, the cut areas are sprinkled with crushed activated carbon. But due to the fact that watering is done through the top, high humidity is created. At the same time, the cut points quickly rot, the plant children deteriorate, and gloxinia does not germinate for a long time. For this reason, you can lose not only part of the flower, but also the whole thing.
Description of indoor gloxinia
This plant from the Gesneriaceae family was originally discovered in 1785 in the forests of Brazil and is considered to be native to South and Central America.
A scientific breeder from Boston University, V. Sinning, has created many hybrids of the plant, including an indoor version, which is still grown at home. Therefore, gloxinia has a second name - Sinningia, which was formed in honor of the scientist breeder.
The plant is a perennial, with a tuberous rhizome, short stem and bell-shaped flowers. The leaves are large, lush green in color, with a velvety surface.
The flowers can be smooth or double to the touch, red, white, purple and pink, varying in size and shape.
Two types of plants were chosen for selection: royal gloxinia and beautiful gloxinia, when in nature there are up to 25 species of flowers.
Caring for home flowers. Gloxinia.
Other types of reproduction
In addition to dividing by tubers, there are also ways to propagate Syningia beautiful: by seeds or cuttings. Rooting with leaves can be done during spring and until autumn. This can be done before, during and after flowering. Moreover, young leaves cut in the spring take root faster and easier than those that were separated in the fall.
Before the procedure, a special device is made. A hole is cut in the lid or piece of cardboard. A leaf is inserted there carefully so as not to damage the tender shoot, and the cardboard/lid is placed on a glass of water. The liquid level should be up to the tip of the cutting. As water evaporates, water is added. During the rooting period, 1 tablet of activated carbon is added to the liquid so that the process of rotting of the sprout does not begin. Within a month, small roots appear at the end of the cutting and a tuber is formed.
Often gardeners divide the edge of the cutting lengthwise so that the greatest division of the gloxinia tuber occurs. It is better to immediately plant the cuttings in the ground, at the first signs of roots appearing. Before winter, the first hazelnut-sized embryos form on it. Rooting with flower stalks is done from an already blossoming plant. The buds should be carefully removed, and the flower stalks should be placed in the same structure as in the case of leaf cuttings. The water level should reach the tip of the plant so that 1 cm of it is immersed in liquid. A month later, when the roots appear, the peduncle needs to be planted in the soil. After another 30 days, the leaves that appear will signal that nodules have already formed. Young plants must be placed in a cool but bright place for the winter to give the flower rest. Watering during the dormant period must be reduced, otherwise the gloxinia flooded with water will die.
Necessary conditions and time
The dormant period for gloxinia is January and early February. Therefore, the most optimal time for planting or replanting a plant is the end of February , at which time the tubers usually awaken. However, it is worth paying attention to some details if you plan to plant it during this period. Since he does not always wake up in February, sometimes this process can drag on until May.
A distinctive sign of awakening is the buds that form on the tuber. Also, if the awakening process does not start for a long time, you can wake it up artificially.
It is important not to miss the beginning of awakening, because if you do not plant the tuber on time, this will negatively affect the plant and may destroy it.
When planting seeds, things are simpler, since they can be planted at any time, but growing them into a strong plant is much more difficult. But, when growing seeds at home, you can create unusual hybrids or enjoy the sight of rare varietal specimens.
Although seeds can be planted at any time, the temperature, humidity and light of the growing environment must be taken into account. Therefore, when planting in autumn-winter, you should think about additional lighting , since the daylight hours of this plant are 12-14 hours, and the temperature is 20-24 °C.
In order for your gloxinias to bloom all year round, you can arrange a rack or a warm shelf for them and provide them with lighting for 14 hours a day. Why gloxinia does not bloom and how to make it produce buds, you will learn from our article.
Watering
Constantly abundant, but only in the soil. Do not allow water to get on the leaves and flower stalks. It is better to place the pot on pebbles or wet peat so that the humidity is high. The air around gloxinia is sprayed periodically. And water it well with melt water. You should take care of the drainage system, since the flower does not tolerate stagnant water as well as dry soil.
Preparation: soil and pot
Gloxinia is not very picky about the composition of the substrate, so there should be no problems with the choice. Preference should be given to light soil with a sufficient amount of nutrients, which will allow moisture and air to pass through well. Peat-based substrates or soil that is used for planting violets are ideal.
Also, you can prepare the soil yourself by mixing 1 part of soil taken from under any tree (except oak), peat (with a low degree of acidity) and 0.5 parts of sand, you can add manure or humus. Before planting, you should disinfect the soil with boiling water or a weak solution of potassium permanganate.
When using soil that is too dense, there is a risk of plant rotting , as this can cause moisture retention in the soil and lack of air.
The choice of pot depends on the size of the tuber:
- The diameter of the pot should be 4-6 cm wider than the tuber itself.
- The height should be calculated for 3-4 cm of drainage layer, soil with a completely covered tuber.
- A mandatory factor is the presence of drainage holes to prevent water stagnation.
- You can choose the material to your taste, there are no restrictions here.
- The color of the pot should preferably be light so that the gloxinia does not overheat in the sun.
It is better to start planting small tubers in containers that are not too wide so that the flower does not begin to grow its root system, as it will delay the flowering of gloxinia to a later date. However, there is no need to overdo it; a container that is too tight (less than 9 cm) will not benefit the plant. It may begin to wither and shed its leaves, and the soil will constantly dry out.
Some tips
- Gloxinia loves feeding very much. It should be produced when the young foliage is fully developed. 60 minutes after watering, a solution of mineral fertilizer should be introduced into the soil. The procedure must be performed once every 10 days.
- Caring for the leaves of the plant is simple - you should wipe off the dust with a soft brush or wash them with warm water, avoiding moisture getting into the outlet.
- If you do not intend to collect seeds, faded flower stalks must be removed. Thanks to this, the flowering period will noticeably prolong.
- After full flowering, before the dormant period, watering is reduced and fertilizer is stopped altogether.
These simple tips and recommendations will help you understand how gloxinia reproduces; planting a tuber will not seem so complicated. A beautiful ornamental plant will bloom with lush bells as a sign of gratitude.
How to care after transplant?
For proper care after plant transplantation, you should consider the following recommendations:
- Gloxinia is a long-day plant, so to obtain a strong, profusely flowering plant, it is necessary to provide good lighting with diffused light. But do not expose it to direct sunlight, the flower may overheat.
- During the period of tuber germination, the air temperature should be slightly above 25 degrees to accelerate the growth of young shoots. But do not reach 28, as the plant stops developing.
- High air humidity is needed.
- Watering should be done with warm water. Be sure to ensure uniform watering so that all parts of the root receive their portion of moisture.
- The room in which gloxinia grows must be regularly ventilated to prevent fungal diseases from forming. But strong drafts should not be allowed. Read about diseases and pests of gloxinia, as well as methods to combat them, here.
- When the flower has taken root (15-20 days), you can fertilize.
Before flowering, it is better to use those that contain nitrogen. Before using fertilizer, do not forget to water the gloxinia.
Read about how to properly transplant and grow gloxinia here, and from this article you will learn how to properly water and feed the plant.
Video instructions for caring for gloxinia: