Representatives of the orchid family are magnificent flowers that delight with their bloom, beauty and variety for a long time. With proper care, the plant grows healthy and beautiful, but sooner or later any gardener will want more such flowers in his greenhouse, garden or room. The orchid reproduces with the help of humans.
To do this, they resort to breeding orchids at home. In this article we will talk about how orchids reproduce at home.
Before breeding orchids and in order to replant exotic beauties, you need to pay attention to the size and level of development of the flower, since the reproduction process is stressful for the orchid. You need to approach transplantation and breeding carefully and very carefully .
So, how to propagate an orchid at home? This will be discussed further.
Vegetative propagation
For this type of orchid propagation, the period of early spring is best suited, when the dormant time is coming to an end and the flower gains energy for active growth and division.
Important! We must not forget that each species of orchid has its own life cycle and the end of dormancy does not always occur in spring. This is closely monitored and the frequency of the home beauty’s cycles is recorded.
Vegetative propagation of orchids is the most common type of division of the represented family. It is the division of an orchid into several parts, which then form sprouts, which over time turn into bulbs, and with proper care they take root.
When dividing a flower, you need to take into account the number of young pseudobulbs and try to ensure that at least 3 pieces are present on each separated part.
Tools:
- Knife;
- Scissors.
Important! Tools must be disinfected so as not to infect the orchid with an infectious or fungal disease.
Division process:
- The flower is carefully removed from the pot and cleaned of any soil that may have stuck to the roots.
- The dried root system is cut off and the sections are rubbed with charcoal.
- The orchid is divided in such a way that 2-3 bulbs remain on each part, and the sections are also rubbed with charcoal.
- The finished parts are strengthened in a pre-prepared transition substrate. It can be a drainage layer covered with wet moss on top. A plant with old bulbs should not be replanted in regular soil, as this may harm its development.
Important! If room conditions during transplantation are far from ideal, then at first you can organize a greenhouse for the transplanted parts.
To create suitable conditions for growth, the transplanted parts are often sprayed and the moisture is carefully wiped from the inflorescences to avoid rotting.
Proper care of newborns
Successful propagation of phalaenopsis depends on proper care of the resulting babies:
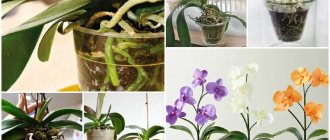
- Large children with an already formed root system are separated from the mother plant . Each baby should have at least 3 roots 4-5 cm long. Without a root system, babies usually die, although some gardeners manage to grow their roots;
- Children are seated in individual pots. The substrate for planting should be fine and contain a large amount of crushed sphagnum moss. Moss is necessary to increase the moisture capacity of the substrate;
- After planting, the babies need to be sprayed with warm water several times a day. Over time, the frequency of spraying is reduced and increased to 2 times a day. Further, as the young plant adapts to new conditions, it is sprayed even less often;
- Immediately after planting, it is advisable to place the babies in a deep tray with a moistened substrate to increase the air humidity around them. For successful reproduction and preservation of children, you can initially keep them in a florarium, covered with film on top. Gradually, young orchids need to be accustomed to drier air;
- Watering and fertilizing for baby phalaenopsis is carried out in the same way as for adult plants. The lighting should not be too bright; direct sunlight is harmful to young orchids.
Propagation by cuttings
Orchids are also propagated at home by cuttings. This type of propagation is suitable for multipodial orchids and is distinguished by the fact that first of all, the stem with aerial roots that are well formed is cut. It's easy to separate. To do this, use sterile scissors and rub the sections with charcoal.
You can care for them in several ways:
- The cuttings are placed on a previously prepared layer of moss placed on drainage.
- Planted in a lump of earth.
In both cases, the cuttings are cared for as if they were adult plants, providing them with good humidity and the correct temperature conditions.
After some time, young shoots should appear on the cuts, but you should not immediately plant them on a permanent substrate, since you need to wait until they take root and they reach a length of 3-5 centimeters.
Care after propagation by cuttings often includes treatment with cytokinin paste, as it is an excellent stimulator of growth and metabolism in young orchid buds. If applied correctly and dosages are followed, after 5-7 days new shoots will begin to appear. Then propagation by cuttings of an indoor orchid can be considered successful.
Important! If the temperature and humidity after separation by cuttings seem insufficient, then greenhouse conditions are created for the young cuttings in which the growth parameters will be optimal.
Propagating an orchid at home using cuttings is one of the easiest ways.
Rooting in a greenhouse on the surface of the substrate
The method is suitable for plants that have retained at least a small part of the roots. Moss, bark, vermiculite or a mixture of these components are used as greenhouse filler. Algorithm of actions:
- Place a layer of expanded clay on the bottom of a suitable container.
- Place the prepared and pre-moistened substrate on top.
- Treat the intended location of root emergence with any root formation stimulator.
- Place the orchid in the greenhouse so that the growing point of the roots is in contact with the surface of the substrate, and the neck is exposed to the air.
- Constantly monitor the degree of substrate moisture.
With this method, it is important to maintain a moisture balance, which requires some experience..
Tip #1 . An improvised greenhouse can be built from a transparent plastic container, an empty aquarium, or a cut 10 or 5 liter water bottle.
Stem propagation
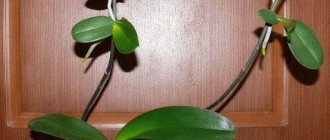
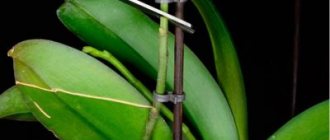
Also called procreation by children. Some types of orchids, such as dendrobium, grow side shoots, otherwise called shoots. Essentially, these are new plants that can be grown separately and successfully produce healthy and beautiful orchids.
In order to increase the number of side shoots, gardeners use fertilizers, such as sets from the main triad (potassium-phosphorus-nitrogen) in combination with amino acids and minerals.
Important! When fertilizing a flower, carefully, in order to grow a baby, you need to monitor the concentration of the solution and the frequency of watering, because with improper care, even a healthy plant can be destroyed.
Stages of stem propagation:
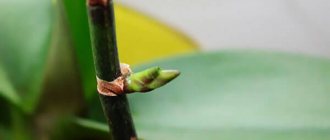
- As soon as the side shoots have their own roots, they are cut off and strengthened on temporary soil or in a plastic bag with moss.
- If the roots are not formed, then the young shoot can be cut off with part of the mother bulb, which will give it the opportunity to feed until its own roots appear.
Important! After transplanting to permanent soil, a full-fledged plant will form in a few years, so do not worry if the flower grows slowly and in no case should it be over-watered.
There are other ways to propagate orchids.
Propagation by seeds
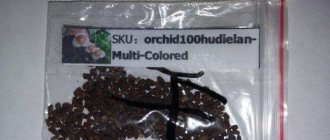
Reproduction of the orchid family at home from seeds is a very difficult and not always successful undertaking. Orchid seeds are dusty and lack nutrients, so a special medium must be prepared for them. To propagate orchids by seeds, you need to prepare tools.
These could be:
- Glassware or test tubes. Height – 15 centimeters, width – 1.5 centimeters.
- Traffic jams. Should be as dense as possible. The success of reproduction depends on this.
Important! Before starting the reproduction procedure, it is necessary to thoroughly sterilize the instruments. This is done with a 2% soda solution.
The nutrient medium is selected in a specialized store or in a laboratory, but it can also be created at home.
Compound:
- Agar-agar - about 4 g;
- Distilled water - 200 g;
- Calcium nitrate - 200 mg;
- Ammonium sulfate - 125 mg;
- Potassium phosphate - 0.6 mg;
- Magnesium sulfate - 0.6 mg;
- Iron sulfate - 0.025 g;
- Manganese sulfate - 0.0075 g;
- Sucrose - 5 gr.
To successfully breed a flower, all components must be chemically pure and purchased at a chemical store. Sterility for seed germination is the most important factor.
Before sowing, the seeds are sterilized:
- Do this with a chlorine solution for 10 minutes,
- Ultraviolet.
- Potassium permanganate. Planting material is sent to a 1% solution.
- Hydrogen peroxide for 10 minutes.
Sow seeds immediately after sterilization at a rapid pace. Agar-agar is added to the test tubes and placed over boiling water, after which the seeds are placed there with a disinfected pipette. Proper care involves maintaining a constant temperature from +18 °C to +24 °C and long daylight hours.
After about a week, changes will begin to occur in the seedlings. Inflorescences form in the form of small green balls, then suction hairs appear, and then young leaves.
After about a year, the formed sprouts can be strengthened on the ground without the risk of death.
Important! Before propagating an orchid by seeds, you need to think carefully about whether it is worth it, because this method is best suited for laboratories.
Growing orchid seedlings
Some orchids end up with collectors as seedlings - in a flask or flask. You can meet such containers while traveling, in clubs, and on forums. In one container, 10 to 25 plants, usually rare varieties and varieties with unpredictable characteristics, grow in a sterile environment. Such orchids require a very long time to grow before flowering and often do not survive.
It is better to remove orchids from a sterile environment only when the seedlings become cramped in the flask or flask:
- The flask is broken by carefully removing very fragile plants, washing them in clean water or in a weak solution of potassium permanganate, and then drying them on a soft towel.
- Planting is carried out in a common container or separate transparent cups, in sphagnum or a mixture of sphagnum, fine bark and perlite, making sure that the growing point and leaves remain on the surface.
Orchid seedlings should be kept in mini-greenhouses, flower displays, closed transparent containers at 100% air humidity, trying to maintain sterility. Artificial additional lighting and temperatures from 20 to 24 degrees are required for many years to come.
Seedlings gradually shift as they grow and very slowly become accustomed to an atypical environment, year after year slightly lowering the air humidity. Without humidifiers, ideal care with watering as the substrate dries, and low-concentrated but frequent complex fertilizing (standard and foliar), success cannot be achieved.
Orchid seedlings
Reproduction by peduncles
Experienced gardeners propagate orchids from a peduncle. This is a complex procedure that requires special attention.
Before propagating an orchid with a peduncle, make sure that flowering has ended, then the peduncle is cut off right at the base and divided so that at least one young bud is planted on each separated part. Then, the moss is placed in a pre-prepared container, preferably made of plastic, and a new peduncle is placed horizontally on it. The kidney should be on top and under no circumstances should it look down.
Important! For successful growth, the temporary pot is covered with cellophane film to create greenhouse conditions. Watering is carried out approximately once every 5 days.
Temperature conditions are maintained around +25 °C.
Breeding orchids in this way is a good solution when it is possible to strictly maintain the regime. In this article we talked about how to propagate an orchid at home and whether it is possible to propagate an orchid in several ways.