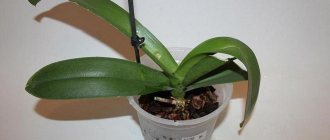
Phalaenopsis orchids are flowers of extraordinary beauty that require appropriate care. Despite this, there are a lot of connoisseurs of exotic beauty.
Almost every gardener wonders how to propagate an orchid at home, because this process is quite painstaking and time-consuming , and quite often can result in the death of the plant. We will tell you about several of the most successful ways to plant an orchid at home.
When to plant orchids?
Orchids begin to propagate only when they reach the age of three to four years. Cuttings and shoots are cut from healthy samples so that the mother bush and the young harvest do not disappear. It is impossible to grow an orchid from leaves because they do not have growing points. Plant division is carried out in early spring, when the flower gains green mass. During this period, orchids actively absorb useful minerals from the soil, so transplanting into another pot will not be stressful for it, and the cuttings will close in about 2-4 days.
Orchids, like many tropical flowers, are easily infected with infectious diseases. Therefore, when starting to sit down, put on gloves and disinfect your tools. The scissors need to be sharpened well, the blades should be washed with a solution of potassium permanganate and wiped with any antiseptic (for example, alcohol). The cuts on the stems can be sprinkled with charcoal; it will protect the “wound” from harmful microorganisms.
Do not replant your tropical flower in autumn, winter or during flowering. It is better to propagate orchids in the spring before the first flowers appear or after flowering. Be sure to remove flower stalks from faded orchids.
If the time for replanting is chosen correctly, and all procedures are carried out without errors, the young flowers will certainly germinate and take root.
Root preparation
When studying step-by-step how to transplant an orchid at home, it should be noted that after this, an audit of the root system is carried out. It needs to be examined carefully. The roots should be free of pests, rot, and diseases. If these negative phenomena are present, you need to treat the plant with insecticides. A special solution is prepared for this. The product must be purchased at a specialized store. It is prepared according to the manufacturer's instructions.
The roots are dipped into the prepared solution for 30 minutes. After this, treat the pruning shears with alcohol. Using this tool, wrinkled, rotten and dry roots are cut off. Only elastic, clean shoots should be left. They have a greenish tint. All black roots need to be removed. Dust the cut areas with crushed charcoal. This will protect the root system.
We breed orchids with seeds - a generative method
Breeding orchids using seeds is not a vegetative method, but a generative method. This is the longest method as it will take about 4-5 years to obtain adult samples. It’s quite difficult to do this in your own home, but it’s still worth experimenting.
The process begins with the seeds being placed in wet soil, to which chopped moss and leaf soil are added. You need to spread the contents in a thin layer, without sprinkling with soil. Then greenhouse conditions are created with a constant level of humidity and the same temperature. There is no need to water the soil; it is better to spray with warm water. The artificial environment must be sterile.
The emerging sprouts are picked at the stage of the first leaf, the second pick is when the second leaf sprouts, the third is at the stage of the fourth leaf. After this, the seedlings are planted in flower pots. The plant will grow, but flowering will begin after a few years.
Please note that the resulting flowers may not be similar to the mother flower. Therefore, be prepared for the fact that the shade of the petals may not meet your expectations. The advantage of seed propagation is the ability to obtain a large number of sprouts in just one sowing.
Propagation by side shoots
Certain types of orchids, such as phalaenopsis, have difficulty with division. In this case, it will be safe to propagate phalaenopsis by lateral shoots, or aerial babies. The upper lobe of a peduncle that has reached the age of 1-1.5 years is cut off, leaving a dormant bud in the lower half of the flower. This should be done after all the petals have fallen.
The plant is prepared in two stages. The first stage begins in February or March:
- reduce watering (once every 10 days);
- move the flower pot to a dark place; the air temperature here should remain within +16 - +18 degrees at night, and +22 -+24 degrees during the day;
- Every day, take the orchid to a well-lit corner, leaving it for one hour.
Sparing irrigation and exposure to a high temperature environment promotes the awakening of the kidney. When it appears, you can proceed to the second stage:
- move the plant to a warm room, the temperature should not drop below +20 degrees, since the shoots will stop forming;
- protect the tropical bush from direct sunlight, curtain the windows and keep the plant in the shade;
- water the flower 2-4 times a week, insufficient moisture will slow down the growth of the children, and excess moisture will lead to the formation of fungus;
- water for irrigation must be prepared in advance: it must sit for 2-3 days, after which it should be heated to +30- +34 degrees;
- spray the leaves of the plant 2-3 times a day with water with the addition of special complexes to nourish the flower;
- feed the orchid with nitrogen-containing fertilizers.
In the conditions of improvised tropics, the plant will soon develop shoots, which will later form its own roots and leaves. These small bushes are located in the place of buds; their further development depends on the microclimate. Maintain an atmosphere with warm air and high humidity.
Children are cut from the stem when the roots reach four to five centimeters in length. Young shoots should be planted in a transparent container, first filled with pine bark (up to 1 cm). It acts as drainage and is able to retain moisture, so the roots do not dry out.
Sprinkle substrate onto the bark. It is necessary to take soil from the pot where the mother specimen grows. Plant new orchids in this soil, water them and periodically feed them with fertilizers. In the first year of life, continue to keep the flowers in a miniature greenhouse with high air humidity (80%).
Recommendation: occasionally flower stalks develop on the side shoots. Do not remove them, let them fade and only then separate the young flower from the stem.
Substrate selection
When studying step by step how to transplant a phalaenopsis orchid at home, it is worth noting that it is important to choose the right soil. This is a substrate that is based on bark. If you are a beginner gardener, it is best to purchase soil from a specialized store. But here, too, some nuances need to be taken into account. Three types of substrate are available for sale. It can have a fine, coarse or medium fraction. The last option is the most preferable for this plant.
You can also make it yourself. For this you will need pine bark (3 parts), peat or sphagnum (1 part) and expanded clay (1 part). 2 g of lime are added per liter of such soil. The bark is collected in dry weather. It is located around pine trees. This material contains less resin, which has a positive effect on the development of the orchid.
The bark must be removed with a knife. If the tree shows signs of rot, this material will not be suitable. This bark crumbles easily and shows signs of parasitic damage. Since the bark is collected naturally, it requires pre-processing. You need to grind it, breaking it into pieces to approximately 2 cm in size. After this, the bark is boiled for half an hour. It is laid out on a clean, dry cloth and dried thoroughly.
Sphagnum is needed to retain moisture in the substrate. Also thanks to this ingredient it becomes loose. Sphagnum moss provides the orchid with essential nutrients. It can be dry or live. The moss needs to be crushed, cutting it into pieces about 5 cm in size. It is immersed in boiling water for 5 minutes. The moss is then removed from the water and dried. Disinfection of the material before transplantation is a mandatory procedure. Otherwise, the plant will get sick.
Considering the step-by-step process of replanting an orchid at home, it should also be noted that peat can be used instead of sphagnum. It absorbs moisture well. For this plant, it is better to choose a material that is characterized by a coarse-fiber structure. Do not use crushed peat. It will not allow air to reach the roots.
Cuttings - process sequence
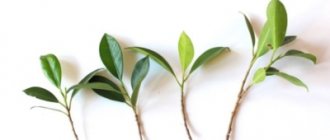
The method of propagating orchids by cuttings is suitable for fast-growing species. The role of the cutting is performed by the upper part of the shoot with leaves and aerial roots. The procedure is carried out in the spring so that the flower adapts and gains strength. Seating is done in the following way:
- the selected cutting is cut with a sharp, disinfected knife;
- the cut is sprinkled with charcoal;
- plant the plant in a transparent pot and transfer it to the greenhouse.
The oblong stems can be divided into several parts, leaving two axillary buds on each. Planting material is placed on damp sand or moss without deepening it into the substrate. The greenhouse (greenhouse) in which the orchid will be located is made of glass, since the plant must develop in a humid, warm environment.
After the white roots appear, the seedlings should be placed in separate containers (for example, plastic cups) with water. Cuttings that are in the same pot will intertwine. And it is very difficult to separate the tender shoots: they break easily, so you risk ruining all the seedlings.
Change the water in the glasses on the second day, do not let it stagnate. Feed the fresh liquid with a drop of orchid fertilizer. If the shoots develop slowly, treat them with a hormonal paste or solution for exotic plants.
Don't forget about the greenhouse effect. Plastic containers with flowers must be covered with a plastic bag to maintain the desired temperature. Young flowers are transplanted into the soil when the roots grow 5 cm. Caring for the hatched plant is similar to caring for an adult specimen, but you need to keep the orchid in the shade for some time.
The correct technology for dividing phalaenopsis
This type of orchid is one of the well-known varieties, it is not picky in care, and can be grown in almost any conditions. When the container for the plant becomes small, it is planted and the children are separated. The children should have 4 roots and at least two leaves. Orchids should not be replanted in autumn, winter or when they are in bloom. The most favorable time for plant propagation is spring or the period after flowering. All flower stalks are removed from faded plants. With proper transplantation and care, plants quickly take root.
Babies can appear on their own or their appearance is stimulated with the help of a special paste based on cytokinin, this product allows the kidney to grow. To root a young plant, it is covered with a plastic or glass cup, thus creating a greenhouse. Once every three days it is necessary to moisten the soil and constantly monitor the plant; sometimes it is necessary to lift the container for ventilation. If the plant is green, does not dry out, and continues to grow, then the greenhouse can be removed and then further care can be carried out.
Dividing a bush - propagating an orchid correctly
Sympoidal plants are propagated in this way: Dendrobium, Cymbidium, Miltonia, Cattleya, Oncidium. Only mature bushes are suitable for this method. When dividing, at least four false bulbs are left, otherwise the orchid will die. The division and replanting procedure is as follows:
- the soil needs to be well moistened and softened, this will make it easier to remove the plant from the pot;
- pull the bush by the base of the stem and remove the flower;
- clear the roots from the soil;
- cut the main onion with a sharp knife into 2-3 parts, taking care that at least 4 pseudobulbs remain on all divided parts;
- Sprinkle the cuts with cinnamon or crushed coal, dry the workpieces in the air;
- after this, plant the divisions in different pots, covered with moss and useful substrate.
After division, the bulbs nourish the orchid and help it recover. If the seedlings are lethargic and weak, you can root them in a plastic bag, first filling it with damp moss. In such conditions, it will be easier for the flower to take root. Keep the bag in a warm room, because in a cool place it is more difficult for the cutting to take root.
If you do not want to spoil the appearance of the mother specimen, you need to wait before dividing the adult bulb. You can start propagating an orchid at a time when fresh shoots form their own bulbs and they enter the dormant stage. This is the most favorable period for their division.
Plant the bulbs in separate containers, but remember that the resting period for the flowers is still ongoing. When the plants leave this phase, they will begin to actively form a root system, begin to grow and gradually turn into an adult orchid.
Common mistakes
If any actions are performed incorrectly or inattentively during the process of planting an orchid, mistakes made can lead to illness or even death of the plant.
To avoid this, you need to know and take into account possible shortcomings in advance. The most common mistakes include:
- Wrong time for seating.
- Choosing the wrong planting method for a particular type of orchid.
- Failure to keep tools clean when pruning plant parts.
- Frequent watering of newly planted young plants.
- Transplantation of weak children or other vegetative parts that are not ready for independent growth and development.
- Dividing a bush or cuttings into parts that are too small and incapable of independent existence.
Recommendations for caring for young flowers
An orchid takes 4 years to fully mature. Before this, “young” flowers are kept in pots suitable for the size of the bush. The container must match the volume of the roots. A mandatory requirement is the presence of a drainage layer, since water should not stagnate near the roots.
Expanded clay, brick chips, and foam granules can be used as drainage. The latter material will do if the window sills in the house are cold. The substrate is prepared from pine bark, sphagnum (moss) and charcoal. Some gardeners add high-moor peat; this substance populates the soil with beneficial microflora and does not allow it to dry out quickly.
Sometimes young flowers have roots pointing upward. Do not try to force them back in: the plant is fragile and can be seriously damaged. Spray such roots with warm water to prevent them from drying out or cover with moss.
Teenage orchids need to be watered more often than adult plants. After all, the pot in which they develop is smaller. Add growth stimulants and other fertilizers to the irrigation liquid. Provide proper lighting and adhere to the required temperature conditions, and then at the right time your beauty will give her first flowering.
How to determine that a flower needs replanting?
When purchasing an orchid, owners wonder how to properly replant the flower. Should I replant immediately or wait until after flowering? How to choose a pot and substrate for a plant?
Let us list the signs by which you can determine that Phalaenopsis needs a transplant.
Accumulations of algae and moss are visible on the walls of the pot. This means that the substrate is compacted and poorly ventilated. Orchid roots can rot from excess moisture. The purpose of replanting is to provide the plant with fresh, high-quality substrate.- The roots filled the entire volume of the container and were closely intertwined. This is clearly visible through the transparent walls of the pot. In this case, the purpose of replanting is to change the container to a larger one that is more convenient for the plant.
- Root damage. Healthy Phalaenopsis roots are greenish in color with a silvery coating. If blackened, moldy or dried roots are visible through the walls of the container, the plant should be replanted.
- Pests seen in a pot are a reason to change the substrate.
- The leaves of the plant are limp and do not restore turgor after watering. It is necessary to remove the orchid from the pot and examine the roots.
- The plant moves freely in the pot - a sign of root death. This is a signal for an urgent transplant!
Important! The presence of aerial roots outside the pot is normal and is not a signal for replanting.


