Planting and care
In order for your pelargonium to smell fragrant all season, it needs to be provided with comfortable conditions.
The soil for planting is prepared in the fall: after digging, mineral fertilizers and humus are added.
Immediately before planting, the plant is watered abundantly and no more than 12-14 seedlings are placed per 1 sq.m.
The next 2 weeks pay special attention to soil moisture. At home, with the right approach, it blooms for 10 to 12 years, maintaining its picturesqueness
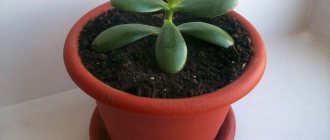
On average, it is recommended to update the pot every 10-12 months as needed.
Large rhizomatous
It is a perennial plant that has an elegant and decorative appearance, producing delightful flowers and greenery. It is often used instead of lawns. In order to avoid problems in the process of breeding this crop, you must follow the following planting rules:
- the soil for planting must be fertile;
- maintain a distance: between bushes 25-30 cm, and between rows from 70 cm to one meter;
- planting algorithm: drainage is laid out at the bottom of the prepared hole, followed by fertilizing, a bush is placed on top and sprinkled with earth.
Rules of care:
- abundant, but not frequent watering (this plant is heat-loving, and therefore tolerates drought more easily than excessive moisture);
- regular feeding;
- timely removal of inflorescences;
- good drainage is a must.
It is better to plant it in sunny and abundantly warmed areas. Partial shade is also perfect. To prevent the plant from freezing, it is recommended to create a shelter for the winter. However, frost-resistant species will winter well without it.
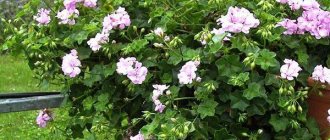
Lugovoy
It is a dense bush up to 120 cm in height. Blooms in mid-summer with blue-purple flowers. Its requirements for planting and subsequent care are no different from other types of pelargonium.
Possible problems of transplantation and cultivation
Transplantation is stressful for the plant, so within 2–3 weeks, plant growers may encounter the following difficulties:
- yellowing and drying of the edges of the leaves occurs as a result of moisture deficiency - daily watering from a syringe device will help solve the problem;
- loss of leaf density and rotting is caused by an excess of moisture - you need to adjust the watering regime, reducing its intensity, and remove the affected leaves;
- exposure of the main stem is caused by a lack of light - organize additional illumination with phytolamps or change the location of the container;
- wilting of flowers is caused by excessive lighting - organize high-quality shading.
Did you know? Leaves and flowers of some varieties of geranium are added to the soup, replacing parsley with them.
If you follow all the rules for transplantation and subsequent care, geranium develops well and blooms profusely at home and in the open ground.
Planting and care
Landing
Growing is possible both at home and in the garden. But it’s better to start with home cultivation, master the care well, and only then start experimenting with outdoor plantings. With the exception of frost-resistant varieties, all the rest will either behave like annuals, or you will have to dig them up every fall and take them home for the winter.
In addition to classic watering, weeding and fertilizing, temperature regulation is added when it comes to home growing. Replanting is often not recommended - only when absolutely necessary.
Lighting
Our guest is from the south, and like any southerner, he loves and needs the sun. South windows will be preferable for him. Only on particularly hot days and hours, it wouldn’t hurt to throw a little shade so that direct sunlight doesn’t cause burns. On the north side, the flower will not be very comfortable; it will seek the sun, stretch and bend, and will bloom much worse. As a last resort, if there is no suitable sunny place, you can illuminate the pots with fluorescent lamps.
Soil and fertilizing
The soil is suitable purchased or from a mixture of garden soil, sand, peat and humus in equal parts. The result should be soil rich in organic matter with good drainage properties. Also, for good drainage, the bottom of the flower pot is filled with expanded clay, small pebbles or broken bricks.
Watering
Watering is simple, but with its own nuances. It is better not to use a water spray for this - high air humidity can only do harm.
It is not recommended to keep plants that need air humidification and spraying nearby.
The southerner tolerates drought well and does not require too frequent watering - once every 2-3 days is enough. On very hot days, if the soil has time to dry out within a day, you need to water it every day. Settled water at room temperature is suitable. The entire soil is watered, but an excess of moisture will cause rotting and death of the bush.
Fertilizers
You will have to feed the plants with fertilizer regularly and relatively often - once every 10 days. Moreover, in hot weather, when watering is done daily, a single dose of fertilizer is divided into 10 parts and one part is applied to the soil every day along with watering.
The fertilizer should contain: low concentration nitrogen, a high percentage of potassium, phosphorus, magnesium, calcium, zinc, copper, manganese, iron, boron and molybdenum.
During the dormant period, feeding is not required.
Temperature
When growing flowers at home, temperature adjustment is added to the usual care measures, taking into account seasonality. So, in the autumn and winter, plantings are stored at lower temperatures than in spring and autumn - this is necessary so that the plant responds to the changing seasons as usual and therefore blooms better.
In spring and summer, the recommended storage temperature is from +20 to +25 degrees, and in autumn and winter, +13 during the day and +6 at night.
Avoid strong drafts and sudden temperature changes, but also do not allow the air to stagnate.
Rest period
Like all living things, plants also get tired and need rest. The optimal rest period is about 2 months. To do this, stop watering and feeding from the beginning of November. In a couple of months, your beauties will have a rest and from the beginning of January you can resume caring for them.
Trimming and pinching
Pruning is a whole gardening art, which sooner or later every amateur will have to learn. And houseplants are best suited for this.
It is necessary to trim the bushes so that there is not too much greenery, so that the plantings are neat, do not grow and retain their shape. Pinching also has rejuvenating properties.
How to prune pelargonium correctly
Basic recommendations:
- In the fall, when the flowering period has already passed, old leaves and branches and peduncles that are exposed longer than the stem are removed.
- Using a utility knife or a good pruner, young branches are trimmed diagonally above the leaf node.
- Be sure to treat the wounds with charcoal, manganese solution or crushed activated carbon.
How to feed geraniums for lush flowering
A flower needs three elements to bloom lushly - nitrogen, phosphorus and potassium.
When the winter dormancy period ends, it is better to feed with nitrogen fertilizers. Soon the flower will need green mass.
When the pet begins to prepare for flowering, it will need phosphorus fertilizers. Potassium is added to prolong flowering.
Complex fertilizers
To enhance the brightness of the buds, trace elements are required. Balanced formulations that are sold in stores are suitable for any flowering plant species. These are “MultiFlora Aqua”, “BioMaster”, “Gumi Omi”. They contain all the elements, ranging from iron, boron to humic acids.
Folk remedies
To stimulate lush flowering of all types of geraniums, you can use folk remedies.
- Iodine. It will speed up the formation of buds and increase their number: add 1 drop of iodine to a liter of water. Pour 50 ml at the root over the damp soil.
- Milk mixture. Alternate watering with a milk mixture (100 ml of milk and 1 liter of water) with watering with clean water.
- Baker's yeast. I will help the flower grow greenery, develop a root system, and then bloom magnificently, since after fertilizing with yeast the soil will be enriched with nitrogen and potassium. Dissolve 20 g of yeast in a liter of warm water and let it ferment for 2-3 hours. Top up to 6 liters, you can water every 10 days.
How to transplant? detailed instructions
So, let's move on to action. How does the transplantation process actually take place? Carefully read each step from the instructions to avoid mistakes and not kill the flower:
- First, you should know that transplantation is mainly carried out in the spring.
- Take care of the size of the pot into which your geranium will be transplanted. It should be a little larger than before, but not huge.
- Prepare the following items that will be needed during replanting: soil, a watering can filled with water and a pot.
- If the pot into which you are transplanting the geranium is old, then you need to treat it. It is best to soak it in a bleach solution. This will rid it of infection, and also cleanse it of those contaminants that are very difficult to remove manually.
- After the cleansing procedure, we place a layer of drainage on the bottom of the pot (this can be broken bricks or pieces of foam).
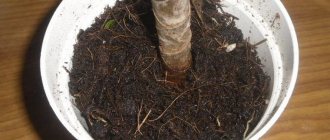
- Let's start removing the geranium from the old pot. It should be removed strictly with a lump of earth, otherwise there is a risk of damaging the plant. To ensure that the plant comes out of the pot easily, be sure to water it before doing so. When water is absorbed, you need to hold the plant with one hand, and hold the pot with the other. If the plant does not come out of the pot very well, then tap the pot a little to lightly shake the soil. But if this does not help, then take a knife and use it to separate the soil from the pot.
- After removing the plant, inspect its root system to ensure there is no damage. Anything that makes you suspicious must be removed using garden shears, while trying not to damage healthy roots.
- We place our plant in a new pot. We fill the empty spaces between the walls of the pot and the old soil with new and moistened soil.
- The soil around the root must be compacted. The final step will be watering the plant.
- Then we put it in the shade for about a week.
After a week, we can already put the geranium in its permanent place and begin to care for it. But it should be noted that there is no need to fertilize for the first 2 or 3 months.
Reasons for replanting geraniums
However, there are situations when geraniums should be replanted, no matter what time of year it is. This happens in cases where your geranium is clearly not feeling well. As a rule, a sick geranium looks like this:
- The tips of its leaves begin to turn yellow. This may indicate that you overwatered your geranium and its roots began to rot;
- The geranium's trunk becomes bare and its leaves fall off. This is a clear indication that your flower is not getting enough light;
- the flower practically does not bloom. This means that the soil for the flower has become depleted.
All these signs indicate that your flower needs to be replanted, and this needs to be done as quickly as possible. As a rule, a diseased flower does not bloom, but even if it has inflorescences, this should not cause the transplant to be delayed.
Features of transplanting pelargonium after purchase
Buying geraniums does not mean immediately replanting them from transport store soil. Over the past weeks, the plant has had to quickly adapt to changing temperatures and lighting several times, so we need to take pity on it and let it adapt to new living conditions. As a rule, it takes several weeks (from two to four) to get used to. Then they proceed according to the algorithm:
We take a pot a little larger than the previous one. Prepare fresh earthen mixture. We transfer the plant into a new container, after moistening the soil a little. Add soil to the edges of the pot (do not compact it)
Water carefully
It is recommended not to touch pelargonium purchased in winter until spring or at least mid-February. In a dormant state, the plant will not tolerate such a test. If you bought a flowering geranium, it is better to wait until the buds fall off.
Purchased geraniums must be carefully inspected before transplanting.
Before transplanting, carefully inspect the root system of the plant. Healthy roots entwine the earthen ball completely. It is necessary to shake off the substrate and wash them only if rot, diseases or insects are detected. In other cases, the whole earthen ball is moved to new soil. Young roots will receive all the necessary nutrients from it.
Some amateur flower growers violate generally accepted rules for transplanting purchased geraniums. They immediately carry out the above-described procedures with it, believing that there is no need to wait and it is better to subject the plant to all the tests right away, rather than dragging them out for a month.
How to plant geraniums without roots
You can plant a sprig of geranium without roots. The ideal time is spring or early autumn. It's usually done like this:
- A geranium branch 5–7 centimeters long with two to five leaves is cut at a right angle.
- Warm, settled or boiled water is poured into a transparent glass.
- A geranium cutting is placed in water. It needs to be changed every 2-3 days. To speed up the rooting process, dissolve succinic acid (250 ml tablet) in the liquid or add a little biostimulant - Epin, Zircon, Kornevin (2-3 ml per liter).
Keeping the future pelargonium bush in water for a long time can cause rotting of the part lowered there. To prevent this, you can put an activated carbon tablet in the container.
Geranium cuttings are dipped in water to cause roots to appear.
Most gardeners do not immerse the cuttings in water, but immediately root them in a prepared pot with an earthen mixture. After pruning, the cuttings are dried at room temperature for about two hours. Then they are planted in transparent plastic cups filled with universal soil for flowering indoor plants or peat chips. The type of geranium affects the method of rooting: zonal geranium produces roots faster in water, fragrant - in the ground, royal also prefers soil, but the process is slow.
Geranium cuttings can be immediately planted in the soil mixture; the probability of rooting is very high
The dishes with future bushes are placed in a well-lit place, but not in direct sunlight. Ivy and zonal geraniums are ready to be transplanted into a pot in 10–15 days; royal geraniums will take a month. Transparent cups are good because the appearance of roots can be quickly noticed - they reach the walls of the dish in a few days. Another criterion that the procedure was successful is the appearance of a new leaf.
Is it possible to replant flowering geraniums?
During flowering, any plants spend a lot of energy on forming buds and ripening seeds. During such a period, it is better to take pity on the geranium, increase feeding, and not subject it to additional stress. Otherwise, first the flowers will fall off, then the leaves will turn yellow. The plant may even die. It is recommended to wait for the end of flowering and replant the pelargonium after 5–10 days.
If there is an urgent need to transplant the geranium into a new pot at the time of flowering (the plant was dropped or damaged, the bush became sick), then this can still be done. You need to try to transfer the pelargonium into a new container without damaging the roots or destroying the earthen lump. The flowers will, of course, fall off, but the geranium will survive.
Features of plant care after transplantation
Geranium transplanted into a new pot does not need feeding for the first two to three months. It will take all its nutrients from fresh soil. Therefore, the pelargonium bush only requires timely watering as the soil dries out.
It is important to ensure optimal temperatures and proper lighting. After the appearance of new leaves and the growth of the rooted cuttings, pinch the pelargonium so that it does not stretch upward, but bushes
Is it possible to transplant during flowering?
Geraniums can be replanted at any time of the year . But it is worth considering some features of the transplant:
- During the period of active flowering, as mentioned above, the plant spends a lot of energy on the formation of flowers.
- At this time, active sap flow occurs. Therefore, during this stressful period, replanting geraniums can lead to a long recovery period and the dropping of flowers.
Is it possible after purchase?
It is not recommended to replant flowering geraniums immediately after purchase . It is advisable to provide the plant with complete rest. It takes very little time for geranium to adapt to new conditions. At this time, you need to carefully monitor the temperature and humidity in the room, ensure regular watering and try not to disturb the plant for some time.
In most cases, if these conditions are not met, flowers recently purchased from a store may die immediately after flowering ends. After all, before appearing in the house, geranium received a lot of stress. This includes a transfer at the nursery, transportation, stays at intermediate points on the way to the destination, and accommodation in the store.
How to propagate at home?
Pelargonium cannot be classified as a capricious plant. It reproduces easily. At home, propagation is carried out, as already mentioned, by cuttings, seeds, and rooting of leaves. Cuttings are the most optimal and reliable option.
Cuttings
It is better to cut the plant in autumn or early spring. Stages of work:
- The upper vertical shoot is cut off. The cutting size should be from 8 to 12 cm.
- The cut is made directly under the leaf node. Roots will subsequently emerge from it. It is enough to leave 2-3 leaves on the cuttings, the rest can be removed. The cutting needs to be left in the air for two hours so that the cut area dries well.
Preparation
- Some varieties of geranium, such as royal geranium, require special care. They stimulate the mother plant. This is done a month before cuttings: small cuts are made along the stem under the leaf buds. Root tubercles will subsequently appear in this place.
- A cut will be made underneath them, which will allow the plant to quickly take root. The size of the cutting will be 7-10 cm. Roots will appear in the lower cut, and the upper part will dry out. The lateral buds will subsequently begin to produce new shoots, and gradually the pelargonium will become a bush.
Rooting
Cuttings can be easily rooted in water:
- The water must be settled in advance. The cuttings are installed so that the water only covers them halfway.
- It is advisable to add activated carbon to the water.
- The lower cut of the cutting is lowered into the water.
- The water is changed once every two days.
- When roots appear, you can transplant the plant into pots.
Some varieties of geraniums are not placed in water, as the root system begins to rot before it has formed. These species include royal and fragrant pelargonium.
Planting in the soil
Rooting geraniums without roots can be done directly in the soil:
- First of all, you need to prepare the substrate. To do this, you need to mix peat, sand and perlite in equal proportions.
- The soil is poured into a small transparent glass (also called a tablet) or a pot with a volume of up to 200 ml. The container must have a hole at the bottom, since watering is carried out through the pan.
Important! If a food jar was used as a container, it is thoroughly washed and disinfected with medical alcohol.
Read more about how to choose the right soil and pot for planting pelargonium here.
Then the landing itself takes place:
- In order for roots to appear faster, the cut areas can be sprinkled with a growth stimulator (Kornevin, etc.).
- A depression is made in the center of the pot, a cutting is inserted into it to a depth of 3-4 cm. After this, the earth is carefully compacted.
- The pot with the cuttings is placed on the sunny side and watered three times a week. In two weeks, roots will appear. Proof of this will be the appearance of a new leaf. After this, the plant can be transplanted into a larger container.
We talked about the features of planting, transplanting and rooting pelargonium in this material.
For the substrate, you can take the following elements, which have a beneficial effect on flower growth:
- Perlite.
- Coconut flakes.
- Sphagnum, but its acidity should be neutral.
Many specialized stores sell universal primer. Such soil is light and loose, capable of conducting moisture well.
Let's look at the video of rooting geraniums without roots directly in the soil:
Seeds
You can collect the seeds yourself or purchase them at the store. It is easier to use the second option, since collecting seeds from a plant is long and hard work. It is necessary to choose a moment so that the seeds are fully ripe and do not have time to fly away from the plant, but at the same time this must be done in late autumn. Therefore, it is better for amateurs to use another method of propagating geraniums.
Planting of seeds will be carried out depending on the size of the seeds. If they are small, then they need to be planted before winter. Large seeds are planted in April. Peat pots are selected for planting, where the seeds will remain until next spring.
This soil - a combination of peat and sand - is considered the most fertile for growing pelargonium. After planting the seeds, the soil is covered with a film and left there until the first shoots appear. Then the shelter is removed.
This video describes in detail the propagation of pelargonium by seeds:
Briefly about the plant
Geranium acquired its beautiful appearance through the efforts of the English breeder George Tradescan . Even then, its healing properties were known: ointment with geranium juice got rid of lice, and nasal drops helped cope with colds. Even Peter the Great himself cured an ingrown nail, which caused him a lot of suffering, with the help of this plant.
For a long time, geranium has been pleasing gardeners with its lush blooms. It is quite undemanding in care (we wrote more about how to care for geraniums to avoid various problems in growing here). In addition, it purifies the air thanks to special substances called phytoncides.
Aftercare
Due to the fact that geranium is very sensitive to the transplantation process, it needs special attention during this period. Despite the fact that in normal times this plant feels great on a south or south-east windowsill under bright sunlight, it is better to place the transplanted flower in a more shaded place for about a week
Watering should be done moderately, carefully monitoring how the soil dries out. Geraniums do not require much moisture; they are accustomed to arid climates. As a result, waterlogging can be detrimental to it, especially when the plant is weakened after transplantation.
Important! Geraniums do not need high air humidity; it is strictly not recommended to spray them, as this can lead to rotting and the occurrence of diseases.
There is no need to fertilize the flower for 2-3 months after transplantation; all the elements necessary for growth are contained in sufficient quantities in the renewed soil. In the future, fertilizing can be done once a month; special products for geraniums or universal fertilizers for flowering indoor plants are suitable.
When feeding for the first time, it is important to reduce the dosage by 2-3 times to avoid damage to the roots, then apply fertilizer according to the instructions. Find out how and what to feed a plant at home or at your dacha here, and in this material read about how to prepare and use iodine fertilizer
Our grandmothers also proved that geranium can grow and even bloom despite any conditions: in simple soil not rich in nutrients, under scorching sun rays or far from them, on a balcony, where even in summer the temperature can drop below +10.
Geranium can withstand almost anything except improperly transplanted plants and constant excess moisture. But this does not mean that extreme conditions are familiar to this plant, like other indoor flowers; geraniums need care, and then they will reciprocate.
Soil preparation
Transplanting geraniums begins with choosing the right pot. To make it easier for her to get used to the watering conditions in a new place, it is better not to change even the material of the planting container. When planting a new plant (bought in a store or obtained from a cutting), you should choose a pot made of natural ceramics: it is more hygroscopic than plastic and will absorb excess water, which often happens with not very careful watering. After thorough washing, a new pot is soaked in hot water for 3-4 hours, and a previously used one is also treated with a 3% solution of acetic acid and doused with boiling water.
The dimensions of the new pot should be only 3-4 cm larger than the old one: the roots of the geranium should not be given much freedom, only then will it bloom well.
For an average plant, the diameter of the pot is approximately 15 cm, the height is slightly less. Naturally, there should be holes at the bottom and a 2-3 cm layer of sterilized drainage material - small pebbles, expanded clay, etc.
The soil needs to be loose, breathable, and not too fertilized: if there is an excess of nutrients, the geranium will grow leaves and bloom poorly. There are many compositions of mixtures, for example:
- turf soil, coarse sand and humus (2:1:2);
- equal amounts of garden soil, sand and peat;
- loamy soil, peat and perlite in equal parts.
If you buy ready-made soil for pelargoniums in the store, you should add a little more coarse sand to it to make it loose. Any mixture (even purchased) must be sterilized: calcined, steamed or spilled with a solution of potassium permanganate. Experienced flower growers advise after this to restore the dead microflora with the help of EM preparations.
Caring for indoor geraniums
Geranium is a southern flower that loves the sun very much. In winter, geraniums should be placed in the brightest place in the house. In summer, geraniums are planted in the ground if possible. Staying in the fresh air is very beneficial for the plant: many new leaves and flowers appear.
Pelargonium grows well at temperatures around 20°C. But if it starts to get colder and cool nights set in with a temperature of 5-7°C, your main task is to protect the flower from drafts, otherwise it may get sick.
Water geraniums not too much, but regularly. The soil should always be slightly moist. In winter, watering is reduced.
In order for flowering geraniums to bloom profusely and brightly, you can feed them with fertilizers. Add liquid flowering plant food to the water you use to water your geraniums. You need to feed every 2 weeks in the summer. In winter, feeding is stopped.
How to cut pelargonium in spring
I will teach you how to cut not only the familiar zonal pelargonium, but also royal pelargonium, star pelargonium, small-flowered pelargonium, etc. When is the best time to cut pelargonium? What is the best way to root: in water or in substrate? You will find out the answer to these and many other questions in our video.
From mid-February to early March, prune the plant and take cuttings. Trim the bare branches to a height of 7-8 centimeters, and plant the resulting cuttings in pots.
- Find branches 7-8 cm long with 3-5 leaves.
- Cut the cuttings above the bud, making an oblique cut. Let the cutting sit for 2-3 hours. During this time, the cut should be covered with film.
- As soon as the cutting is closed, plant the cuttings in pots with soil, water lightly, and cover with a bag, creating a greenhouse effect.
There is a second cutting method.
- Cut the cuttings, put them in water, adding an activated carbon tablet to protect them from rotting.
- When roots appear, transplant the sprouts into small pots. The smaller the pot, the faster the roots will wrap around a lump of soil, the more abundant the flowering will be.
How to care?
Humidity
Geranium does not have any special requirements for humidity, but it loves fresh air. The culture tolerates humid and dry atmospheres.
Note! You should not spray it, otherwise it will lead to burns.
Temperature
It is necessary to grow geraniums outdoors at an air temperature of at least 12 degrees. If this indicator decreases, the leaves will begin to fall off and droop.
Watering
It is necessary to moisten the plant regularly, but avoid standing water, as this can lead to the development of root rot. But drought is also undesirable, otherwise the flower will not bloom or its inflorescences will become smaller and the leaves will begin to fade. But after watering, all elements of the plant will be restored.
It is best to moisten the soil after the top layer has dried. Excessive soil irrigation causes the cessation of flowering.
Feeding
Geranium does not need abundant nutrition. It is quite enough to use compost and peat that were added to the hole before planting. An excess of fertilizers will have a detrimental effect on the formation of flowers.
Before flowering, you need to apply fertilizer containing phosphorus. Potassium compounds should be used once every 2 weeks during the formation of inflorescences and during active flowering, as they will provide large lush inflorescences.
Trimming
With the onset of autumn, you can move on to forming the geranium crown. Then it will be thicker and begin to bloom profusely. During pruning, it is necessary to leave the stem with 6-7 leaves.
Recommendation. You need to remove shoots that grow not from the roots, but from the leaf axils.
If the bush has grown greatly for the winter, then at the end of February or at the beginning of March it can be pruned again. Cut shoots are perfect for cuttings.
Subsequently, to improve flowering and create a beautiful crown shape, cut off geranium shoots when 4-5 leaves appear. But only from December to January it is better not to touch the plant, as it enters a dormant period. There are many benefits to pruning geraniums:
- the bush turns out to be dense, as a result of which it acquires a compact and decorative appearance;
- pruning helps protect young leaves and shoots from diseases, since dried flowers and leaves are often affected by gray rot.
We have prepared a lot of useful tips about geraniums: pinching, ideal soil for an indoor flower and pot, feeding with iodine, planting geraniums.
How to care for your garden in summer?
Summer care for geraniums grown outdoors is not very different from the standard. At this time, it is necessary to increase the amount of watering; the soil should not be allowed to dry out. Do not apply nitrogen-containing fertilizers anymore, as they promote the development of foliage, and flowering will be poor and unsightly. In the summer you need to add compounds rich in potassium, then the bush will bloom for a long time.
Step-by-step instruction
It is worth considering step by step the process of transplanting geraniums both at home and outdoors.
At home
Initially you will need to prepare the following:
- new pot;
- drainage;
- soil mixture;
- scissors;
- knife with a sharp blade;
- settled water at room temperature for irrigation.
The transplant process at home is as follows:
- you need to take a new pot, put drainage on the bottom, which can be made of broken brick or expanded clay;
- the drainage layer should be sprinkled with soil mixture;
- the plant must be pulled out of the old pot, while the geranium should be held by the base, turned over, and then pulled the pot towards you;
- it is necessary to clean the roots - some of them may have dried out or have rotten areas, so they should be removed with scissors and a knife; if there are no signs of damage to the root system, then it is better not to touch the lump;
- the plant needs to be placed in the center of the new pot and sprinkled with soil; you should refrain from compacting it;
- The soil will need to be thoroughly watered so that all voids are filled with soil.
On the street
Although geranium is a houseplant, in the warm season it grows well in a flower bed or garden.
Many flower growers plant their “favorites” in an open-air garden for the summer. In this case, it is worth choosing the right moment. The air temperature should already be quite high, and there should be no frost at night. The optimal solution is the end of May or the beginning of June.
So, the transplant process itself looks like this:
- It’s worth starting with the preparation of the site: the soil needs to be thoroughly dug up, and the depth should be approximately 35 cm;
- then make a hole, the diameter of which should be slightly larger than the diameter of the earthen ball with geranium roots;
- it is worth sprinkling the bottom of the hole with special soil - it can be bought in a store or made independently, as described above;
- the plant must be taken out of the pot and placed in the center of the hole, and all actions must be performed carefully;
- you need to cover all the roots with soil and thoroughly water the soil around the flower.
Geraniums usually grow in the garden until autumn. And some species are even able to survive winter in the garden beds if they are provided with the proper conditions. But in the fall, it is better to replant the plant in a pot and place it on the windowsill at home.
If it is necessary to transplant pelargonium from the street to the house, then it is worth carrying out this procedure before the first cold weather, following these steps:
- water the soil around the plant well so that it is saturated with moisture;
- pour drainage into the pot and sprinkle with a small amount of soil;
- dig up the geranium along with the root ball;
- carefully examine the roots, while removing excess soil;
- remove dry and damaged roots; if the root system has become quite powerful, then you can trim it a little;
- place the plant in the center of the container and fill it with soil mixture in a circle, but be sure to leave 1 cm to the top edge of the pot;
- water moderately so that all voids are filled with soil.
Important! Geranium can be propagated using both roots and shoots. In the second case, it is enough to plant the sprout in the ground and provide proper watering. After some time, the plant will begin to form a root system.
When to perform the procedure
Transplantation is a stressful situation for a flower. Therefore, in order to minimize the negative effect of it, manipulation should be carried out at a certain time. Geraniums should be planted in a new pot in the spring. At this time, you can also divide the rhizome and thus propagate the flower. In spring, pelargonium (also called geranium) can even be planted in open ground in the garden. But in the fall it should be moved from the garden to the house.
It is possible to transplant geraniums in the fall. There is no strict definition of time here. But you should know that in winter plants take root much worse than in other seasons.
Flower growers say that the best time to transfer indoor geraniums to a new pot will be the following months: April, March and February. But everyone decides for themselves when to replant indoor geraniums.
Soil selection
To minimize the stress that pelargonium will receive during transfer to a new pot, you need to choose the right nutrient soil for it. When choosing soil for this indoor plant, you can consider different soils. The simplest option is to use standard ordinary soil for universal purposes. It is suitable for most plants grown in apartment conditions. Perlite and river sand should be added to the universal soil. The mixture should be thoroughly mixed.
Special soil for geraniums can be purchased at any flower shop. It is allowed to use land intended for begonias. You can also take garden soil or make your own soil mixture. In the latter case, it is necessary to remember that the soil should not only be rich in various nutrients, but also loose. It is also necessary that the soil has a light consistency.
The soil mixture for growing pelargonium at home should include the following components:
- turf land (2 parts);
- humus (2 parts);
- river sand (1 part).
You can also prepare a soil mixture of sand, humus, peat and turf soil.
How to replant geraniums from the street
So, let's find out how to properly transplant geraniums back from the street into a pot. The day before, you need to water the plants well - maybe even with some excess. Then we carefully dig up the bush along with a lump of earth and transfer it into a pot of a suitable size.
If the bush has grown and does not fit into its old pot, you can take cuttings from the plant and grow a new, young plant. Or divide the bush into several and plant them in several pots.
Then geranium again goes into the category of indoor plants. When transferred from open ground to a house, the death of some leaves is a completely natural and inevitable phenomenon. This is how the plant adapts to new conditions.
Preparing the soil for pelargonium
You can buy ready-made soil for pelargonium or mix 2 teaspoons of humus, 1 teaspoon of sand and 1 teaspoon of peat. The root system of the plant can become moldy if you take heavy and stale soil. The plant loves nutritious and loose soil. After replanting, the soil is not compacted; once a month, the top layer is additionally loosened. Geraniums require a high turf layer (minimum 2 cm).
Feeding pelargonium after transplantation
The plant accepts fertilizing with mineral compounds well. At the end of winter they begin to feed with potassium and phosphorus compounds. Nitrogen, on the contrary, reduces. This promotes abundant flowering in spring. Feeding is carried out once a month (in winter and autumn) and once a week (from early spring to late summer). Two weeks before transplantation into the house, feeding is stopped.
Lighting and temperature
Geranium should overwinter at a temperature of 8–10°C, but it tolerates normal room temperature well. You should not place the flower on the south windows. Although the plant loves light, afternoon sun is unacceptable. Twilight will have a detrimental effect on flowering. In spring, geraniums can be transferred to the loggia before planting in the garden.
Humidity and watering
Geranium is moisture-loving. Abundant watering should be done daily. Water for irrigation should be at room temperature.
Humidity in the room is allowed at least 20%. In apartments with a central heating system, the leaves are sprayed once every two days.
Step-by-step diagram for pruning geraniums
Pruning a flower in spring is a mandatory procedure. Remove all frail, very elongated shoots, leaving 2-3 “live” buds. Before the first inflorescences appear, long shoots should be pinched.
How to prune geraniums sequentially:
- First, very elongated, weak shoots are removed.
- After two weeks, give the bush a neat shape.
- The main stem is shortened by a third.
- The root shoot is left to allow new stems to grow from it.
- To make the cuts quickly tighten, they are sprinkled with crushed coal.
The stem of pelargonium consists of nodes and internodes. Each nodule is a dormant bud. As soon as spring comes, a fresh branch will appear from it.
The nodes are easy to find. They look like light stripes covered with light rustling scales.
Each shoot must be cut to a “stump”, on which there are 3-5 nodes. You need to leave a few dormant buds, because not all can come to life in the spring.
You should not leave more than 5 main shoots. If you leave more, the bush will turn out to be dense, which will add neither beauty nor health.
Suitable periods
If we consider the time frame that is suitable for transplanting geraniums, then it is worth noting the end of winter or the beginning of spring. Many gardeners recommend planning this procedure from February to April. It is during this period that the flower begins to “wake up”, so this time is the best for such an operation; the plant will cope well with stress. Many gardeners replant geraniums even in summer. At this time, the plant is less susceptible to stress, changing the place of growth is not perceived so painfully
It is important that the plant does not bloom. When flowering, the procedure should be postponed until the geranium has faded.
Usually in the autumn season it is necessary to transplant geraniums that grew in open soil into a pot in order to transfer them indoors for the winter. This procedure is mandatory; the plant feels great after it if all actions are performed correctly and carefully.
Is it possible to replant a flowering plant?
Like many indoor plants, geraniums tend to bloom. Many people are interested in the question: is it even possible to transplant it during this period?
It’s worth saying right away: there won’t be very good consequences if you start replanting a geranium during its flowering or flowering, since you can damage some part, risking damaging the most important thing - the roots.
But if there is an urgent need for this and this is due, for example, to the fact that the roots have grown in size and the plant is cramped and uncomfortable, then you can safely replant, but very carefully!
When replanting geraniums during the flowering period, you need to tear off the old flowers.
There are several tips on this topic:
- The day before transplanting flowering geraniums moisten the soil into and from which you will transplant it. This will help somewhat soften the transplant operation.
- Pick off old flowers . Don't worry! New lush flowers will grow in their place. After all, it is better to sacrifice a few flowers than the entire plant.
- Be sure to save the earthen ball . You can simply take it and transplant it into a larger empty pot along with the soil from the previous pot.
How to replant geraniums at home: rules
Transplantation (transfer) of compact plants is carried out when the flower becomes cramped in the old pot. This is evidenced by the roots that begin to crawl out of the ground. Due to the overgrown root system, pelargonium experiences a lack of nutrients in the soil, which may lead to its death in the future.
In addition, transplantation should be performed in the following situations:
Due to carelessness, a lot of water was poured into the container with the flower. High soil moisture causes root rot; despite proper and balanced care (watering, fertilizing), geranium grows poorly and does not bloom; the shoot was exposed from below; soil contamination by parasites and pathogens is observed
In this case, transshipment is of a preventive nature in order to prevent the development of the disease after treatment of geranium; damage to the pot. It can be damaged due to physical impact (falling from a windowsill) or due to prolonged exposure to sunlight; soil depletion, which is not removed by fertilizing. Periodically, you need to add new soil to the pot in order to naturally replenish its nutritional composition and prevent the appearance of pests; the need to propagate the plant by dividing the rhizome.
As you can see, there are many reasons for transplanting geraniums.
Transplant instructions
Transshipment of geraniums is carried out according to the following scheme:
- preparing a new pot. Drainage is laid at its bottom: broken red brick, expanded clay, clay shards, pieces of foam plastic, etc. A little soil mixture is poured on top of the drainage layer;
- the plant is watered and carefully removed from the container. Pelargonium is transferred to a new pot along with a lump of earth;
- Next, we place the flower in a selected pot and cover it with new moistened soil, filling all the voids in the container.
The transplanted plant can be watered for the first time after 4 days. As you can see, transshipment of geraniums at home is carried out without any particular difficulties. The main thing is not to damage the roots and carry out the procedure in the optimal time frame.
Have questions and need answers? specialist
Pot size and material
If the transfer will be carried out due to the fact that the geranium has simply become crowded in the old pot, you need to responsibly approach the choice of container. The intensity of growth and quality of flowering of pelargonium directly depends on the correctness of this choice. First of all, the container should be slightly larger than the previous pot. You should not choose a container that is too large, as the flower will not grow well in it. It will form many shoots that will stop blooming and begin to stretch. As a result, instead of a beautiful flowering plant, you will get an overgrown bush. The new container in diameter should be only a couple of centimeters larger than the old one.
The pot can be either plastic or clay. Plastic is more practical in terms of care, but it impairs root aeration. Clay containers are prettier and better for plants. But it is more difficult to remove flowers from such pots, since the roots are often strongly attached to the inner surface of such a container.
It is important that there are drainage holes at the bottom of the pot through which excess moisture in the soil will be removed.
How to care for geranium seedlings
Correctly carried out planting procedure is part of a good result. Seedlings need to be grown in favorable conditions. Geraniums require timely watering, correct temperature conditions and good feeding.
First shoots
Watering
The amount and frequency of watering directly depend on the time of year. In hot summers, moisturizing is carried out every 3 days. In winter - once a week. The bottom of the container is laid with a thick layer of drainage. The plant categorically does not tolerate excess moisture. Watering is carried out only when the top layer of soil dries.
Feeding
The first feeding is carried out only 14 days after picking. At this stage, the plant requires potassium and phosphorus. Agricola and Effecton are well suited for these purposes. Fertilizers are applied to the soil from March to October. Frequency – once every 20 days.
On a note! In winter, any feeding is suspended.
External factors
Before growing geranium from seeds, it is important to create the right climatic conditions for it. The flower grows only in well-lit places
But, as with other indoor species, direct sunlight should be avoided. Daylight hours for pelargonium should be at least 15-16 hours. In summer, the plant is taken out into the fresh air.
Due to the fact that geranium leaves are covered with a special protective layer, it is strictly not recommended to spray the species. Any moisture on the stem and leaves can lead to rot on the flower.
The flower painfully tolerates temperature changes. For young shoots this is unacceptable. The optimal air temperature is 20-22 degrees above zero, the minimum is +7 ℃.
Picking
After the first sprouts appear, the seedlings are picked and transplanted into individual containers. The depth should be 2-3 cm. Young flowers are transplanted into small and shallow containers.
Picking a view
Pinching
It is recommended to pinch geraniums at the level of 6-8 leaves. Adult species must be pruned in spring and autumn. Timely pruning of weak and damaged shoots will allow you to get an unusually beautiful plant that will delight you with lush flowering for a long time.
On a note! Pinching should not be carried out during the formation of buds and during the flowering period.
Process Features
Pelargonium is unpretentious in care, but once it is replanted, the plant turns into a real sissy. Due to the resulting stress, the leaves lose turgor and turn yellow. If you approach the process correctly, relocation can be made more or less comfortable.
What to look for:
- First of all, you should make sure that the geranium needs replanting. It is better not to injure the plant again.
- It is important to choose the right time for this process, taking into account the biological characteristics of the flower and the stages of the growing season.
- The main conditions for comfortable movement and further cultivation are a properly selected container and earthen substrate.
If the soil in the old pot is good and the root system is not sick, then it is better to transfer the pelargonium to a new container with a lump of earth. This method is considered gentle on plants and allows them to adapt more easily.
Care after landing:
- the plant is immediately removed to partial shade to prevent direct sun exposure to the flower;
- water the transplanted geranium not at the root - pour water along the side of the pot;
- loosening is carried out carefully and shallowly so as not to harm the roots.
It is better to carefully remove wilted, yellowed leaves so that the plant does not waste energy on them. If the geranium was transplanted during flowering, then the buds are also broken off.
It is recommended to carry out one of the waterings with a growth stimulator (“Kornevin”, “Heteroauxin”). With the right approach to agricultural technology, after 2-3 weeks the pelargonium will come to life, and the foliage will again turn a rich green color.
Why replant geraniums
The need to replant the plant arises when the root system grows and it becomes crowded in the planting container. You can understand this by lifting the pot - the tips of the roots will be visible through the drainage holes. In this case, the flower begins to suffer from a constant deficiency of nutrients, is easily susceptible to diseases, and there is a risk of death.
The flower needs transplants as it grows
A transplant may be needed in the following cases:
- the occurrence of root rot due to violation of the watering regime;
- stimulating the onset of the flowering stage after a prolonged period of dormancy;
- excessive exposure of the lower part of the stems;
- soil contamination by pests and pathogenic microorganisms;
- the need to replace a damaged pot;
- severe depletion of soil for pelargonium;
- needs for rejuvenation.
Additional Information! To rejuvenate a flower, it needs to be planted in a new container. Simultaneous propagation by dividing the bush is possible.
Agricultural technology for moving to another pot
When deciding how to replant geraniums, they pay attention to every moment. The choice of suitable soil, the size of the new container and the material from which it is made determine how well the transplant will take place.
Soil selection
Pelargonium needs light, loose soil, saturated with useful microelements. Of the substrates offered in the store, soil for begonias is best suited. Summer residents can use the fertile soil from under the trees of their own garden by diluting it with sand.
Home gardeners recommend making the following batch:
- 1 part sand from the river;
- 2 parts each of turf soil and humus.
It is better to take sand in a coarse fraction, this will ensure the necessary looseness of the soil. You can mix it with a small amount of peat or completely replace it with vermiculite.
Pot size and material
When choosing a container for geraniums, take into account the size of the bush. The diameter of the container should be only a couple of centimeters wider than the dimensions of the rhizome.
Note! Even if pelargonium takes root in a spacious pot, it will definitely not bloom. The plant will direct all its energy to the development of roots.
When dividing a bush, it is recommended to take a container with a diameter of 10-12 cm and a height of no more than 15 cm for layering with one root. In the future, when changing the pot, the new container should be only 1.5-2 cm larger than the previous one.
As for the material of the pot, geranium feels more comfortable in ceramics that are not covered with glaze. In plastic containers, despite the drainage holes, irrigation water can stagnate. While the ceramic walls will absorb the excess.
Is it possible to replant flowering geraniums?
Flowering requires a lot of energy from the plant. Therefore, it is worth considering once again whether flowering geraniums can be replanted. Not every pelargonium is able to cope with stress during this period. If there is no urgency, then the plant should be left alone and wait until the inflorescences wither. After 7-10 days, the transplantation begins.
Relocation of flowering geraniums
When it is necessary to take emergency measures to improve the health of the bush (or the pot is broken), the flowering geranium is moved to a new container, following the algorithm described above. But the inflorescences will have to be cut off immediately so that they do not interfere with adaptation. So this season it will not be possible to collect seeds for propagation.
What else do gardeners like to plant geraniums in?
Pelargonists have come up with original ways to root their favorite plant. Here are the options tested in practice. They are suitable for cuttings of whimsical varieties, weakened or diseased plants. Try planting cuttings in moss, vermiculite or padding polyester. According to reviews from flower growers, such methods provide 100% rooting.
In sphagnum
Moistened moss is an excellent material for rooting pelargonium cuttings
In vermiculite
Natural vermiculite is a mineral from the hydromica group. These are plate-like crystals of yellowish-brown color. They do not rot and decompose; microorganisms do not live in them. In floriculture, vermiculite is used as a drainage material and for rooting cuttings. It can be purchased at flower shops.
Cuttings of a wide variety of plants take root well in vermiculite.
In padding polyester
Cuttings of the most capricious pelargoniums take root normally in artificial material - synthetic padding polyester.
Video: rooting cuttings in peat tablets
Is it possible to replant flowering geraniums?
Those who have just started growing geraniums sometimes have a dilemma: whether to replant a flowering plant or not. Flowering takes away the geranium's strength; at this time it is more vulnerable. A transplant is a serious stress, and it will be followed by a period of adaptation, which will also require a lot of vital energy. It turns out that by replanting a flowering bush, you are guaranteed to lose both buds and flowers, and perhaps destroy the entire plant. He doesn't have the strength to handle both cases.
Blooming geraniums are relocated only when absolutely necessary.
But sometimes there is simply no other way. For example, you flooded your pelargonium, and the roots were affected by rot. Then, to save the plant, an urgent transplant is needed, regardless of flowering.
How to rejuvenate geraniums by renewing the stems
Over the years, the lower part of the shoots of indoor geraniums inevitably becomes exposed; as flower growers say, it “grows out.”
Pelargonium can be rejuvenated by transplanting. After moving the plant into a new pot, the roots will have more space and nutrition to develop. And the above-ground part must be severely pruned; in some advanced cases, literally “stumps” with several buds are left. For some time, pelargonium will get used to its new position. When the roots become established, the remaining buds will begin to develop.
Pelargonium that is too large and has lost its leaves can be rejuvenated, for which it must be replanted and severely pruned
The cut top of a geranium can also continue to live and bloom. It will make excellent cuttings. With proper rooting (how to do it was discussed above), you will be able to grow several healthy plants.
Ways to get roots from a shoot
Tip cuttings take root best. But in order to get viable seedlings, you need to know how to transplant geraniums with cuttings without roots. It is recommended to root them in soil, not in water. The stems accumulate moisture and may rot over time. Roots appear faster in water. Therefore, flower growers prefer this method of propagating geraniums.
In order to prevent the death of the sprout, it is necessary to constantly monitor the process. Geranium is immersed in settled water at room temperature to a depth of no more than 2 cm. The container with the liquid should be dark and opaque. Coal diluted in water will help reduce the risk of rotting.
With the soil rooting method, the shoot is buried to a depth of 2 cm. Before planting, the cuttings are treated with powdered coal. For better growth, the tip is sprinkled with a special stimulator. You can use any soil for home flowers that is well-drained and loose.
Important! The main danger for hydrangea is rotting. Therefore, the soil in which it is planned to be planted is pierced over a fire and treated with a solution of potassium permanganate
Abundant watering is not required when growing the root system. It is enough to ensure that the earthen lump does not dry out. Young shoots are protected from direct sunlight.
Rooting process
The finished seedlings are planted in a pot and cared for like a mother plant. Drainage, a mixture of universal soil, vermiculite and sand, is placed at the bottom of the container. The day before planting, water the ground with a solution of hot potassium permanganate. The sprout itself is deepened into the soil strictly in the center of the pot.
For your information! Different varieties of geranium have their own rooting period. Some of them take up to 1.5 months to take root.
Caring for a rooted shoot
After planting, flower pots are placed in a dark place. After five days, they can be moved to the windowsill, protecting them from direct sunlight. If the leaves dry out, then cover the plantings with film or a jar. The shelter is removed after the young bushes return to normal. Watering is carried out regularly with a small amount of water.
Important! During watering, young geraniums need to be protected from drops. Excess moisture can lead to rotting and death of the plant.
The cuttings will develop quickly at room temperature in a well-lit area. If you follow these simple rules, young shoots will delight you with abundant flowering in a few months.
Transplantation to a permanent place
Successfully rooted cuttings can be transplanted to a permanent location. The maturity of the sprouts is indicated by the appearance of young leaves. Transplantation is carried out in flowerpots with light and loose soil, which are placed on windows on the western and eastern sides. In summer, flowers are taken outside. In winter, the optimal temperature is no more than 15 °C. Watering is reduced.
You may also find the following materials useful:
- How and when to prune currants in August 2022 after fruiting and harvesting
- The best days for salting and sauerkraut in August 2021 according to the lunar calendar
- When to dig up gladioli bulbs for storage in the fall of 2022
- How to care for phlox in the fall of 2022: planting and care in open ground, pruning, wintering
- How and when to transplant lilies to a new place in 2022 according to the lunar calendar