Everyone knows that orchids are quite fastidious plants ; they require special care conditions. It is recommended to replant the flower every few years. Also, sometimes a baby appears on a plant and when its roots grow sufficiently, the shoot will need to be transplanted.
How to carry out this procedure correctly without damaging the orchid, what conditions need to be provided and much more will be discussed in this article.
How to prepare a shoot
Suitable cuttings can be taken throughout the growing season. Only in autumn and winter the rooting process is delayed due to insufficient lighting, as well as the natural slowdown in the life processes of the plant. The best time is the end of winter and the beginning of spring, then in the warm season the shoots will take root better and the planted plants will take root faster.
The best cuttings are obtained from the upper parts of the plant. All flower stalks are removed. On an adult bush, twigs 5–8 cm long with three developed buds or leaves are selected. The shoot is cut off with a sharp knife disinfected with alcohol. The cut is made at a right angle, 1-2 cm below the internode. The cut area is sprinkled with crushed activated carbon or “root”. Before rooting, the shoot needs to lie in the open air for 3-4 hours, without direct sunlight.
Selection of landing capacity
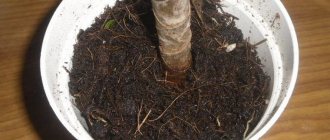
A flower pot or planting container for planting a Crassula shoot with roots must be chosen very carefully and thoughtfully , which is due to fairly active growth processes and the rapid rate of increase in the above-ground part of the plant. In a fairly short time, a dense and relatively heavy crown can form on an ornamental crop, which is not always well supported by the insufficiently developed root system of the Crassula.
Experienced amateur flower growers, who have been cultivating Crassula in indoor floriculture for many years, recommend giving preference to heavy and fairly deep, but at the same time capacious planting containers. It is best to plant Crassula in clay or ceramic pots with a wide neck, which is due to the peculiarity of the rapidly growing and rather superficially located roots of the ornamental crop.
It is important to note that the succulent ornamental plant does not need frequent replanting, which is especially important for adult or heavily grown specimens. However, the larger the flower pot, the faster the green above-ground mass of the crop grows. In any case, the container for planting must fully satisfy all the requirements of the fat plant and contribute to the full growth or development of this indoor crop.
Rooting methods
The appearance of roots on geranium cuttings is possible in an aquatic environment or soil substrate. When choosing a method, consider:
- Variety of plant. Varieties or hybrids, for example planting pelargonium, require increased attention, because... takes root up to 40 days.
- Time of year: In spring and summer, any methods are used, and in winter and autumn it is advisable to use only soil.
- Speed of root emergence. Simple varieties take root quickly, so an aquatic environment is often used for them. Hybrid plants rot during prolonged contact with water.
In water
Rooting occurs best in a warm, dark place. It is important to ensure that there are no significant night/day temperature changes. Take an opaque container, disinfected with an alcohol-containing liquid. The cutting is immersed 4 cm deep. To prevent the plant from rotting and the appearance of a black leg due to excess moisture, add activated carbon powder - 1 tsp. for 1 l. water.
Take soft, clean, settled water at room temperature. Change every 2 days or top up with fresh water to the original level. The dishes with cuttings are placed in a lighted place without direct rays of the sun. The first roots appear after 2-3 weeks.
In the ground
You can purchase ready-made universal soil or create the optimal soil mixture yourself. To do this, mix in equal proportions: drainage soil, peat, sand, preferably add vermiculite. Expanded clay, 1-2 cm, is poured into the bottom of the pot, then a layer of prepared soil, and on top - a thin layer of sand, protecting the cutting from waterlogging.
The pot and soil must be disinfected before use, for this:
- the container is doused with boiling water, formalin solution or a hot solution of potassium permanganate;
- The soil is heated in the oven for about 30 minutes.
The prepared shoot is planted in nutritious, loose soil. The branch is buried 1-2 cm, the soil around it is carefully compacted. It is not recommended to cover the pot with film or a jar. A “greenhouse” is needed only if the outer edges of the leaves begin to dry out. It is recommended to place the container in a bright, warm place, without drafts and direct rays of the sun. Water moderately, with water at room temperature, after the soil has dried on the surface.
Possible difficulties
If you are planning to separate and transplant a baby orchid for its further growth, then you should familiarize yourself with the list of the most common possible difficulties that you may encounter during such procedures.
During transplantation, the plant may contract an infection. This not only ultimately leads to the appearance of serious diseases, but even to the death of the flower. To avoid such a problem, you should use only sterile scissors, a knife and pruning shears when working with young sprouts. Many gardeners are faced with the rotting of this capricious plant. To avoid these problems, you need to let the baby lie in the air for a while (about 30 minutes). After this, the sections will need to be treated with ground cinnamon or wood ash. Please note that if you cut a sprout too early, it will simply die
It is easy to distinguish a baby that is not yet ready for separation; the main thing is to pay attention to the condition of its roots. If several children appear on an orchid at once, then cutting them all at once is prohibited. This is due to the fact that the mother plant may die from the damage received.
First you will need to separate only one baby. It will be permissible to plant the second one after the cut area from the first part is completely overgrown.
Video
This beautiful plant is found in almost every home. There are many tips on how to plant geraniums and how to care for them. But we will tell you in detail how to plant a geranium with a shoot without roots. However, despite the apparent ease of growing this beautiful plant, there are several fundamental rules. Pelargonium (Pelargonium) belongs to the geranium family. Another, more common name for this flower is geranium. Both the names "geranium" and "pelargonium" come from the Greek language. The first of them is translated as “stork”, and the second as “crane”, since the shape of the plant fruits resembles the beak of these animals.
Brief description of the money tree
This is a tree-like succulent from the genus Crassulaceae, belonging to the family of the same name. Over time, its stem below becomes woody, and the plant takes on a shape similar to a small tree. It is covered with oval thick glossy green leaves, which sometimes have a red border. It blooms in the cold season (autumn-winter) with small star-shaped flowers. Under natural conditions it grows in the south of the African continent.
How to grow geranium from a cutting
To grow geranium from a shoot, geranium cuttings can be cut from a house plant, purchased from hand or at a specialized exhibition. Exchange of cuttings or searching for collectors on the Internet is gaining great popularity among flower growers.
You can cut and root cuttings from any variety of geranium, but hybrid varieties can only be propagated in this way. However, rooting time will vary. The shoot of zonal pelargonium will take root the fastest - in 2 weeks. Royal varieties will give roots in a month. And for fragrant geraniums this process will take up to 1.5 months.
Geranium cuttings are used not only for propagation. From time to time it is recommended to rejuvenate the plant. Several cuttings are cut from it and planted in one or more containers, and the old bush is thrown away. Young geraniums are more decorative, they bloom more profusely and retain all the characteristics of the plant from which they were cut. The plant is usually completely replaced after 3–4 years.
The structure of orchids
It is important to understand the difference between the baby, peduncle and roots. At the initial stage, these parts are similar to each other.
- The peduncle is the main (in our opinion) part; this is what beautiful flowers appear on later. The peduncle comes from the center, is necessarily directed upward (unlike the roots) and has a sharp tip.
- The root grows from anywhere on the base, usually pointing downwards (but not necessarily). Its tip is always rounded. Be careful - sometimes the basal baby successfully disguises itself as a peduncle or root, but is a little different from either one or the other.
- A baby (cake) is a mini-plant that has sprouted leaves and roots.
Theoretically, this flower can reproduce not only by children, but also by seeds. The last option is used by breeders. At home, it is safer and easier to use new mini-orchids - babies. They can grow:
- in the leaf axils;
- from dormant buds on a peduncle.
Orchid babies may appear in specified areas of the plant
It is important to remember that completely healthy orchids with a number of leaves of at least 4 can be propagated. Even if your orchid has given birth to a baby, make sure that it is healthy and not trying to continue its genus with all its might.
Rooting
Geranium cuttings are often rooted not in water, but directly in the soil. The fact is that its trunk tends to accumulate water, and this often leads to rotting. However, in water the shoot will take root faster, and the process itself can be observed.
When rooting geraniums in water, it is important not to lower the cuttings too deep: 1–2 cm under water will be enough. Take an opaque container, preferably dark, in which roots will appear faster. The water should settle well and be at room temperature. It is changed once a week and topped up as it evaporates. As soon as the roots reach 2.5 cm, the cutting can be planted in the ground. It makes no sense to wait longer, since there is always a risk of rotting. The cutting with roots will develop more actively in the soil where there is free access to air.
Geranium cuttings can be planted in the ground as soon as the first roots appear.
If the soil rooting method is chosen, the prepared shoot is stuck into the ground to a depth of 2–3 cm. You can sprinkle the tip with a root growth stimulator. A special composition of the substrate for rooting is not required; any universal soil for home flowers will do. The main thing is that the soil is loose and well-drained. It is better if it contains a large percentage of sand near the surface. The biggest risk when rooting geraniums is rotting. Therefore, the soil is disinfected: calcined in the oven or microwave, treated with a weak solution of potassium permanganate.
While waiting for the roots to appear, abundant watering is not necessary; it is enough to ensure that the earthen ball does not dry out completely. It’s not scary if in the first days the leaves on the cuttings begin to wither and turn yellow - geraniums without roots need to go through a period of stress. But if the wilting is prolonged, you can help the plant adapt to new conditions: cover the cutting with a plastic bag or place it in a greenhouse.
In water
The cuttings are placed with a dried cut in water (at a level of 4 cm). It is better to take an opaque container and disinfect it before use. The water should be soft, clean, settled, at room temperature (+22...+24 °C), it should be changed after 1–2 days. Some gardeners argue that you cannot change the water when rooting cuttings - they say, it’s better to just top it up. To reduce the risk of stem rotting, you can add crushed activated carbon.
The dishes with the appendage are placed in a lighted place, avoiding direct sunlight. Daylight should last at least 16 hours, and at night the temperature should not drop sharply. With this method, it is convenient to observe the growing roots, and you can easily determine the moment of planting in the ground.
In the ground in a pot
If you know how to plant a varietal geranium with a shoot without roots directly in a pot with soil, you can quickly wait for a new plant. To prevent the shoot from rotting, planting prepared geranium shoots should be carried out in nutritious, loose, slightly acidic soil to a depth of 1.5–2 cm. Experienced gardeners make a soil mixture of drainage soil, peat and sand, sometimes adding vermiculite. A layer of expanded clay is poured into a pot with drainage holes, then soil, and a small layer of sand is added on top, which provides some protection from waterlogging of the base of the cutting.
Preliminary preparation
Replanting baby orchids requires knowledge of certain nuances associated with the preliminary preparation of tools and materials.
The work will require:
- a container made of transparent or matte plastic with drainage holes for rooting sprouts (8–10 cm in diameter);
- suitable soil (fine bark and crushed charcoal);
- sphagnum moss;
- the drug "Kornevin" to accelerate the growth of roots;
- garden shears or a sharp knife;
- rubber gloves;
- crushed activated carbon or cinnamon powder to disinfect sections;
- alcohol (for disinfecting instruments).
Determining readiness to escape
At the end of the next period of flowering of phalaenopsis, over the next six months the orchid peduncle is covered with new stems with buds. Sometimes babies appear that should not be hastily separated from the main peduncle. Since the roots of young shoots are still very small (less than 4–5 cm), it is better to replant them later, when the young flower is stronger. When the baby has leaves (at least five) and roots grow (there should be at least three), the young shoot will be completely ready for transplantation.
Important! A phalaenopsis shoot capable of survival must have at least five leaves, otherwise it has very little chance of survival, since it is through the leaves that the young plant breathes and feeds on solar energy.
Before the baby's roots grow, it is very important to strengthen the main shoot so that it does not break under the weight of the cake, and also to prepare it for subsequent rooting into the soil. To do this, you can build a wire structure on which a small container with soil (pine sawdust or moss) is suspended, and as the roots grow, they will become stronger in the soil. When the roots grow 5 cm and descend into the container, the baby is disconnected from the mother trunk.
It happens that the baby has formed and grown near the root of the mother flower. In this case, the gardener also needs to be patient until the roots of the new shoot get stronger.
Branch of the appendix
When the child’s roots grow to an acceptable size, the time comes to separate the shoot from the mother trunk. Here are the basic recommendations for its separation:
- The baby needs to be cut off with a sterile knife or pruning shears along with a piece of the peduncle. A peduncle of 1 cm is left at the cake itself.
- Dry the cut of an adult plant a little (about 30 minutes), and then sprinkle with cinnamon or charcoal powder.
- The baby with its roots is also dried (for 24 hours), and then planted in the prepared soil.
Preparing the container and soil for replanting
To plant the baby, you will need a small container made of transparent plastic, as well as a soil mixture suitable for the shoot.
The container and soil mixture are prepared as follows:
- in the bottom of the future flowerpot you need to make several drainage holes using a hot rod, and then lay expanded clay, vermiculite or ceramic shards on the bottom as a drainage layer;
- prepare the substrate yourself from pre-boiled (5 minutes), dried and finely chopped pine bark (to remove resin, parasites and fungal spores), sphagnum moss and charcoal, or buy a high-quality ready-made soil mixture;
- fill the container with the prepared substrate, leaving 3 cm to the edge.
Read more about what soil for orchids should be and how to prepare it yourself.
Further care
You need to specially prepare the cups - make holes in them for water to drain. In addition, thanks to the holes, air penetrates to the roots, which is also very good. Next you need to follow the following instructions:
- Add a little vermiculite to slightly wet, damp soil.
- Fill each cup with soil,
- If the soil was treated with boiling water, you must, of course, wait until it cools down. Fortunately, this will not take much time. Only a few minutes.
- Place the shoots that were previously freed from the lower leaves and deepen them a few centimeters.
- Place the cups on a tray (to make them convenient to move) and place them in a dark place for a while,
- After 5 days, the cups need to be moved to the window. Preferably NOT on the south side.
What to do if yellow, limp leaves appear on some plants? You can place them under the jars. That is, create something like mini-greenhouses for them. Thanks to the special microclimate, the plants will recover in a couple of days.
Propagation of a plant such as geranium is a fairly simple process that anyone who takes it upon can do it. And proper and timely care for a rooted plant will help it delight the eye with its attractive and aesthetic appearance.
Geranium is a well-known plant that almost all gardeners know and grow without problems. Or at least have experience in growing this unpretentious flower.
He loves rare, but at the same time abundant watering, he is not afraid of open air. Geranium is more associated with our grandmothers, but no one forbids those who are much younger from growing it. How to properly plant geraniums with shoots, including without roots, read on. Also watch a useful and interesting video on the topic.
Choosing a plant for cuttings
Like any business, obtaining productive shoots from a rose must follow certain rules:
- The plant from which the cutting is taken must be healthy. The stem of the rose should not be thin, but juicy and green.
- The middle part of the branch is used.
- The cuttings should have two or three large buds. They can't be dark.
- It is advisable to take blanks from growing plants. If you take a cutting from a flower from a bouquet, it should be freshly cut, and not a month old. During long-term storage, flowers are treated with chemicals.
It happens that roots appear on purchased beautiful imported roses. Of course, you can try to plant it. But such a shoot is unlikely to take root, and if this happens, it will not survive the winter, since the plant from which the roses were cut is not zoned, that is, it is not adapted to our climate.
Landing Features
When to plant or transplant this flower? You should be guided by two criteria:
Appearance of the plant : if the flower grows very slowly, but is properly cared for, then this most likely means that it is time to plant it in another, larger pot.- Soil inside the pot : if after watering, the soil dries out quickly enough, this means that the roots of the flower have grown, and it’s time to change the pot to a larger one.
There is also a universal method that will help determine whether it is time for a transplant or not. You need to remove the plant from the pot and carefully examine the lump of earth. If the roots literally penetrate right through the ground and there are a lot of them, then it’s time to replant the plant.
Watch a video about transplanting geraniums:
General Tips
- Ideally, it is better to replant geraniums in the spring . It is necessary to prepare in advance a larger pot into which the flower will “move”.
- It is not necessary to replant the geranium into a new pot, but it must be disinfected . Also, to transplant geraniums you will need a watering can with water and fresh soil.
- It is not advisable to replant geraniums during flowering, but it is possible . If possible, it is better to avoid this.
- To remove geraniums from an old pot, you must first water it . And then you need to hold the pot with one hand, and carefully pull the flower with the other. As a last resort, there is an option to use a knife. With its help, you need to very carefully separate the soil from the walls of the pot.
Keiki Phalaenopsis
Unlike the hybrid Dendrobium phalaenopsis, which can reproduce vegetatively (cuttings, dividing the bush), the Phalaenopsis orchid reproduces by growing keiki (babies, aerial offspring) - fully formed small plants. Baby orchids can grow on stems, on peduncles, or sprout from roots. This is quite a rare occurrence. It is believed that children grow up in two cases:
- when caring for a flower is far from ideal, the plant, with all its might, fulfills the program embedded in it - it reproduces its copy;
- healthy, blooming and happy orchids give their owners a new sprout in gratitude for their care.
Whether it is worth planting the baby orchid or leaving it on the mother stem is up to you to decide. Both approaches have their advantages. If you want to create a completely new flower (for example, as a gift to friends), then you can separate the baby, with some caution, at home. Or you can leave the new orchid. The result will be an interesting branched plant.
What do you need to know before propagating a flower?
How to propagate? There are several ways to propagate geraniums . But the best way is to use cuttings or shoots.
Why exactly is this method better? One of the advantages is that with this choice you can see which geraniums are grown using this method - it is clear what will grow in the future. That is, the growth of the plant, what color the flowers and leaves will be. When is the best time to take cuttings? It is possible all year round, best in July-August and February-March.
When should I take a cutting from geranium flowers to plant? Before taking a shoot, you need to follow a number of simple rules :
You need to choose a well-developed specimen of the flower as the mother plant; in order for rooting to take place, you need to cut off the apical shoot, which has a well-developed growing point. The length of the cutting should be about 7 cm. Such a cutting should have about 4 leaves. The bottom two must be torn off.- Then you need to put the cutting in water so that roots form. This usually takes 2-3 weeks.
- Is it possible to plant a cutting without roots in the ground? Oddly enough, yes. But under special conditions. Many gardeners, having kept the shoots in the shade for about a day, and having previously dipped them in crushed coal, need to plant them in a light mixture at a temperature of +20...+22°C. You need to wait about a month for rooting in this way.
- It is important to compact the soil around the seedling well and always in a generous manner.
- It is important that the shoot is provided with good lighting at room temperature.
- How do you know if the cuttings have taken root? If they have formed new leaves, this means that their horse system is developed and there is no need to wait any longer. You can transplant the plant into a permanent pot.
Find out more details on how to transplant geraniums into another pot and grow them from cuttings here.
Possible problems
However, it is not always possible to grow a healthy shoot that can be transplanted. There are some special situations, let's look at them in more detail.
Transplanting a shoot from a flowering mother plant
This procedure is not recommended, as it may harm the plant. Sometimes orchids bloom continuously throughout the year, so flower growers make some exceptions for their children: if the shoot has formed roots and at least 3-4 leaves, then it can be planted.
It is worth considering that if the baby has formed on a flowering peduncle, then when the shoot is cut off it will be damaged . It is best to wait until the orchid enters the dormant stage and then carry out the transplant procedure.
Root damage
Important! First of all, during transplantation it is necessary to handle young horses very carefully; they are very thin and fragile.
If it is still not possible to maintain their integrity, then you can use several options for growing the root system:
- small greenhouse. In this case, you need to take a small plastic glass, put drainage on the bottom, and wood bark treated with boiling water on top. The shoot is placed in the container and covered. It is necessary to ventilate every day to prevent excess condensation from forming;
- use of polystyrene foam (same principles as in the previous version);
- using the air method . To do this, you will need 2 plastic glasses, one of which has small holes made in the bottom. An orchid shoot is placed in it, moss is placed in the second glass so that the roots of the orchid do not touch it. Moss must be moistened and ventilated every day.
Using one of these methods, you can get fresh roots within a month.
How to plant correctly in a pot with soil?
How to plant correctly? First you need to properly prepare for this. To do this, you need to follow the following instructions:
- Sharpen the knife as sharp as possible.
- Carry out thorough disinfection with medical alcohol.
- Cut the cuttings as carefully as possible. Definitely from the top with 3-4 leaves. But under no circumstances with buds! Otherwise, roots will not grow on such shoots for very long.
- Place the resulting raw material in the shade for a while. Which one? When a new film appears at the cut site.
- Sprinkle the cut with Kornevin; if desired, you can use coal dust instead.
Watch a video about propagating geraniums by cuttings without roots:
Further care
You need to specially prepare the cups - make holes in them for water drainage . In addition, thanks to the holes, air penetrates to the roots, which is also very good.
Next you need to follow the following instructions:
Add a little vermiculite to slightly wet, damp soil.- Fill each cup with soil,
- If the soil was treated with boiling water, you must, of course, wait until it cools down. Fortunately, this will not take much time. Only a few minutes.
- Place the shoots that were previously freed from the lower leaves and deepen them a few centimeters.
- Leave the glasses on a tray (to make them convenient to move) and place them in a dark place for a while,
- After 5 days, the cups need to be moved to the window. Preferably NOT on the south side.
What to do if yellow, limp leaves appear on some plants? You can place them under the jars. That is, create something like mini-greenhouses for them. Thanks to the special microclimate, the plants will recover in a couple of days .
Preparatory work and equipment
What will be needed to separate the baby from the mother plant and replant it:
- Acute sterilized sector.
- Substrate (you can buy it in the store, or you can prepare it yourself).
- Activated carbon, ground cinnamon or charcoal to disinfect the cut area.
- A small transparent pot with holes.
- Gloves.
- Mini-greenhouse (if necessary).
To prepare your own soil, you need to mix fine pine bark and sphagnum moss, you can add a little charcoal.
The substrate should be well moistened, but not wet.