- home
- Plant catalog
- Succulents
Reading time: 8 minutes
48803
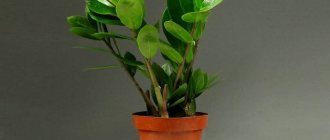
Zamioculcas is a large herbaceous plant belonging to the araceae.
Sometimes it is also called the dollar tree. East Africa is considered its homeland.
It is characterized by very beautiful foliage and specific inflorescences, more like cobs , covered with a greenish blanket.
Despite its exotic nature, this flower is not picky, has great endurance and, with proper maintenance, grows well in ordinary city apartments.
But in order for Zamioculcas to develop properly, you need to know the rules for caring for it. One of them is transplantation.
- Zamokulkas: transplant after purchase
- Transplanting zamioculcas at home - basic rules When to replant
- Soil and drainage
- What pot for the plant
- How to properly transplant Zamioculcas
How to understand that Zamioculcas needs a transplant
Signs that Zamioculcas requires a transplant can easily be mistaken for signs of other problems:
- growth slowdown;
- yellowing and wilting of leaves;
- other signs of wilting.
All this in indoor flowers can also be a sign of the presence of pests, root rot and other diseases.
Zamioculcas has a well-developed root system. If the roots have taken over the entire area of the pot, the flower stops developing. At this time, he also begins to experience nutritional deficiencies, so he needs a transplant.
Repotting may be necessary if the drainage in the pot is insufficient. Excess moisture is harmful to the root system, so in this case replanting is necessary to improve drainage.
Important! It is believed that Zamioculcas is poisonous, so try to keep it away from children and pets.
After purchasing zamioculcas in a store, it is also advisable to plant it in another container.
And there are several reasons for this:
- a store pot is a temporary container, smaller in size than needed;
- unbalanced soil composition - you cannot be sure that it is nutritious enough;
- lack of drainage;
- The holes at the bottom of the container are too large.
What kind of land is needed for Zamioculcas
In nature, Zamioculcas lives on rocky soils mixed with sand and a small amount of humus. The plant has difficulty obtaining nutrients and moisture, as evidenced by tubers and powerful roots.
What kind of soil is needed for zamioculcas growing in an indoor pot? Some sources recommend using mixtures based on humus, garden soil and peat for the plant. Such a substrate will give the plant the opportunity to quickly grow the above-ground part, but excess nutrition and moisture will lead to a high risk of rotting of the root system of zamioculcas - the main problem when growing this spectacular indoor crop.
The soil for replanting zamioculcas should be moderately nutritious, but at the same time very loose, air- and moisture-permeable.
As a ready-made substrate, you can offer soil for succulents. If a universal mixture for ornamental crops is purchased, at least a third of the volume of fine expanded clay, washed river sand and perlite, crushed to small fragments of charcoal and granite chips, is added to it.
When and how often can a plant be replanted?
If you replant zamioculcas annually, there will be no harm from it. In addition, you can easily notice the presence of pests or problems with the root system. Some gardeners recommend replanting this indoor flower every 2-3 years.
Zamioculcas can be replanted at any time of the year, but it is best to replant in late autumn. In summer, this can cause unnecessary stress on the plant, which is in the phase of active vegetation and reproduction. Early spring is also suitable for replanting.
Did you know? This plant is popularly called the “dollar tree.” It is believed that the appearance of each new leaf foretells a sudden monetary gain for the owner.
Flowering plant
A clear sign that your zamioculcas is doing well is the regular appearance of flowers. Of course, it’s a stretch to call them flowers; they rather resemble the core of a feces flower, but you can rejoice at such a manifestation, because it means that you have created ideal conditions for the plant. Typically, flowering lasts about 10 days, after which the dried inflorescence can be pruned. Don’t forget to regularly spray your pet, wipe the dust off its leaves, and bathe it in the shower from time to time.
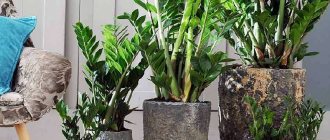
For this, he will reciprocate your feelings and, if you believe the signs, he will attract not just money into the house, but currency! It’s up to you whether to believe it or not, but it’s for sure that he can revive the interior and add a touch of spring freshness to it. Small pots with young plants can be placed on the windowsill, and adults in large tubs can be placed on the floor or on special stands. In summer, take it outside if you live in a private house.
This is such an unpretentious plant that can delight with its beauty all year round. I hope my article has provided comprehensive answers to your questions, and you are happy to recommend it to your friends and acquaintances. Good luck!
Necessary conditions for transplantation and cultivation
The plant grows well in diffused light. Therefore, a cloudy day with moderate air temperatures is suitable for transplantation.
For optimal growth and development after Zamioculcas transplantation, the following conditions are necessary:
- “dappled” lighting, without direct sunlight;
- almost any air humidity – from 40 to 70%;
- temperature +16…+24°C;
- well-drained soil;
- weekly watering, which is necessary if the top 4 cm of soil is dry.
Season
It is better to replant it in the spring . It is advisable to wait for the onset of warmth, this could be the end of March - beginning of April.
The only exception to the rule can be replanting the plant after purchase (it is done 1-2 weeks after the flower has adapted, regardless of the season) and rotting due to excessive watering (in this case, urgent replanting is required).
It is not recommended to replant the flower in winter and autumn .
You can find out more about how to properly plant Zemioculcas here.
Preparing for transplant
To successfully transplant zamioculcas, you will need to prepare:
- universal soil for replanting;
- a new pot that will be 5 cm wider in diameter than the previous one;
- drainage.
Bush indoor plants are also considered: Alocasia, Hoffmania and Hypocyrta.
Choosing a pot
It is necessary to plant zamioculcas at the same depth at which it grew in the “old” pot, so buy a container a little wider and larger than the previous one. The material can be plastic or ceramic; ceramic containers are more beautiful, but removing zamioculcas from such a pot is more difficult. Choose a pot taking into account your interior and ease of caring for the plant.
Soil and drainage preparation
The soil for zamioculcas should be loose and nutritious. You can buy universal soil for planting at a flower shop or prepare a soil mixture yourself.
To do this take:
- loam - part of the garden soil with some clay and sand content;
- perlite - a mass of volcanic origin used to increase soil looseness;
- compost - organic fertilizers that will increase the nutritional value of the soil;
- peat moss.
All components must be mixed in equal parts.
For a pot with a diameter of 12 cm you will need about 3 liters of each ingredient. Important! Peat moss is a natural antiseptic that can destroy putrefactive bacteria, which has a positive effect on the development of zamioculcas after transplantation.
When to propagate
Zamioculcas is an unusual flower. It has no stems or branches. Instead, he produces rachis directly from the root. These are erect, compound-pinnate leaves. At the base of each of them there is a tuber in which substances necessary for life accumulate. You need to know about these features of exotics in order to successfully propagate it. In addition, to obtain healthy seedlings, it is necessary to observe the seasonality inherent in the bush in nature.
It is successfully propagated during the stormy growing season, which occurs in late spring and early summer. By autumn, the seedling will have formed and strengthened, will overwinter normally and begin to grow in the spring.
- House plants
Zamioculcas flower: growing and care at home
Step by step transplant guide
Instructions for transplanting Zamioculcas:
- Water the plant until water begins to flow from the pot into the tray.
- Place your hand on the soil and turn the container upside down, holding the earthen ball.
- Shake it up and down until the lump of earth slides out of the container.
- If that doesn’t work, press the neck of the pot several times (assuming it’s plastic); Once the soil leaves the edges, the plant will be easier to remove.
- If the container is more than 30 cm in diameter, carefully walk around the perimeter with a spatula to easily remove the earthen lump.
- Cut off any black, twisted or diseased roots with pruning shears.
- Unravel the tangled roots.
- Make 3-4 cuts along the sides of the root ball with a knife.
- Place drainage in the new pot; it can be anything: expanded clay, crushed stone, gravel, polystyrene foam, ceramic shards, charcoal.
- Place a small layer of damp soil mixture on it.
- Place the root food on top of a layer of moist soil.
- Make sure that the roots are not crushed when transplanting.
- Fill the area around the root ball with prepared soil mixture or all-purpose soil.
Important! Do not knead the soil before watering!
Water the plant so that the water begins to flow into the pan. Under the influence of water, the soil settles. Now all that remains is to add more soil to the pot, so as to level the surface.
Video: Zamioculcas transplant
Creating a Mixture
First of all, it is necessary to lay expanded clay drainage in a layer of 3-4 cm .
The soil should be loose and soft. The following mixture is considered optimal: peat, turf, sand, leaf humus.
You can use ready-made soil for succulents and cacti, adding a little sand and humus to it. The substrate should be light and prevent the accumulation of moisture so as not to damage the plants.
Correct and timely replanting will allow you to grow a healthy plant that will decorate any interior of your apartment.
More information about the soil for Zamioculcas can be found here.
Aftercare after transplant
The plant is extremely unpretentious and can withstand difficult conditions, including drought and low light levels. Zamioculcas grows well in a cool room.
Zamioculcas will need periodic watering and fertilization. It should be taken into account that after transplantation, it will take some time for the flower to acclimatize to new conditions - during this period, flower growth is not observed. This is normal.
Location
In moderate lighting, Zamioculcas develops better, so it does well in indirect light on eastern or western windows: where the sun's rays only reach periodically.
Watering
For good development, the flower prefers moderately moist soil. To preserve soil moisture, the soil in the pot can be mulched - this will also prevent compaction of the soil and improve the development of the root system.
When watering, you need to pour water until it begins to flow into the pan. At this point, watering is stopped, and the water is drained from the pan so as not to contribute to the development of pests. The frequency of watering depends on the drying of the soil: if the soil has dried to a depth of 4-5 cm, then watering is needed. In winter, the plant needs less watering than in summer.
Did you know? In Tanzania, zamioculcas juice is used to treat earaches, and its roots are used to treat ulcers.
Fertilizer application period
Zamioculcas is fed during the growing season: spring and summer. Taking into account the fact that the plant is transplanted into new soil, it is fed with a half dose of fertilizer to avoid an excess of mineral salts in the soil. This is just as harmful as their lack.
The fertilizer must contain nitrogen, phosphorus and potassium. It is advisable to purchase liquid fertilizers with an equal proportion of the above components.
Possible pitfalls
Some readers ask me why Zamioculcas turns yellow after transplantation? In most cases, excessive watering is to blame, because we are used to watering the plant well immediately after settling in new soil, but this cannot be done. In addition, you can only replant a flower in the warm season, and if you do it in winter, you cannot avoid problems.
Many people also put the plant on the balcony or veranda. And if in the summer this is quite acceptable, then in the spring the nights are still cold and the plant may freeze, which is why the leaves are yellow.
If, during transplantation, the stems of the plant become wrinkled, then, on the contrary, it is too dry. This is the result of the flower becoming thirsty and using the water stored in the trunk. Remember that the lump of earth should be thoroughly wetted when watering and dry between them. Choose a special soil, and the problem will solve itself.
Possible problems of transplantation and cultivation
Signs that a plant has problems:
- lower leaves turn yellow – most likely, you are over-watering the zamioculcas;
- the tips of the leaves turn brown: the cause is dry air and low humidity - organize more frequent watering;
- leaves turn brown and fall off – waterlogging of the soil and the appearance of putrefactive bacteria on the roots.
The main problem that the plant cannot cope with on its own is excessive watering.
If the soil is wet all the time, this leads to rotting of the roots and death of the zamioculcas. To fix the problem, you will need to remove the root ball, inspect the roots and remove any dead or diseased parts, then treat the root system with a fungicide and transplant the plant into another pot with new soil. In the future, you need to ensure that watering is carried out correctly.
Considering the unpretentiousness of Zamioculcas, it will not be difficult for you to transplant and grow this beautiful plant. And it will thank you for your care with magnificent development and flowering.
What difficulties might arise?
Cutting a tuber in violation of technology often leads to the death of the entire plant . Therefore, many gardeners prefer to wait until the daughter formations appear, and for breeding, they separate them from the mother plant using the following technology:
- Remove the zamioculcas from the pot, being careful not to damage the tuber and roots.
- Rinse under running water.
- Separate the daughter branches with a sharp tool along with part of the tuber, roots and a rosette of one or more leaves.
- Treat the cut areas with a weak solution of potassium permanganate, cinnamon or an activated carbon tablet.
- Dry the cuttings at room temperature for a couple of days and plant them in separate containers.
Also, after planting the separated fragments in a container with a substrate, many begin to water them with cold water. The tuber contains enough liquid, so at first the soil is not moistened, but only lightly sprayed with a spray bottle .
Important! Before planting, you also need to disinfect the soil, otherwise there is a high probability that fragile plants will become infected with bacterial infections.
Transplant process step by step
- Prepare a new container, drainage, and soil mixture in advance.
- 24 hours before replanting, water the plant to keep the soil moist.
- When using a new clay pot, soak it in water for several hours so that it does not take water from the soil, and disinfect the plastic pot.
- Pour expanded clay into the pot in a layer of 2-3 cm.
- Pour in the prepared soil. It is advisable to heat it to 25-30 degrees, this will reduce stress for the plant.
- Carefully remove the dollar tree from the old container.
- Conduct a thorough inspection of the root system. Remove damaged or rotten roots, divide overgrown roots for further propagation.
- Place the zamioculcas in the pot, straighten the roots and cover it with soil, lightly compacting it, while the tubers should be slightly on the surface (0.5 cm).
- A small amount of expanded clay is placed on top of the soil.
- Do not water the plant for 2-3 days.
Carefully! Zamioculcas leaves contain poisonous cell sap, so you need to be careful and work only with gloves, allergic reactions are possible.
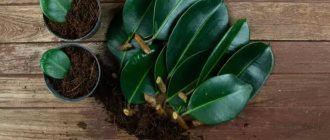
Dollar tree: propagation by leaf
Dollar tree - what is the name of the plant?
The main disadvantage of this method is the too slow development of a new individual. Under ideal conditions for planting material, 2-3 leaves are formed on it per year. Before the procedure, materials are selected: they should not have pronounced deformation or signs of disease. From uniformly colored, large foliage, a young plant develops faster.
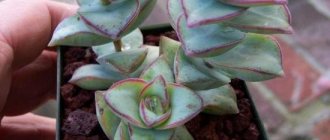
Propagation by sheets
You can grow a succulent plantation according to the following scheme:
- Using a previously sharpened and disinfected knife, cut the leaves at an angle of 45 degrees.
- Leave them to dry for 24 hours.
- 1/3 of the lower part of the workpieces is treated with crushed activated carbon or crushed chalk with a root growth biostimulator.
- The prepared material is planted in a moistened mixture prepared according to the recipe: sand and peat chips taken in equal proportions.
- Seedlings are deepened to a third of their size.
- The plantings are covered according to the greenhouse principle, maintaining the temperature at 22-24 degrees.
Next, you need to ensure proper care. Ventilation is carried out daily, and as the soil dries, it is sprayed.
After a few months, the foliage will dry out, and at the same time small tubers will form - no larger than a pea. After six months, the first leaf will appear - after this, the flower is transplanted into containers with a diameter of 7-10 cm, filled with drainage material and a mixture for succulents. Further care is the same as for an adult plant.
Important! Botanists do not recommend rooting zamioculcas leaves in water with roots. The resulting tubers and roots will be weak, the young plants will get sick and may die.
Zamioculcas: propagation by cuttings
How to propagate a money tree at home
Refers to popular methods of obtaining daughters. Propagation by cuttings is carried out using adult shoots. Young foliage, due to its incomplete formation, is not suitable for these purposes - it does not contain a sufficient amount of nutrients, without which it will not be possible to obtain a healthy harvest.
Important! Cuttings do not always give the expected results. It is allowed to transplant the shoots directly into plastic containers, without creating artificial greenhouse conditions.
Propagation by cuttings
Dollar tree: how to take a cutting
To obtain healthy cuttings, follow these step-by-step steps:
- Sharpen a knife or scalpel sharply.
- The whole leaf is cut off at its base.
- Divide into short cuttings - each of them should have a leaf node with 2 leaves.
- Sections are disinfected with black or white activated carbon.
- Dry for 2 hours.
How to root zamioculcas with a stem
Beginners in floriculture are interested in the question of how to root zamioculcas with a stem correctly.
The scheme is quite simple:
- Small plastic cups are filled with drainage to a third of the total volume.
- Wet sand, perlite, vermiculite, and crushed sphagnum moss are placed on top.
- If desired, the containers are filled with a ready-made mixture for cacti or violets.
- The base of each petiole is treated with a powdered biostimulant.
- The petioles are planted 2-3 mm deep into the ground.
- The substrate around the plant is carefully compacted.
Plantings require lower heating and a high level of humidity - more than 70%. The air temperature should not deviate from 22-25 degrees. As the soil gradually dries, it is moistened with a small amount of root growth stimulator. The first procedure is carried out 72-96 hours after landing.
After 14 days, the first roots appear and watering is increased slightly. New tubers are formed by 7-8 weeks. After their formation, the plant is moved to a permanent place and begins to be cared for as an adult succulent.
Important! The first foliage will appear in six months. In some cases, it is delayed and takes 7-8 months to form. Their curling and reddish film on the surface are not a sign of disease - this is the norm for succulents.
Dollar tree: how to propagate with a branch in water
How does a dollar tree propagate in a liquid medium at home: by rooting a cutting or branch. The whole process takes place before our eyes; its convenience lies in the ability to control all stages.
Procedure:
- A cutting about 8 cm long is cut from the upper section of a whole leaf.
- The stem is cleaned of excess leaf blades, leaving up to 3 top ones.
- Place the cutting in a plastic cup of water and immerse it half its length.
- The liquid in the container is periodically changed or topped up as it evaporates.
Important! The formation of roots will take up to 3 months. After root formation is completed, the plant is planted in a flowerpot filled with soil for succulents.