Growing and caring for plants at home
There are many reasons to start growing herbs, vegetables and berries indoors: the growing popularity of gourmet home-cooked meals, as well as the demand for fresh, local and home-grown produce. Basil pesto, rosemary chicken, fresh oregano pizza sauce, tarragon salmon, cilantro salsa - aren't these reasons to grow your own herbs and vegetables year-round? Considering how far the development of grow lights, soil-based and soil-less substrates, and self-contained hydroponic systems has come today, growing herbs in a special corner of your home is a way to add new aromas, tastes, and even a never-wasting profit to your life.
In this article we will consider the possibility of creating your own home garden using herbs as an example, as a traditional start for the home gardener. Traditionally, herbs were grown on windowsills, under fluorescent kitchen lights, and next to orchids under incandescent lights. The success of these enterprises, so generously described in articles, videos and several books with dubious information, is very disappointing. The light from even the sunniest window will sometimes be enough only for a tiny and rare harvest - a pinch of rosemary for February and a couple of basil leaves for the New Year. Standard fluorescent lights can help herbs survive the winter and even produce some crops, depending on how much light they shine. If the lights are placed more than two feet away from the plants, the best they can do is keep perennials like oregano, rosemary and sage alive over the winter so they can be transplanted back into the ground in the spring, but that won't work. Always.
Basil and parsley die without light on the windowsill
The truth is that in order to grow sufficient yields of herbs indoors, they require long periods of bright light. Powerful light is also necessary for herbs to produce essential oils, which give them their characteristic aroma and taste. Rosemary that slowly dies on a windowsill with six hours of sunlight will not taste even close to rosemary that thrives in the bright summer sun. Growing interest in indoor growing has led to the development of devices that allow culinary herbs to be grown more efficiently. New cool fluorescent grow lights with a special reflector, if placed correctly, will be much better than regular household kitchen lights. The new generation of HID lamps gives the advanced gardener the ability to harvest large, bountiful harvests. If you combine this with the modernization of hydroponic systems, it turns out that the modern gardener has the opportunity (with enough space, of course) to grow his favorite herbs (as well as vegetables and berries) all year round, with yields sufficient to share with friends and even sell in local markets.
To this end, I have converted one corner of my basement into an herb garden that will produce ample harvests of basil, oregano and rosemary for kitchen use, as well as small amounts of cumin, marjoram, mint, chives and sage during their overwintering period, until they will not return to the ground. My motivation came from my love of cooking with fresh ingredients coupled with the questionable quality and high price of herbs in stores.
Growing Herbs Indoors: Think About a Plan
The first thing to think about when planning to grow indoors is the type and quantity of herbs you plan to grow. Will it be potted rosemary, sage or other perennials? Would you like to germinate and grow successive crops of coriander and parsley? What will you need to create the ideal conditions for your plants? Most culinary herbs grow well if indoor conditions resemble a Mediterranean climate, with bright, powerful light and drier, cooler air. Some herbs, such as mint and chives, are less demanding on humidity and light brightness. Planning for a variety of herbs will influence the type of lighting and substrate you will need to purchase.
How much of your favorite herbs you plan to use in your cooking (or want to give to friends or sell) should also factor into your planning. If you're only going to use a pinch of fresh oregano for homemade pizza every now and then, or a little marjoram for sautéed mushrooms, then a few pots on the kitchen shelf under a properly placed fluorescent light should be more than enough. If you, like me, need enough basil to make pesto every week (or for Christmas gifts), or enough rosemary to roast a chicken on Sunday, then more global methods will be required.
Where to grow is another matter. Basements, with their small temperature differences, make it easy to control conditions for plants regardless of the time of year. Attics are usually too hot. Any space in the house itself will do, but many of us don't have the extra space for even a small growing space, let alone converting an entire pantry or closet (which would be ideal). Some grow setups may not fit into your home decor. Others, subject to thoughtful design, can become its central element.
Hydroponic herbs as a central element of the interior
Those who want maximum yields in a minimum space should consider placing their plants in a reflective grow tent or closet. Growing in such small spaces allows you to easily control the conditions: light, temperature, humidity, air circulation, which will allow your plants to thrive. Pots with plants can also be placed on shelves, racks, or hung near a south window or spotlight, but one must understand that such less effective lighting will lead to a lack of growth and little fruiting.
Herbs growing in a grow tent
Using reflective materials to reflect and retain useful light not only increases illumination, but also helps control temperature. You can find a variety of grow tents in various sizes in stores, or you can try constructing one yourself by stretching reflective sheeting or a survival blanket over a simple frame or closet walls. You can also turn an unnecessary closet or nightstand into a grow space (growing space). You can even create a grow space from plastic containers with fluorescent lamps. Creative gardeners are limited only by their imagination and the size of their available space.
It is important to maintain easy access to your plants. Make sure you leave enough space to water and care for your plants. Rearranging potted plants involves some heavy lifting - you need to be sure you can reach and move the pot when needed. There should also be outlets and a water source nearby, and it would also help to have a place to drain the water, but this is not necessary.
First steps
First you need to choose where you will place your plant pots
The first thing you need to do is decide where you will place certain plants. When selecting, consider the following features:
- If you place flowers on window sills located towards the east or west, the light will not fall on the plants all day long. But only a few hours a day. These conditions may suit a number of plants.
- If you place flowers on the windowsills of windows that face south, they will always receive the sun. For the whole day. These conditions are also suitable for a number of plants. In particular, cacti. And also succulents.
- If you place the plant on the windowsill of a north window, the light will not be very bright. And absent-minded. This is suitable for plants whose main growth condition is the presence of dim light.
You can also install additional lighting. In this case, a number of plants will respond positively. In particular, those of them who love having a lot of light. Such plants behave especially well in autumn and winter.
Preparing everything you need
Once you decide where to place the plants, move on to the next step. To prepare all the elements in order to plant a flower. In particular, you will need to prepare the pots. Find the soil. And also prepare drainage.
Consider the following features of planting:
- If you plan to grow cacti and Saintpaulias at home, we recommend paying attention to flat pots. We recommend avoiding massive ones. They are not suitable for use.
- If you plan to grow plants at home that produce a large number of tubers (for example, chlorophytum), then you need to purchase medium-sized pots. The same applies to plants that produce large tubers. For example, amaryllis.
- If you plan to grow large plants, then purchase tubs. In particular, we are talking about ficus, lemons and other similar plants.
About planting container and drainage
Absolutely every container in which you plan to plant a plant must have a special hole. Drainage. It is located at the bottom.
Expanded clay must be placed in the very bottom of the vessel. Just one layer. You can also place pebbles and vermiculite.
As an alternative to a new pot, you can use other similar materials. For example, you can take an old container. And take advantage of it.
Features of planting and transplanting
Remember to disinfect materials when planting for the first time. Or transplant it from container to container. It is recommended to carry out disinfection using potassium permanganate.
Be sure to get rid of those plant roots that have been completely deformed. Or they are sick. We recommend treating the part of the plant that has been cut. To do this, you can use charcoal, which is recommended to be pre-heated.
How often should plants be replanted?
Plants living in the room do not need to be replanted too often. But with a certain frequency. About once every few years.
Plants may require replanting more often. For example, in cases where the pot becomes too small for them. When their roots begin to peek out of it. Exit through the part of the pot that has a drainage hole.
What plants are recommended for purchase if you are just starting to grow them?
At the first stages of mastering the hobby, we recommend giving preference to those plants that are hardy. And they don't require too much maintenance. As well as daily monitoring of your condition.
Read about a particular plant first. Learn about the features of its cultivation. Then select the three main parameters correctly. The place where the plant will be located. The lighting that will be installed for it. A watering regime that will need to be followed regularly.
It is advisable to grow a houseplant in the same way as representatives of its species live. In nature. The plant should be kept in conditions similar to them. This ensures that it can grow.
If you decide to grow cacti, then you need to take into account one feature of these plants. They were created in a part of the planet where it rarely rains. And precipitation appears unevenly. Accordingly, such plants require additional care.
For them it is necessary to prepare the most favorable drainage. Place them in a special sand mixture. It must be soil based.
It is recommended to place the cactus where there is a lot of light. It is recommended not to water too often. Then, when the earthen lump becomes completely dry.
In the spring and autumn seasons, watering should be done approximately once every seven days. In winter - approximately every two weeks. Not more often. These are the most favorable conditions for watering.
What plants should you prefer in the first stages of mastering the hobby?
It is recommended to give preference to caring for the following types of plants:
- Decorative deciduous. These plants love shade. And they are quite hardy to survive in indoor conditions. Pay attention to large sizes. As well as hanging plants. For example, you can buy croton, ficus, epipremnum and so on.
- Beautifully flowering, shade-tolerant. Plants of this type are also ideal for growing at home. Pay attention to the anthurium. And also clivia. Optimal plants to buy.
- Drought-resistant. We are talking about cacti. As well as a number of other types of succulents. When purchasing, pay attention to prickly pear, aloe, and aporocactus. You can purchase other plants of this type. Succulents are very easy to care for.
Effective lighting for growing plants is the key to success
Light is the most important component of your entire growing system. If you want harvests to be frequent and abundant, the light source must be powerful and bright. The type of lamp you use will determine not only whether the herbs survive or not, but also how quickly and confidently they grow.
Office-style commercial fluorescent lights have long been used by home gardeners. They will keep your plants alive and even produce some growth, but the use of modern fluorescent lamps designed specifically for plants will give a noticeable increase in growth. Fluorescent bulbs are affordable, use less electricity than other types of bulbs, and don't produce much heat. They require little maintenance and, when used correctly, it is possible to grow enough herbs for serious culinary enthusiasts. A 150-watt lamp is enough to illuminate up to 1 square meter of area.
Modernization of the spectra and light intensity of modern fluorescent lamps, designed specifically for indoor growing, has led to the emergence of high-power T5 lamps, which are a good choice for the home gardener. A system with T5 fluorescent lamps produces approximately twice as much light as a standard T12 lamp. Again, placing the lamp close to the plants and using reflective materials to focus the light into the grow space will greatly improve your results. Since these lamps produce very little heat, they are suitable for hot areas such as attics, especially if you place the lamps very close to the plants.
Basil under T5 lamps
Those gardeners who strive to get quick and serious harvests should pay attention to gas discharge lamps. They usually range from 250 to 1000 watts. It is very important to choose a lamp of the required power that suits your area. A lamp that is too weak will produce uneven results, no matter how much reflective material you use. A lamp that is too powerful will overheat your grow space and your electricity bills and lamp components will be huge. A rough recommendation for lamp power is 400 watts per 2 square meters of area.
There are two types of discharge lamps: metal halide and high pressure sodium. Both types of lamps require additional ballast - electrical equipment that allows you to create the voltage and current required by the lamp. Metal halide lamps, due to their blue spectrum, are recommended for growing green herbs, as it specifically promotes the growth of green leaves. High-pressure sodium lamps (usually the HPS type) with their white-red spectrum are best suited for the growth of flowering plants (use of HPS lamps can cause unwanted flowering of herbs such as basil, followed by the formation of seeds). Sodium lamps are best suited for flowering herbs that are valued specifically for their flowers: chamomile, calendula, borage and others. The correct placement of the lamp and reflector is very important. You should be able to lower the lamp as low as necessary and then raise the lamp higher as the grass grows. To do this, you need to hang the lamp using ropes or chains, securing them to strong frames so that you can move them up and down with ease.
A grow tent with a HPS lamp can produce huge yields
LED lamps are also slowly gaining popularity. Advances in LED technology have made them suitable for growing herbs on a small scale, but the cost is still too high for the average gardening enthusiast. They have a number of advantages: they use less electricity, produce less heat, and last five or six times longer than HID lamps. They also do not require additional ballast. How much all this justifies their high price is still an open question. However, there are examples of successful use of LED lamps, in addition, LED lamps are available in different spectra: lamps with more blue light are better for growing herbs than others.
Connecting electricity to lamps and ventilation requires special attention. You'll need to design your grow space so that all electrical equipment - lights, sockets, plugs, wires, ballasts - are elevated above the surface and away from wet areas and water. Water and electricity in the same place always pose a potential danger. Although most home gardeners do not need this, larger and more complex systems that use large amounts of electricity should be connected through their residual current system. If you are not well versed in connecting electrical appliances, then it is better to ask a qualified specialist for help. As always when it comes to electricity, safety is key.
The light source should be as close to the plants as possible without burning them. You can check the proximity of the lamp by placing the back of your hand over the tops of the plants. If your hand is too hot, then the lamp should be raised higher.
Multi-level cultivation under fluorescent lamps
Discharge (metal halide and HPS) lamps must be connected to ballasts that match them in type and wattage (some ballasts can be connected to both types of lamps if the wattage is the same). We advise you to check this information with the lamp seller.
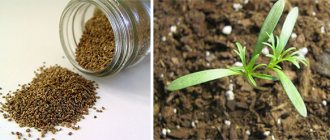
How to grow plants from a leaf or stem
Not every stem or petal will produce roots for propagation. However, if you want to propagate a houseplant from its leaves, it is best to do so in the spring.
Reproduction using cuttings and leaves What you need to do first is to choose the strongest and healthiest shoot or leaf. The length of the cutting should be at least seven centimeters; if it is a leaf, then it should be the largest and not diseased. Make a cut with a blade or sharp knife. The stem must be cut slightly below the leaves, and if it is a leaf, then it must be cut across. Next, place it in soil or water.
Secrets of success in propagation Several cuttings or leaves should be planted simultaneously, since not all so-called shoots always take root. Almost all shoots require moist air. Cuttings and leaves should be removed from direct sunlight. Bring the temperature closer to 18 degrees.
Layering You need to choose the strongest shoot of the plant, you need to press it down to the ground in another pot, this can be done, for example, using a piece of wire. This process takes quite a long time. However, you can speed up this process by first, before pressing it to the ground, you need to lightly cut this semi-process. It can be cut from an adult plant only after complete rooting.
Offshoots This name is usually given to shoots from the sides of plants. They should be cut as close to the main plant as possible, so that the root remains on it. It will be possible to plant it after it becomes one third the size of the main plant.
Whiskers With such plants everything happens like strawberry tubers. When a plant has a tendril, it already has a root and can be safely cut and planted; if there are no roots, then dig it in and cut it after good rooting.
Air layering This is a method for overgrown plants that have lost their appearance with long stems without leaves. The stem should be cut at the height you would like the plant to be. Remove the bark 15 millimeters from the bottom. Wrap the bottom in polyethylene, first covering it with sphagnum moss, or put it in water and wait two to three months until the roots appear. After a good root system appears, you can plant the flower in the ground. In addition, remember that the pot with the root with the stem of the flower remaining in it should not be thrown away; it must continue to be watered and cared for, because after some time it will sprout a new branch of the plant and will delight your eye with its flowering and growth.
Soil or hydroponics?
Another topic to consider is will you be growing in soil or using a hydroponic system (growing without soil)? It has always been believed that vegetables and herbs grown in the soil naturally taste better. With the development of advanced hydroponics solutions and fertilizers, this opinion is beginning to change. A variety of commercial and homemade hydroponic systems make it easy to fertilize your plants, and a selection of store-bought nutrient solutions can give your plants everything they would get from soil. It is always best to talk to your hydroponic system supplier about choosing a specific fertilizer.
Growing in soil is recommended for beginners. Gardeners who are fond of growing in vegetable gardens can easily transfer their experience to home conditions. If there is enough drainage, the soil is of high quality and well fertilized, and the plant is given at least some attention, then it will be quite easy to grow. Again, try to create Mediterranean conditions - dry, cool air, not too much fertilizer, a neutral to slightly acidic pH level (between 6 and 7) - and your herbs will thrive.
Growing in the ground won't be as expensive if you have low yield expectations. Soil is also more forgiving than hydroponics. If you miss watering or make another mistake, the plants will most likely be fine. Mistakes in hydroponics can lead to faster and more disastrous consequences.
Fortunately, modern hydroponic systems do not allow the gardener to make too many mistakes. When done correctly, hydroponic growing will yield faster and larger harvests. There are many different ways to design your hydroponic system, but even the simplest solutions require a little work, while more complex ones can be comparable in cost to commercial solutions and slightly beyond the capabilities of a gardening enthusiast.
Growing herbs hydroponically is easy.
Commercial hydroponic systems come in a variety of shapes and sizes. The wick system, which uses the capillary effect, is the simplest. Automatic watering systems may use a mechanical valve that begins watering when all of the substrate is dry. Intermittent flooding systems, as the name suggests, pump water to the roots and then allow it to drain so the roots can absorb oxygen. Deep water culture systems (DWC - Deep Water Culture) pump air into the solution using compressors, saturating it with oxygen.
Modern hydroponic system
The correct choice of substrate - this can be coconut fiber or other soilless mixtures, as well as various additives - is an individual decision for each gardener, depending on his preferences. Coconut fiber is highly valued for its ability to saturate the roots with both moisture and air. In addition, it is processed into compost. The experts at your hydroponic system store will help you choose the right system and the substrate that best suits it.
Ventilation and temperature in the grow space are also a very important issue. Herbs like cooler temperatures than you might think. Maintaining the ideal temperature - between 17 and 22 degrees - can be challenging if you have hot, powerful bulbs installed. Use fans or other air exchange methods to keep temperatures under control while also refreshing the air your herbs need to grow. Plants with broad leaves such as basil can absorb all the carbon dioxide from an enclosed space in a few hours, which is what promotes rapid growth. Constant air exchange will prevent this problem. If your conditions are too extreme, such as if you have a very humid basement, then you will need a dehumidifier to maintain the ideal humidity around 15-30%.
Features of growing plants
If you have experience growing herbs in an outdoor garden, this knowledge will come in handy when growing indoors. Annual plants such as basil, coriander and lemon balm can be easily grown from seeds. Of course, if you dig up basil from the garden before the first frost, it will continue to bear fruit. But you'll probably need new plants to harvest continuously and start growing again in the spring. Do not place seeds directly under a powerful lamp. Wait until the plants send out their first true leaves before placing them in a well-lit area. Fast growing plants such as coriander will not recover once cut, so you will need a constant stream of new growth, but be aware that coriander transplanted from an outdoor garden will not grow as well as one grown from seed. Dill and coriander like cooler air; too hot conditions can inhibit their growth or cause them to bloom prematurely.
Various herbs in a hydroponic system
To germinate parsley seeds, you need to crack the outer hard shell. This can be done by soaking the seeds in warm water or freezing them in ice cubes. When it's time to plant, simply place an ice cube containing the seeds in a germination cup.
Perennial plants such as marjoram, oregano and rosemary are usually difficult to grow from seed; it is better to purchase their cuttings. Sage is a great example in this regard because a plant can take two years or more to mature. Grow sage and other perennials in large pots for faster growth. Transplanting mature perennial plants into your home garden will allow you to constantly obtain fresh harvests.
Choose basil not only by taste, but also by size, as much as the height of your space allows. Sweet basil grows more compactly, while lemon basil or, for example, the Magic Mountain variety can grow up to a meter or more.
Thyme, despite its Mediterranean roots, loves good watering. However, make sure there is adequate drainage too. If your plants are growing well, prune them - this will help them grow even better. Lavender needs less moisture during the winter than the soil outside. Allow the soil to dry completely before watering the lavender again. Instead of water, fill the lavender with light.
Rosemary grows best if it has the opportunity to grow a large root system, so transplant rosemary into deep pots. Long branches of rosemary from the garden can be cut in August and transplanted into pots, then they will take root and grow well. Cut off about 20cm of the stem, plant in loose soil and place in a cool, shaded area. It will be better if you dip the tip of the stem in a solution of special root hormones before transplanting. Tarragon needs to be divided every couple of years to keep growth going. Replanting before the onset of winter is a good reason to divide the tarragon into different pots. Thyme is difficult to grow from seed or shoot. Buying a mature plant is the simplest solution.
How to grow a new plant
When the leaf cuttings are ready, you can choose one of two ways to root them.
Rooting in water
The planting material is placed in a container with water, covered with a plastic bag on top to maintain moisture, and wait for the roots to appear. If necessary, add water.
When the roots grow to two centimeters, the plant is ready to be transplanted into light nutrient soil.
Rooting in soil
The cut leaf is immediately placed in a pot with soil and covered with a glass jar or film. Water when the soil dries with water at room temperature.
The first leaves will appear in two weeks. They are gradually prepared for indoor conditions, first by removing the shelter for a short period of time.
For any of the chosen rooting methods, containers with cuttings are placed in a bright place, but protected from direct sunlight.