Learn to draw a flowerpot with daisies step by step
When drawing flowers, you can always give free rein to your imagination and creativity. You can use different techniques, materials, implement any ideas and play with the difference in colors. On our website we already have a sufficient number of creative works that depict bouquets, a drawing of a lily of the valley, a rose or a dandelion, a vase, etc. In this drawing lesson we suggest drawing a flowerpot, or rather, indoor daisies in a pot. The stages of work are not at all difficult. Follow the instructions carefully and you will succeed.
1
Auxiliary lines
We recommend drawing two even cross lines in the center of the sheet. Use a ruler for this. Starting from them, it will be much easier to draw a picture.
2
Top of the pot
Indoor plants are usually planted in beautiful clay pots. They have a peculiar shape. The upper part protrudes slightly and differs in size.
3
Bottom of the pot
We depict it in the form of a trapezoid. It is enough to add two straight lines on both sides. And draw a semicircular bottom.
4
Flowers
For example, we chose to draw daisies in a pot. Carefully repeat the details as in the picture. If you have any difficulties, you can look at more detailed instructions on how to draw a daisy step by step.
Erase the lines that intersect.
Using the same principle, we depict the following flower heads. We start with the simplest elements – the middle.
Add the petals, first on one side.
Then - on the other.
5
Erase the lines
We will no longer need auxiliary parts. It's time to get rid of them. Erase carefully with an eraser.
6
Greenery
Like most flowers, it has green leaves. We draw them in the form of thin, sharp shapes that resemble tongues.
7
Color it
To make the drawing play with different colors and look more interesting and impressive, it needs to be painted. You can offer this to your child as a coloring book or do it together. The choice of color is at your discretion.
8
Collage
9
Choose the appropriate color and draw on the site
If you like to color online, we suggest using online coloring of flowers in a pot. Your child will definitely love this activity!
Choose how you want to paint.
Video for the material
If you see an error, please select a piece of text and click
Ctrl+Enter.
Did you like the instructions?
6 Yes No 0
More instructions on this topic:
evrikak.ru
Example of lesson notes
Before the lesson, you need to choose a popular indoor flower that almost every child has at home, for example, a cactus or violet.
Template for lily
Progress of the lesson using the example of a lily:
- Introduction to the topic. Read a riddle or fairy tale where the central character is a flower. Invite the children to guess for themselves what they are talking about. Say the name of the plant.
- The preparatory stage is the first acquaintance. The class will need a live example of a lily or a visual large-format photograph. Let us examine the structure of the plant: stem, leaves, flowers. Invite the children to describe it: what color and shape the leaves and inflorescence are.
- A game. Invite the children to create conditions in which the flower can live in the classroom. To do this, you need to divide all the guys into teams and arrange a tournament. The goal of the competition is to find the right place where the flower will be comfortable (window sill, balcony). The second stage of the game is to find the items that are needed to care for the lily (a watering can with water, a sponge for cleaning leaves).
- After completing the game, explain what flowers love (sunlight, useful fertilizers, water). Children can talk about their experiences caring for house plants.
- Interactive quiz on the topic: “Why do you need plants at home?” It should be emphasized that they produce clean air and decorate the room.
- Move on to the main part of the lesson - drawing. Explain the sequence of actions, and also help draw a flower.
- Exhibition of works.
- Results of the lesson. Conducting an interactive survey to consolidate acquired knowledge.
How to draw ficus
We continue the series of articles “drawing indoor flowers” or “drawing tropical plants”, as you like. Of course, I like tropical plants in nature - let them grow free in their own climate. But they were not asked, they were domesticated and now they are considered indoor animals. Today we are drawing ficus. There are many types and varieties of them. My idol is the rubber ficus - it’s so big! Large leathery leaves, a strong trunk - a tree! This cannot be bent into fashionable bonsais; I would never believe that this ficus can be forced to be crushed for the whim of aesthetes.
Ficus drawing - step by step lesson 1
It is clear that we will learn to draw a ficus with the goal of, in principle, mastering the approach to depicting a tree with foliage. Let's start with a pencil sketch:
The plant is not yet very large - the trunk is relatively thin and has few branches. But there are already a lot of leaves - they are large, oval and located at different angles. Yes, yes, children, unless specifically warned, will simply draw ovals evenly hung on the branches, but we understand that in reality you cannot arrange leaves in a line. But there is still a certain pattern - the leaves are all directed outward from the trunk:
The width of the oval depends on the angle at which the sheet plate is turned towards the viewer:
Well, this is how the ficus drawing turned out. Let's color the leaves - they are shiny, dark green, the midrib is light and clearly stands out:
Let’s imagine that the ficus grows in its own India and we won’t paint on the pot or tub. And I’ll tell you: it’s not a good idea to teach children to draw all the flowers in a row in pots or vases - then they won’t be able to adapt and depict “free” plants.
And one more lesson - shorter.
Ficus drawing – 2
Sketch:
This ficus is more densely leafed, the trunk and branches are practically invisible and the leaves are arranged more interestingly, and, by the way, pay attention - the younger leaves are smaller than those that have already fully developed.
Let's color the picture with ficus. Let’s mark the highlights on the glossy leaves; this will make it possible to fragment the picture so that the crown does not appear as a dark green monolith.
Marina Novikova told you how to draw a rubbery ficus (elastic).
Parts of plants for children: diagrams and pictures
Plants play an important role in our lives. We know indoor and wild plants. Indoor ones grow on our windowsills in pots, and many children are very familiar with them.
If you are introducing children to plants in class, you can try asking the question: what houseplants do children know? Surely they will name at least a few.
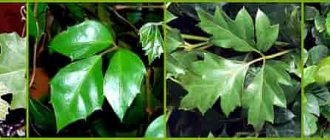
Medicinal plants are also of great importance: many medicines are made from them. When telling children about medicinal plants, do not forget to mention plantain. Children should definitely know what a plantain looks like. The kids run a lot outside and often fall, scraping their knees. Plantain can be the best medicine for wounds and scratches if you apply a clean leaf to the wound in time. Plantain is our reliable friend on hikes, when there may not be medicine at hand. The juice of this plant is often infused with alcohol and drunk for colds. So every child should know the plantain by sight.
What's the best way to introduce children to plants? Images, coloring pages, riddles and poems on our website will help with this.
Material and equipment
During the lesson, children should have before their eyes an example of the indoor flower that will be discussed. Therefore, you need to either bring a live copy, or print out a high-quality and color image of it.
Important! The plant should be similar to the sample that is intended to be used as a template for the drawing.
Lilies in pointillism style
To play you will need:
- watering can or water bottle;
- several identical small-format images of plants for teams.
Each child will need while drawing:
- blank A4 sheet;
- colored pencils, paints (watercolor or gouache);
- brushes, jars of water, palette as needed.
How to draw a blooming cactus in a pot
Once upon a time, the cactus was a rare plant that could be seen in the deserts of Africa or America. Now we consider the cactus to be an ordinary houseplant. In the south, some cacti are prepared as dishes. Some types contain liquid beneficial to the body. The cactus absorbs maximum moisture and then grows quietly in the desert without requiring much water.
We suggest you draw this plant. But not desert, but homemade - in a pot.
1
The basis
Draw a horizontally elongated oval.
2
Top
Draw two slightly curved lines down and connect them with a vertical line. You will get the top of the pot.
3
Bottom part
Draw two lines down, tilting them at a slight angle. Connect.
4
Plant
We begin “planting” the cactus. Draw a large circle, part of which intersects with the pot. Draw the shape using a compass.
5
Extra lines
Carefully erase the circle lines that intersect with the pot.
6
Recesses
The cactus is not perfectly straight. It has depressions like grooves.
Draw the other side of the plant as well.
8
Big spines
It's time to decorate the cactus with spines.
9
Little thorns
Decorate the rest of the lines with small thorns.
10
Additional lines
The last detail is two additional vertical lines on the cactus. Now the drawing can be considered complete.
11
Coloring
Color the cactus any shade of green. The rest of the details can be colored as you wish.
12
Collage of stages of drawing a cactus
If you see an error, please select a piece of text and press Ctrl+Enter.
evrikak.ru
Pencil drawing lessons - plants
Plants are a living part of the world around us. Take a pencil and paper, using the diagram, carefully repeating all the lines, draw a picture.
Pencil drawing lessons on the theme of plants - trees, leaves, flowers. By drawing simple and more complex pictures of nature, children learn more about plants and learn to see the world around them creatively.
Let's get acquainted with visual lessons-schemes of pencil drawing for children.
Drawing "Tree"
Scheme of drawing a tree in pencil
Material: pencils and paper
Complexity: ••
Drawing "Leaf"
Scheme of drawing a leaf with a pencil
Material: pencils and paper
Complexity: ••
Drawing "Mushroom"
Scheme of drawing a mushroom in pencil
Material: pencils and paper
Complexity: •
Drawing "Chamomile"
Scheme of a chamomile drawing in pencil
Material: pencils and paper
Complexity: •••
Drawing "Tulip"
Sketch of a tulip drawing in pencil
Material: pencils and paper
Complexity: •••
Drawing "Mimosa"
Scheme of mimosa drawing in pencil
Material: pencils and paper
Complexity: ••
Drawing "Rose"
Scheme of drawing a rose in pencil
Material: pencils and paper
Complexity: ••••
Drawing "Sunflower"
Sketch of a sunflower drawing in pencil
Material: pencils and paper
Complexity: •••
Drawing "Birch"
Scheme of a birch tree drawing in pencil
Material: pencils and paper
Complexity: •••••
Drawing "Pine"
Scheme of drawing a pine tree in pencil
Material: pencils and paper
Complexity: •••
Drawing "Herringbone"
Scheme of a herringbone drawing in pencil
Material: pencils and paper
Complexity: ••••
To make drawings on paper more colorful, you can take colored paints and color the resulting drawing. And from several drawings you can make a gallery of flowers and plants.
xn—-8sbiecm6bhdx8i.xn--p1ai
Lesson Objectives
This lesson has three main objectives:
- educational;
- educational;
- developing.
Note! During the GCD, children should gain new knowledge about why plants are grown at home and what care they require.
Testing preschoolers for school readiness according to the Federal State Educational Standard
It is also the responsibility of the teacher to explain why it is important to take care of flowers.
By drawing flowers, children will be able to:
- practice drawing straight lines without a ruler;
- learn not to go beyond the outline when coloring;
- mix several shades of the same color.
flower for drawing step by step with children
The floral theme is one of the most beloved in creativity. Observing gardens, flower beds and even indoor plants, a child from a very early age receives a lot of different impressions; by the age of 6-7 this topic seems familiar to him and therefore accessible. Both at home and in art lessons, flowers especially often appear in children's drawings. They have practical uses: tulips and lilies of the valley for greeting cards for March 8, and carnations for Victory Day. The variety of colors in nature, the richness of their shapes and shades allows us to use step-by-step drawing techniques with maximum benefit for children. Starting with simple pencil sketches, you can gradually increase the complexity of drawing techniques and develop new skills.
How to draw daisies
A simple and delicate wildflower lends itself easily to pencil, but looks even more beautiful in watercolor.
Make sure that the child is provided with everything necessary.
He will need:
Stages of drawing a daisy
- We start with a pencil sketch. The flower should occupy the top half of the sheet of paper, with an evenly small distance to the edges.
- Paint the petals white. We draw the brush from the edge to the center, while changing the angle of the brush and turning the sheet as convenient.
- Fill the middle with ocher, leaving the very bottom unpainted. Let's make it darker. Using a toothpick, add a few brown, white and green dots in a circle around the middle.
- Using the side of the brush, draw a green line—the stem of the flower.
For children, chamomile is one of the most convenient summer flowers that can be combined into a bouquet when painting step by step with watercolors. At the same time, pay attention to the competent construction of the composition. It is advisable to take an odd number of flowers of different sizes and “maturity” and arrange them evenly.
How to draw roses
The scheme for drawing a rose with paints (watercolor, gouache, etc.) is suitable for children who have been creative for a long time and already know a lot. You will need the same supplies as above, just without the toothpick.
Stages of drawing a rose
- We create a contour drawing of the bud in pencil or gouache (the first option is recommended for not very experienced artists, the second for more advanced ones). Lightly paint it with a neutral shade of red, not too light and not too dark.
- We accent the edges of the petals with paint of a darker shade.
- Add a large spot in the middle with white gouache and lighten the edges here and there.
- Draw the stem and leaves. Using darker gouache we add thorns and make the stem voluminous. Draw the veins on the leaves.
- We emphasize the stem and edges of the leaves with brown gouache, and the spots on them with white gouache.
- We make a light blue background, starting from the upper left corner: here it is the most saturated, then it becomes more and more transparent. We leave blue spots here and there.
How to draw tulips
To paint tulips, we suggest trying acrylic paints. The child will get acquainted with some new techniques and discover the possibilities of this bright, juicy palette.
Prepare
- acrylic paints in tubes
- paper
- brush
- container with water
Stages of drawing a bouquet of tulips
- Create the background. To do this, squeeze out drops of yellow and white paint onto the entire surface of the sheet and begin to brush it, as if smearing them. In the upper part we make the background more transparent, for this we add water with a brush. Let the sheet dry.
- Using a wide brush, pick up yellow paint and make the first petal approximately in the middle of the sheet, and others nearby to make a flower.
- We draw several of these flowers, placing them in the middle horizontal third of the leaf.
- Using a smaller brush, paint the veins on the petals with orange and red paints.
- We draw green stems and leaves, use different shades of this color.
Acrylic paints are suitable for painting on wood, plywood, plastic and other surfaces. A child can use such a scheme to create a real picture or decorate some interior items.
fruktoviysad.ru
Practical part of the lesson
After a brief introduction to the theory, students should begin drawing. The plant is a great way to learn how to draw long straight lines without a ruler, mix different shades of green, adding yellow, blue or brown to the paint, layouts on a sheet (the drawing should be large enough, located in the center).
Didactic games on FEMP in the preparatory group
Suitable techniques for drawing in the senior group:
- pointillism - drawing with dots, suitable for watercolors;
- “wet on wet” watercolor is suitable for painting large areas (background, leaves, pot);
- gouache, but you need to explain how to mix colors to convey shadow and light;
- colour pencils. Attention should be paid to the contour beyond which you must not go.
Example of step-by-step drawing of flowers
To create a creative atmosphere, you can turn on music. It should be a calm melody without words so that it does not distract the children. It is worth considering that a song that is too cheerful and fast will undermine the calm.
Important! The musical accompaniment should not be too loud so as not to cause discomfort.
How should drawing “Indoor Plants” proceed step by step (senior group of kindergarten):
- Organize your workplace.
- Make a composition on a sheet of paper. Mark the location of the inflorescence in a circle in the center, the stems with lines, and the leaves with ovals.
- Draw an outline with a simple pencil.
- Explain the features of the technique chosen for drawing.
- Paint over in stages: first the background, then the light areas of the flower, then the dark ones.
- Dry the drawing.
- Use a brush with a minimum of water to draw details (veins in leaves, highlights).
Works of the children from the senior group