Violet is a delicate and beautiful plant that is liked by many housewives. But once you buy one flower, you immediately want more. There are a large number of species and subspecies of violets, and to purchase them all you need to spend a significant amount. That is why flower lovers often prefer to propagate their violets, and share with similar lovers of home flowers.
But, in order for the flower to grow healthy and constantly delight you with its appearance, you need to plant it correctly in a pot. How to do this without mistakes, how to prepare for planting, what soil to choose, and much more we will consider in our article.
Transfer
Deadlines
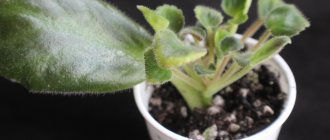
When, next to a rooted Saintpaulia leaf, daughter rosettes grow to sizes of 3-5 cm, this is a signal for replanting and dividing the plant.
Divide the young plants so that each one has 2 leaves with a growing point and several roots. To ensure that plants tolerate transplantation and division well:
moisturize the soil in the pot well; take out the plant along with a lump of earth; carefully shake off the soil from the roots by hand;
small children are separated from one another using a needle.
Transplantation of children.
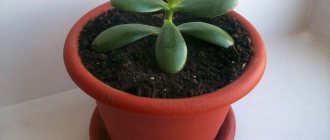
For such tiny plants, pots are selected whose diameter does not exceed 4 cm. A mixture of soil and perlite is poured into them, planted to a depth of no more than 1 cm and kept under cover for about 10-14 days.
Technology
When the diameter of the rosettes becomes 1.5-2 times the diameter of the pot, the violets are transplanted to a permanent place of residence. For this:
select a pot with a diameter of about 6 cm with drain holes; pour a drainage layer on the bottom; add soil mixture for violets;
moisten the lump of earth in the pot where the plant is located; carefully remove the Saintpaulia with a lump of soil; plant the violet in the prepared pot; add soil mixture from the sides, slightly compacting the soil.
Priming
The soil mixture for Saintpaulia must meet certain requirements. The substrate must be:
- loose;
- fertile;
- moisture- and breathable;
- have a slightly acidic pH.
Many violet lovers prefer to prepare the soil for planting themselves. A mixture of turf, coniferous, leaf soil, compost, sand and peat is suitable for this. Vermiculite and sphagnum moss are used as leavening agents.
With big roots
Instructions on how to properly plant a violet with a leaf with a root more than two centimeters long:
It is necessary to stock up on suitable soil and a pot with a diameter of no more than 10 cm; Place a drainage layer on top and a little soil mixture at the bottom of the prepared pot; They spill the plant; Carefully remove from the old pot, cut off the lower yellowed leaves;
Very long roots can be shortened by 2/3 without harm to the plant, sprinkled with activated carbon; Plant a plant, add soil to the sides, compacting it a little;
Water the Saintpaulia.
Roots that are too long can be cut off.
Potty requirements
Before planting violets in a pot, it is necessary to correctly determine the dimensions and material of the container. According to the standards, a pot with a diameter 3 times smaller than a violet rosette is optimal. If the dimensions of the pot do not correspond to the proportions of the bush, there may be no flowering. In a container that is large for the variety, the soil will oxidize due to the lack of nourishment for the roots.
The height of the pots should be up to 10 cm, because Saintpaulia's root system is shallow. For regular flowering, the roots must densely fill the pots.
Miniature species are grown in containers with a diameter of 4 cm. Standard varieties are planted in pots 5-9 cm in diameter. Adult bushes are placed in 9-11 cm tubs.
To grow Saintpaulias, pots are used from:
- peat humus raw materials;
- plastic (thin, dense);
- clay, ceramics.
For planting Saintpaulia cuttings, compact peat-humus containers or plastic glasses are optimal.
Pots made from dense polymer raw materials are practical, budget-friendly, light in weight, and have a wide range of textures and shades. Plastic containers do not require complex care and disinfection. The decorative characteristics of the products are average.
Ceramic pots are aesthetically pleasing, durable, allow air and moisture to pass through, ensuring stable development of the plant’s root system, and prevent sprouts from rotting. However, the products are massive, high in price, and are not recommended for glass and plastic shelving. It is necessary to take into account the rapid drying of the soil in clay containers and ensure frequent watering. Ceramic products are durable, but after replanting the containers must be disinfected.
The bottoms of pots for Saintpaulia should have holes of at least 2-3 mm. The tubs are complemented by trays to collect water and prevent fungal plant diseases.
Why don't homemade violets bloom?
There is an opinion among amateur flower growers that Saintpaulias, better known as violets, are not picky in their care and, when planting them at home, they count on the year-round availability of beautiful flowers of different shades and a pleasant aroma inherent in many varieties of this species.
Disappointment from the fact that the plant quickly develops leaves, but no flowers, occurs quite often, because caring for a violet involves more than just watering.
The reasons for the lack of flowering for a long time may be associated with the following factors:
Lighting: its duration and intensity directly affects the formation of the violet peduncle. Saintpaulia loves light and its lack causes improper development of the plant, in which flowering may not occur at all. When choosing a place for a young flower, make sure that it receives good sunlight, but so that it does not burn the leaves. Northern and western window sills are suitable. In the south, especially in the summer, greenery will suffer from excess direct rays. Remember! Regardless of where the plant is located in the house, it needs 10-12 hours of daylight, otherwise it suffers from lack of sun. To achieve this goal, a combination of natural and artificial lighting, if necessary, is well suited. A signal that Saintpaulia does not have enough light will be the stretching of the leaves - they will be drawn to the light source if the place for the flower was chosen incorrectly. Humidity and watering can also affect the natural development of flowers. Saintpaulia does not tolerate drought or excessive watering. In both cases, the plant loses its beautiful appearance and begins to hurt. Abundant watering leads to rotting of the root system, and its lack leads to drying out of the ground part of the flower. It is optimal to use a tray with water for watering, this way the violet will absorb the moisture it needs. The remainder needs to be drained
With the top watering method, you should carefully apply water under the roots, without touching the leaves and rosettes, as water can harm them. Important! Another important factor when adding water is its temperature: in no case should you use cold water directly from the tap . The flower prefers liquid at room temperature, which has settled well. In their natural habitat, violets grow near bodies of water, and they require a constant level of humidity for full growth
A good solution in the house would be a container of water standing next to the flower. You should not spray Saintpaulia with cold water, especially in winter; spraying is permissible only in the hot season, but only with warm water and not very abundantly. Incorrect room temperature can also lead to a lack of flowers, in particular, if it is too high, the optimal option for a plant year-round is 16-20 degrees. In order for Saintpaulia to delight with flowers, it must be fed frequently; in the absence of the required amount of fertilizer, the soil quickly loses nutrients and the plant has nothing to draw strength from to bloom. For violets, the composition of the substrate in which it lives is important. If its composition is incorrect, it will not only not bloom, but will also not be able to develop normally. The easiest way is to buy a substrate for Saintpaulia in a store, but you can prepare it yourself. You should not take hard soil; you must add baking powder and fertilizer to the mixture. Since the flower has a delicate root system, it needs a substrate that is light in consistency. The size of the flowerpot in which Saintpaulia is planted also affects flowering. You should not replant it in large and spacious pots, otherwise you will end up with an ornamental deciduous plant without flowers. Diseases and pests can also affect flowering, since if they are present, all the forces of Saintpaulia go to fight them. If traces of insect life appear on the plant, it should be treated immediately, otherwise it will quickly die. The same applies to signs of various diseases, which will be expressed in a deterioration in the appearance of the violet.
In addition to these reasons for the lack of flowering in the type of indoor greenery in question, you should also know the characteristics of the variety grown at home. Each variety has a certain flowering period and for some it is not long.
Proper propagation from leaves
Another way to breed violets is the cutting method, or simply growing from leaves. Growing violets from leaves also has its own characteristics:
- The very first, so-called pot for the leaf, should be an ordinary glass of water. The point is to develop the root system of the seedlings. Boiled water is used to germinate roots.
- The first step is to disinfect the sprout; to do this, add a little potassium permanganate to warm water, dip the leaf in it, and let it sit for several hours.
After the disinfection procedure, a new container or plastic cup, previously washed, is taken. Pour boiled water with the addition of activated carbon into a glass.Note! The sprout is placed in a glass to a depth of about 2 cm. The cut should not touch the walls of the dish; for this you will most likely need to fix it with something.
If the water starts to evaporate, do not forget to add it . Depending on the variety of violet, the appearance of the first roots may occur after 3 weeks.
Rooting of leaves into the soil occurs in a small container, one-third covered with fine drainage and the rest of the soil.
The cuttings are planted at a shallow depth so that there is access to oxygen to the still weak root. The soil around the leaf is compacted and moistened, after which the glass is covered with film and placed in a warm place with sufficient sunlight. The plant remains in this form until small leaves begin to appear on the cutting, which means that the rooting of the leaf was successful.
You should avoid transplanting the cuttings directly into the soil after cutting them, since the root system is not developed and the soil is saturated with various bacteria and parasites.
From the video you will learn how to grow a violet from a leaf:
Leaf with roots
Among people who love and grow violets, there has long been a certain confrontation: how to plant violets - with or without roots? But the majority is still inclined to planting material with roots. Let's look at how to properly plant a violet with a leaf and a root.
To plant a leaf, you need to prepare the soil with absolutely the same composition as for cuttings without roots
When preparing a violet leaf, you need to pay attention to the veins on the leaf. At least one vein must be present
It is from this that the root system will develop when you plant the cuttings in the ground.
Next, the cutting must be protected from various harmful bacteria with which it may be infected. To do this, prepare a special solution of copper sulfate. If this is not available, make a regular soap solution and rinse the cutting
It is important that the water temperature not only in this, but in other, for example, irrigation liquids, is at least twenty-five degrees. Cold water, again, promotes rotting
If you see that the rotting process has begun, simply cut off the infected tissue with a sharp knife.
There is no need to worry that the cuttings will not take root - the roots that appear will quickly begin to grow and hold the leaf in a straight position. Among the advice from experienced gardeners on how to plant violets, there is one essential one. After you have planted the leaf, cover it with film. This will create the greenhouse conditions necessary for development. We looked at the question of how to plant violets with leaves and roots. But there is another way.
Step-by-step planting instructions
Beginning flower growers need to determine the order of stages when planting violets. To root a young plant or plant a large bush (this is done once every 6-9 months), you need to determine the size of the pot. When planting a new shoot, the ratio of container to rosette diameter is 1:3. A pot that is reused must be disinfected.
A layer of up to 1/4 of the drainage composition is poured into the container, covered with a layer of sand and prepared soil for Saintpaulias. The plant is then placed in a pot. Soil is gradually added to the container, distributed between the roots and compacted. The plant must be watered abundantly.
The adaptation period for Saintpaulia takes about 14 days. The temperature during this period is maintained at +24°C. When growing small sprouts, it is necessary to organize a greenhouse made of covering material.
When planting a bush, it is recommended to avoid exposing the plant to direct sunlight. Dry indoor air is also not suitable for Saintpaulia sprouts. It is a mistake to place the plant in dense soil and excessively deepen the roots that appear.
Before planting violets correctly, it is important to consider the microclimate of the room. After rooting the seedling, the temperature can be maintained at +22…+24°C. Young plants require plenty of soil moisture and the addition of perlite to prevent damage to the root system.
When breeding Saintpaulia, the humidity level in the room is maintained at 50-60%; To grow adult bushes, it is enough to maintain 50% humidity.
How to grow an adult plant from a baby?
You can raise children yourself or trust store specialists:
- If you grow the babies yourself, then when they appear on the leaf, do not rush to separate them. This is done when the rosette reaches a size of 4-5 cm and has a pair of leaves;
- If you bought a baby, then do not rush to transplant it into your pot. Give her time to get used to the ground. And after 2 weeks, replant.
Plants in the stage between baby and adult are called “starters”. At this stage, the plant is transplanted into fresh soil. At the same time, all the lower, small leaves are torn off, this contributes to the formation of a beautiful and regular rosette.
Stages of violet development.
There are several important points on how to grow a beautiful rosette:
- if the “sterter” is constantly flooded, an irregular rosette will form, the leaves will bend, and the middle will become denser;
- At the stage of rosette formation, lighting plays a very important role. In order for it to be of the correct shape, the pot with the plant is periodically turned towards the light;
- the first buds and stepsons that appear are removed, the violet is not yet ready for full flowering;
- with the further growth of Saintpaulia, temperature plays a role in the formation of a correct rosette.
Within 7-9 months after the baby has separated, you will have a fully formed plant.
Seasonal care on the windowsill
There is no seasonal care for violets as such. You independently determine when the plant will rest.
At this time, feeding stops, lighting and watering are slightly reduced. With a large collection, it is convenient to allocate a separate shelf for plants that are “on their well-deserved rest”.
If your flowers are on racks, they will be cared for the same all year round. For violets grown on window sills during the heating season, you must adhere to the following rules:
- be sure to provide lighting - at this time the plant does not have enough sun;
- Place the pots so that the leaves do not touch the cold glass, otherwise they will freeze and disappear;
- Heating devices should not be placed in close proximity to plants;
- if there are batteries under the window sill with flowers, they need to be shielded using foil or another method;
- increase the humidity in the room - in winter, when the heating is on, the air is very dry, which negatively affects the condition of the violets.
How to choose soil?
Violets are very sensitive to the consistency of the soil in which they will grow. The soil composition should include a certain set of nutrients, and the pH level should tend to be slightly acidic. Also, the soil should be loose and well permeable to air.
The easiest option is to purchase ready-made soil from a specialized store. However, experienced gardeners say that purchased soil does not always meet the needs of violets, so it is best to prepare the substrate yourself.
To prepare the soil, soil taken from mixed forests, under acacia, hazel, linden, alder or pine, is perfect as a base. But oak groves should be avoided, since the tannins contained in such soil will inhibit the process of absorption of nutrients by the plant. An old anthill will also work well.
The soil collected from the forest must be steamed. To do this, pour water into a metal pan, sprinkle forest soil on top and heat it over the fire for about 15 minutes, stirring occasionally. Little water is required; it should only slightly moisten the substrate. After the earth has cooled, various additives can be added to it.
There are several main components, the use of which will help bring the substrate closer to the natural soil for violets.
The ratio of components in the soil can be different and depends on many factors, such as the place of origin of the main soil, the composition of the water that will be used for irrigation, and some others. In the average version, the composition of the soil for violets looks like this:
- 1 part of forest land;
- 2 parts peat;
- 1 part mixture of perlite and vermiculite;
- 1 part crushed sphagnum.
In addition, the composition may include sand, charcoal and coconut fiber. There is no need to adhere to a clear ratio of components.
What conditions need to be created for healthy growth of violets?
The second name for violets is Saintpaulia, as they are named after the man who discovered them, Baron Adalbert von Saint-Paul. Today, a huge number of species of this plant have been bred, differing in color, shape of inflorescences, leaves and number of petals. The most common varieties: Osa, Violet-bell, Labrador Saintpaulia, Hemalis, Star. After purchase, indoor flowers usually experience stress. In order for them to quickly get used to a new place, it is necessary to immediately create the most favorable conditions for them. The best location for violets will be western and eastern windows. When placed on the south side, we shade the flowers. Saintpaulias love bright light, but when exposed to direct sunlight they get burned: unsightly holes appear on the delicate leaves, dry around the edges. Diffused sunlight can be obtained if the window is covered with parchment paper or thick gauze. The ideal option for darkening a south window is a mosquito net. When placing pots on the windowsill, make sure that the leaves do not touch the glass. For normal development, violets need fresh air, but they do not like drafts. Therefore, from time to time we ventilate the room; at this time it is better to take the plants to another room.
Typically, pots of violets are placed on window sills, but if the number of plants does not allow this, you can buy a special rack with artificial lighting or make one yourself. Saintpaulias need good light; if there is not enough light, the cuttings will stretch. As additional sources, you can take fluorescent lamps, which will provide a 12-hour daylight hours.
Flowers do not like hot air, so we place them away from heaters and heating devices. Cold is also harmful to plants. To protect Saintpaulia from hypothermia, we place the pots on a board, polystyrene foam or other heat insulator. Comfortable temperature for violets is 20–23 degrees in summer, the lower limit is 16 degrees.
Saintpaulias require acidic soil. You can prepare the soil yourself from the following components:
- 3 parts peat;
- charcoal (10% of the total mass of the soil composition);
- 5 parts leaf soil;
- one part coarse sand.
Experienced gardeners advise adding perlite to peat; it helps retain moisture in light soil.
When transplanting and planting, it is better to buy a ready-made substrate in a specialized store. It contains all the necessary substances for the growth and flowering of indoor plants. If we take soil from the garden, we add fertilizer to it.
Typical germination mistakes
Negative results often occur during the first attempts to breed Saintpaulia. Reasons for failure:
- Leaf rotting. Most often it happens due to waterlogging, especially in winter. To speed up rooting, the cut is dipped in root material before being immersed in the soil.
- Water in rooting cups is disinfected with activated carbon.
- The rooted leaf became limp. You should place it in a greenhouse and reduce watering for a while.
- The leaf turned black. This happens due to excess moisture and sunburn. The pot should be placed in a greenhouse away from direct sun and dried.
Note! The general rule is: it’s better to dry it out a little than to fill it with soil. When rooting in water, you should change it to clean water every day and wash the glass
Popular varieties of violets
- Flamenco. The flowers are semi-double, lilac-pink in color with a greenish fringe and a bright yellow core. The green “ruffle” is a distinctive feature of the species.
- Fire moths. The flowers are red or burgundy, with simple petals with slight fringe. Less common with a light border.
- Mars . With large buds of a crimson hue, distinguished by the presence of a wide frill. The edges may be decorated with a white border.
- Rococo Viol. These homemade violets are double varieties. Their flowers are deep blue in color. The shape resembles curly balls that go perfectly with the light green foliage.
- Rosemary. Plants with double star-shaped flowers. The main color is pink, with ink splashes and a lightish border.
- Rococo Rose. They look like small roses, delicate pinkish color. They belong to terry varieties.
When to replant
Indoor flowers grow in containers with nutritious soil, which becomes depleted over time. If at first they can be fed, then this will not be enough for the overgrown specimens. There are other reasons that it is time to transplant the plant into another pot. A violet transplant is needed in the following cases:
- Store-bought flowers require replacement of the soil, as they are sold in peat. Flowers are transplanted into a new pot and different soil two weeks after purchase.
- Adult specimens with an overgrown root system are transferred to another pot, which should be slightly higher and wider.
- Violets with children are placed in separate flowerpots.
- The plant grows poorly, does not bloom, the leaves wither - these are the reasons why it needs to be taken out of the container and the roots examined. If they are normal, then replace the soil. The rotten roots are cut off, sprinkled with crushed coal, and the bush is planted in a smaller pot.
- A constant white coating on the surface of the soil indicates that it is time to replace it. First, you can try to remove the top layer and sprinkle it with sand. But if this does not help, the substrate is replaced.
Having realized that it is time to replant the violet, all that remains is to figure out when it is best to do it. It is not recommended to disturb plants at home during the dormant period. Replanting can be done in spring, summer and autumn, since violets rest in winter. Replacing the soil in winter is carried out only as a last resort if the plants show signs of disease.
Reproduction
Seed propagation of violets is difficult and is used only by breeders when creating new varieties.
Plants are propagated vegetatively by rooting leaf cuttings or daughter rosettes. To do this, they are placed in water, planted in light soil, perlite or a peat tablet.
The same leaf can be rooted several times. For especially valuable varieties, the leaf blade is even cut and planted in a peat-sand mixture using phytohormones. Trailers are propagated by stem cuttings.
The resulting babies are placed in a separate container only when they grow to 3-5 cm.
Why might you need to rejuvenate a violet?
Over time, violets (another name for Saintpaulia) lose their decorative appearance, because plants, like all other living organisms, tend to age
It is important to know how to renew a violet. After all, only the first 2-3 years will delight Saintpaulia with abundant flowering
Blooming violets decorate our lives
The leaves of the lower tier of young plants live only 1 year. Then they curl up and die. The stem may become bare and woody. The inflorescences become small and inconspicuous, the former beauty disappears.
All this suggests that the violet is far from young, it’s time to renew it. This old lady can get her second wind. And if rejuvenation is carried out, then Saintpaulia will again delight with abundant flowering.
Only young violets delight with large flowers
Beginning flower growers have a question: how to prune a violet so that it blooms more? Leaves are cut with scissors or simply removed by hand without waiting for them to dry. If the violet has grown greatly in the pot and has become lush, such pruning is very useful: it promotes abundant flowering in the future.
Another good question: should you pluck the bottom leaves of violets? If the leaves are juicy and fleshy, this will not cause harm. But if the plant is weak and the leaves are already old, then the conditions are unsuitable. Saving leaves or, conversely, cutting them off will not help. An emergency transplant or taking a healthy leaf for propagation is needed.
Attention! The older the violet gets, the more it becomes like a palm tree, which has a bare stem and a flowering crown.
How to care for it to bloom?
With proper care, Saintpaulia can bloom without a break for a whole year, but in order for it not to become depleted, a two-month break is needed. The violet will show itself in all its glory if you provide it with:
- sufficient, but not excessive lighting;
- proper watering;
- regular feeding;
- protection from drafts;
- timely removal of withered flower stalks and daughter rosettes that appear in the leaf axils;
- transplant 2 times a year;
- a cramped pot, since in a spacious one it will not bloom at all or will produce few weak peduncles.
Do not forget that Saintpaulia is a short-lived plant and is already considered old at the age of three.
When is the best time to replant violets?
If Saintpaulia has begun to bloom worse, and its stem in the lower part has become noticeably bare, it’s time to think about replanting. When growing on a windowsill, without additional lighting, it is advisable to have time to transplant the rosettes before active spring growth begins, that is, in December, January or February. February can be considered the deadline for transplanting violets, since in March the day becomes equal to night and timely transplanted plants are ready to bloom again. Violets grown on a rack with additional lighting can be replanted at any time. Even flowering rosettes. You just need to remove all flower stalks and buds at least a day or two before.
What is the right pot for violets?
We still hear discussions about the benefits of ceramic pots and the dangers of plastic pots. Without debunking myths, I will say that real professionals use ordinary, lightweight and, as a rule, inexpensive plastic pots.
As for size, for miniaturists this issue is practically not worth it - mini-varieties of Saintpaulia do not need successive transfers from a smaller pot to a larger one as they grow. They are transplanted into pots of the same diameter in which the violets grew before. Some people gravitate towards very tiny containers with a diameter of 5 cm, but I prefer standard “tall” pots with a diameter of 5.5 cm. Despite the fact that the difference in diameters seems insignificant, the volume of such pots can differ by a third.
The maximum size for semi-miniature violets can be considered 6 cm (the volume is 60% larger than with a diameter of 5 cm). In such pots it may be easier to maintain uniform soil moisture, but the rosettes may grow larger, which will be their disadvantage.
What do the roots of Saintpaulia tell you?
Transplanting violets (Saintpaulias) is an excellent time to inspect the root system. Based on its condition, you can analyze its care and understand whether the mixture for planting was prepared correctly last time. The most common mistakes that can be identified at this stage are too large a pot, excessive watering and a lack of cultivators in the soil mixture. Ideally, the lump of earth should be completely penetrated by thin roots, and the living white tips of new growing roots can be visible on its outer part. If on the third day after watering the soil remains excessively wet and pieces fall off the roots, which are difficult to identify, or the soil has a characteristic sour smell, this is a signal to change the care regimen. In this case, it is better to use not a traditional transplant, but complete re-rooting.
Caring for a transplanted plant
It is not recommended to water only transplanted violets. The roots of the plant have not yet strengthened and will not be able to absorb much moisture. As a result, they may rot. At the same time, increased humidity of Saintpaulia is needed for the first time after transplantation. How to achieve this? Just cover the flower with a plastic bag or jar. This will preserve the moisture present in the soil. Watering through the tray can be done within a day or two. Be guided by the soil moisture level.
After transplanting, it is better to place the flower in a shaded, but not dark place. The air temperature should also be moderate.
What you need to plant violets
To grow and propagate Uzambara violets at home, you will need to stock up on:
- flower pots of various sizes;
- plastic cups or small bottles for rooting cuttings;
- suitable soil mixture or components for making your own substrate;
- complex fertilizers;
- fluorescent lamps for illuminating plants in winter.
Containers for Saintpaulias are usually used small, flat type, due to the fact that the roots of violets are located quite close to the surface. Flower pots are selected three times smaller than the diameter of the plant's rosette - only in such rather cramped conditions does the Uzambara violet feel best and bloom more luxuriantly. If you are going to root a cutting, disposable plastic cups (necessarily with holes in the bottom) or medicine bottles will do.
There should not be any special problems with the soil mixture, since in any flower shop you can now buy a special soil for violets, light, loose and breathable. But some gardeners are very sensitive to the question of how to plant violets, preferring to mix the soil for their plants themselves from turf soil, leaf and pine humus, peat, river sand and sphagnum moss. You can find many different recipes for soil mixtures on the Internet - whatever you choose, try to ensure that the soil is not heavy and allows moisture and air to pass through well; for this, be sure to use vermiculite, sphagnum moss or perlite. You can also use foam chips.
It is advisable to immediately add superphosphate fertilizer to your own prepared soil mixture. In the future, it is recommended to apply fertilizers when buds form on the violet and after it blooms.
And of course, do not forget about additional lighting, without which Saintpaulias will be uncomfortable in the cold season, when daylight hours are very short. Artificial lighting is used for 10-12 hours daily, fixing the lamps above the plants at a distance of at least 20 cm.
Transplanting violets step by step with photos
To understand how to properly transplant a violet, check out the methods of replanting a flower at home:
- With complete replacement of soil. If the flower is sick or if it is necessary to replace the depleted substrate.
- With partial soil replacement. After purchasing in a store and when replanting adult plants, carefully shake off some of the old soil from the roots.
- Transshipment during flowering so as not to disturb the roots, and the violet bloomed well even after transplantation.
Whatever method is chosen, you must first select a suitable container, soil mixture and properly prepare the flower.
Choosing a pot
Which pot to transplant into depends on the age, size of the violet and the reason for transplanting:
- For healthy adult plants, choose containers 10 cm high. The width of the new pot should be 2-3 cm larger than the old one so that the roots have room to develop.
- Violets with bare stems are transplanted into a higher pot. Its height is selected taking into account the fact that the stem should be covered with earth right up to the leaves.
- For young rosettes, a diameter of 6 cm is enough. If you plant them immediately in a large pot, they will not bloom for a long time. Flowering will occur only after the roots have grown and filled the entire bowl.
- Sick specimens whose rotten roots have been cut off should be planted in the same container or a smaller pot.
Violets look very beautiful in ceramic pots. However, the soil dries out quickly. Therefore, plastic pots with drainage holes are preferable.
You will be interested to know: Chinese rose or hibiscus from seeds at home: cultivation and care
Please note that pot heights do not include drainage. It is necessary to add about 2 cm more to the drainage layer.
Containers that will be reused are first washed with soap and rinsed with a solution of potassium permanganate.
Soil selection and preparation
The substrate for Saintpaulia from the store does not need to be prepared in advance. It is nutritious and completely ready for use.
The soil for violets is prepared independently using black soil and peat (5:3), to which one part of coarse river sand is added. A prerequisite for self-prepared substrate is preliminary disinfection in any way (for example, heat it in the oven, spill it with a solution of potassium permanganate).
You need to stock up on not very large drainage (perlite or expanded clay).
Preparation and transplantation
Water indoor plants at least two hours before transplanting. The earth ball must be completely moistened so that it does not fall off the roots and the flower can be easily removed from the pot.
Immediately before the procedure, the violets are carefully removed from the pot and examined:
- cut off the lower old, damaged, yellow or diseased-looking leaves;
- remove easily crumbling soil from the roots;
- very long roots are shortened by a maximum of a third of their length;
- in diseased plants, the substrate is completely removed, rotten roots are cut off and sprinkled with coal;
- There is no need to shake off the soil of blooming violets so as not to disturb the roots.
How to transplant a violet into another pot at home step by step:
- Place a 2 cm layer of drainage on the bottom of the bowl for large plants and 1 cm for small ones.
- Cover the top of the drainage with a layer of 2-3 cm of soil. In small pots a little more than 1 cm.
- Place a flower on top along with a lump of earth.
- If the soil has been removed from the root system, the roots need to be carefully spread out on the soil in the pot.
- Place soil around the roots and stem, under the leaves, down to the bottom leaves.
You may be interested to know: Caring for cyclamen in a pot after purchasing it in a store and replanting it
- Water the soil a little at a time slowly. If it settles, add more.
- Check to see if the transplanted violet is wobbly. If necessary, compact the substrate a little very carefully, add a little more soil and sprinkle vermiculite on top. Sphagnum moss can be used as mulch.
Make sure that the core of the violet is not covered.
After transplanting, keep the flowers in the back of the room for 2-3 days, and then you can put them in their place. For better survival, put bags on top.
It is best to grow violets in a well-lit place without direct sunlight and away from heating radiators.
You can tell when you need to water the flowers after transplanting by the dried top layer of soil. Check carefully with your hand, and if the soil near the roots is still wet, it is too early to moisten it. In large pots, 2-3 cm of the top layer of the substrate should dry out, after which you can start watering.
You can root a violet leaf directly in the ground.
From my experience I know that it is more convenient to plant planting material directly into the ground, there is less loss and time. To propagate in soil, place a leaf cutting of a violet without roots, cut side down, at an angle of 45 degrees or almost horizontally, placing the edge of the leaf on the side of the cup, lightly pressing the cutting with your finger and covering it with soil. The shallower the depth of planting of the cuttings, the faster the leaf will produce new rosettes.
Leaves planted without roots sometimes lose turgor, but there is no need to worry. As soon as roots appear, turgor will be restored. After some time, babies emerge from the ground.
If violet cuttings are planted in the summer, then they do not need to be covered, but if the apartment is cool, then it is better to cover the cuttings or young rosettes with a transparent bag
Be careful with watering so that the petiole does not rot; keep in a warm and bright place, but not in the sun, which can cause burns
Choosing a leaf for planting
The future life of the plant will depend on the leaf you choose; approach this moment responsibly. If you pick up your violet and carefully examine the structure of the rosette (the place where the leaves grow), you will see that the violet's leaves grow in rows. If you start counting from the bottom, this will be the first row; it is not recommended to take leaves for propagation from this row, since they are old and will not produce children for a long time when transplanted. It is also not advisable to take a leaf from the middle of the rosette; in most cases they are small; near the center there is a high probability that you will damage the growing point of the violet - the consequences may not be predictable. The most optimal place to obtain planting material will be the second or third row from the bottom. These leaves are quite young, strong and will quickly produce young offspring. All that remains is to choose which leaf we will use for propagation; there are several conditions:
- The leaf should be healthy, with a bright color characteristic of your plant type.
- It should not have any yellow spots, scratches, fractures, signs of damage, or pests.
- The sheet should be elastic - keep its shape well.
Popular articles Why do anthurium leaves turn yellow and how to treat the flower
If you brought planting material from an exhibition or from friends and it withered on the road, be sure to immerse it in clean warm water, lightly tinted with potassium permanganate for a couple of hours. Then let the leaf dry. Having decided on the choice of leaf, we move on, and the next operation in turn is cutting and preparing the leaf for planting.
Rooting a leaf in water and soil. Step by step description
Both methods have pros and cons, but in general they are very simple and understandable even to an inexperienced gardener. To root leaves in water, you need:
Rooting a leaf in water
- Prepare containers: one for each specimen. These can be plastic glasses or bottles of liquid medicines (iodine, hydrogen peroxide, etc.).
- Pour boiled water into them.
- Drop an activated carbon tablet into each container. This measure will help avoid rotting of the planting material.
- Place the leaves so that they are immersed in water by a maximum of 1 cm.
- Place containers in a warm but not sunny place. Add water as needed.
Popular articles Photo and description of black pine Spielberg
After a while, roots will appear. When they reach a length of 1 cm, you can transplant the leaf into the ground. The method of propagation in water allows you to monitor the formation and development of the root system - after all, in a transparent container it is visible. Replanting to a permanent location must be done very carefully so as not to damage the roots.
Violet roots before planting in the ground
To root a leaf in the ground:
- Make holes in the bottom of a plastic glass.
- Lay drainage - a layer of polystyrene foam.
- Pour soil.
- Plant the leaf, deepening it no more than 1 cm. Root the cutting at an acute angle; if necessary, support it with a match or toothpick.
- Insert the glass into another one, slightly larger in size (no need to make holes in it).
- Water the violet and put it in a warm place where the sun does not reach. If the air in the room is very dry, you can make a “greenhouse”: cover the glass with a transparent bag. The leaves need to be watered periodically and, if desired, ventilated.
It happens that a plate rooted in the ground begins to wither. You need to carefully remove it and see if it has rotted. This is the disadvantage of the procedure for growing violets in the ground - that the roots are hidden from observation. But they immediately find themselves in their “native” environment and do not need additional adaptation.
If the cutting rots in water or soil, cut off the damaged tissue and start the propagation process again. If everything is done correctly, you can expect the “baby” to appear in 1-1.5 months. Try both methods to see which one is more convenient for you.
What is the danger of purchasing a “baby”?
It often happens that the mother plant from which the “babies” are sold did not have time to bloom in time for the exhibition. You can judge what will ultimately come out of such a purchase either by the photograph attached to it, or by a violet of the same variety exhibited by another collector. And it is not a fact that a violet grown from such a “baby” will bloom in exactly the same way as the exhibition plant that captured your imagination. Different specimens of Saintpaulia of the same variety often differ from each other in color saturation, amount of “fantasy”, border width, etc.
Therefore, experienced collectors advise purchasing leaf cuttings - in this case, there is a greater chance of growing the same plant as the one you like. This is the most common method of propagating Saintpaulias.