Astilbe planting and care in open ground which will be described in this article, is especially valued by gardeners for its unusual appearance, long flowering period, ability to easily tolerate waterlogging and shade tolerance. This plant looks beautiful not only when it blooms. From spring to late autumn, astilbe decorates the flowerbed with openwork leaves on reddish petioles.
Our article provides a detailed description and photo of the plant. You can learn more about planting methods and features of growing astilbe by watching the video at the end of the article.
The plant is suitable for forcing and cutting. Astilbe bushes are covered with lush foliage, which will be a wonderful decoration for flower baskets and bouquets.
What does astilbe look like when it blooms?
The herbaceous plant astilbe is a member of the saxifrage family. The first representatives of this culture grew in Japan, East Asia and North America. There are about 40 species of this plant and more than 400 varieties.
- The height of the bush can vary from 1 to 2 m.
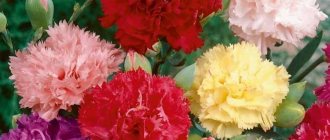
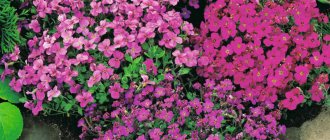
- Flowers are collected in paniculate inflorescences 10-60 cm long. Flower colors can be very diverse: white, red, pink and purple.
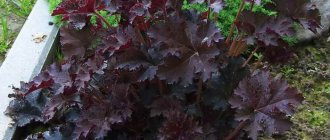
- The color of the foliage can be dark green, burgundy, bronze.
- In the form of a fruit - a capsule with small seeds.
- The flowering period is from June to August.
Astilbe varieties
More than 400 varieties of astilbe, differing from each other in size, flower color and leaf shape, have been bred by scientists. The most famous and popular types include:
David. The bush can reach a height of 150 cm. The inflorescences are arranged horizontally, looking down, the flowers are lilac-pink. Flowering period from July to August.
Naked. Plant height up to 20 cm. Flowering in June and July. The foliage has a bronze tint.
Chinese. The bush can reach a height of up to 100 cm. The flowers of the plant are pink, lilac or white, and the leaves are covered with reddish fluff. The inflorescences are up to 30 cm long. The flowering period lasts from June to August.
Japanese. Reaches a height of about 70 cm. The bush grows well, forming a circle of wide diameter. Inflorescences up to 30 cm long, diamond-shaped, flowers pink, red, white.
Flowering period is mid-summer. This variety is distinguished by its resistance to cold, and also by the fact that it takes root well.
Thunberg. The height of the bush is up to 80 cm, the flowers are white, the edges of the leaves are jagged. The inflorescences are sparse, looking down, the width of the panicle is 10 cm, length – 25 cm. Flowering period: July-August. This variety belongs to the pyramidal species, characterized by spreading shoots, which are covered with dense foliage. The species reacts poorly to low air humidity and heat.
Plant characteristics
Consumer qualities
Summer residents probably wouldn’t pay attention to the panicles of wild astilbe. Tiny buds, inconspicuous colors, reminiscent of weeds, which are in abundance around. However, breeders managed to accomplish the incredible - to develop such bright varieties of astilbe that simply cannot go unnoticed.
Required cultural qualities:
- decorative openwork leaves;
- catchy strong inflorescences;
- abundant and long flowering;
- winter hardiness;
- shade and moisture-loving.
This flower is grown everywhere in central Russia. Moreover, in the south, astilbe often burns and dries, and tamed to the specific climate of Western and Eastern Siberia, it is successfully cultivated in the territories of the Altai Territory, the Urals, as well as in the Far East (Primorsky, Khabarovsk Territories).
Conclusion: astilbe is not a crop for hot regions.
Flower garden companions
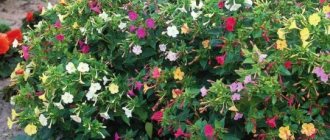
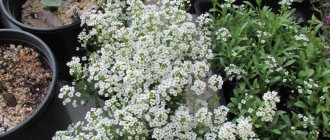
Gardeners plant astilbe together with coniferous and decorative deciduous shrubs, create original sites along the perimeter of reservoirs, combining varieties of adjacent color and height.
Low-growing perennials successfully prove themselves as a potted crop, and dwarf astilbes take root well in rocky areas of rockeries or rock gardens.
Astilbe is comfortable in the circle of the following plants that are tolerant of a lack of sunlight:
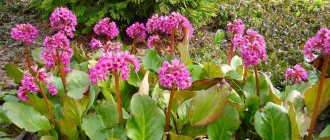
- hydrangeas;
- hosts;
- Siberian iris;
- fern;
- bergenia.
It is noteworthy that even the absence of astilbe flowers will not make such a flower bed boring. The leaves of the “neighbors” have a unique decorative shape and different colors. At the same time, for all plants to live, it is enough to see the sun only at sunrise or closer to sunset. Moisture, diffused shade and minimal care are all that is needed for healthy growth and prosperity of astilbe.
Preparing for landing
It is advisable to choose a site for planting astilbe with close contact with groundwater. The plant can also be planted on the shore of a pond located in the garden. Since sandy soil does not retain moisture well, the area above must be mulched with peat.
Recommendation! Before planting, the soil on the site should be dug up, roots removed and organic matter added.
If astilbe was purchased in a store, then before planting you should soak the rhizome in warm water for 1 hour. It is recommended to add potassium permanganate to the water to make the solution pale pink.
Watch the video! How to plant astilbe
Conclusion
Astilbe is an interesting and not difficult plant to grow. It does not require regular feeding throughout the season or a special watering schedule. The process of rejuvenating the bush and preparing it for winter is not complicated either.
At the same time, astilbe looks beautiful in the garden, filling shady areas where not all plants can grow. And even after flowering has ended, astilbe will delight you with its appearance, thanks to its openwork leaves and dry inflorescences.
Planting astilbe
Planting technology:
- The first step is to dig a hole 30 cm deep.
- Organic fertilizer (compost) should be poured into the bottom of the pit, which is used in the proportion of 2 buckets per 1 sq.m.
- It is recommended to add 1 tbsp to the hole. complex fertilizer of any type containing nitrogen, phosphorus, potassium (nitroammofoska) or 2 handfuls of ash.
- Then the fertilizer is mixed with the soil.
- Then pour water into the hole.
- Astilbe should be planted in the ground, deepening the root collar by 5-6 cm. After the water in the hole is absorbed, 3-4 cm of dry soil should be poured on top, which will help retain moisture in the rhizome area for as long as possible.
- The mulching procedure will help retain moisture in the hole for a long time, and also facilitate the adaptation of the plant. Sawdust, humus, pine needles, and crushed bark can be used as mulch.
Astilbe grows very slowly, so it is recommended to plant it densely: 20*20 cm. The planting will become dense next year. It will be possible to thin out the plants in 2-3 years.
The astilbe flower goes well with other types of plants. The easiest way to grow is in mono-plantings using one variety. You can also plant the plant in groups, using several varieties with flowers of the same tone, but of different heights.
Care and cultivation
The main methods of caring for flowers include:
- weeding;
- loosening;
- watering;
- mulching.
Watering
Astilbe needs constant watering. It is recommended to ensure that the top layer of soil is constantly moist, since the root system can only develop well in moist soil. It is necessary to water the flower at least once a week; in hot weather, this procedure must be carried out at least 2 times a week. Astilbe can be watered either at the root or using the sprinkling method, since this plant is resistant to the appearance and spread of fungal diseases.
Even a short drying of the soil in the area can cause the astilbe leaves to wither, the inflorescences to become smaller, and the bush itself to look sloppy. In order to prevent these undesirable consequences, you should mulch the plant with any organic material:
- dry leaves;
- sawdust;
- bark
Advice! It is best to use compost for mulching, since it is an organic concentrated fertilizer and maintains a sufficient level of moisture in the area.
Fertilizer
The bulk of fertilizers should be applied to the site when planting astilbe. The plant really loves organic fertilizers. It is recommended to add up to 1 liter of humus to the planting hole, after which the composition should be mixed well with the soil.
- In the spring months, the plant must be fed with nitrogen fertilizers. It will be enough to hill up the astilbe with humus or add a urea solution to the area in a proportion of 1 tsp. granules for 5 l. water.
- Before flowering begins, in the summer, it is recommended to apply potassium fertilizers. For example, you can prepare a composition from potassium nitrate (2 tablespoons) diluted in 10 liters of water. Each bush should be watered at the rate of 0.5 liters per 1 bush.
- Phosphate fertilizers should be used in autumn. At the rate of 20 g of superphosphate per 1 bush.
After flowering is completed, in the autumn, several buds form at the base of the shoot formed this year. These will subsequently develop rosettes of leaves. Next year, flower stalks will appear from the rosettes. Small buds located below will begin to develop only next year.
Advice! The plant annually rises above the site by a distance of 3-5 cm. Therefore, every year it is necessary to add fertile soil to the site.
Bush rejuvenation
If you followed all the rules for growing astilbe, then very soon the flower will grow on your site.
Over the next 5-7 years, you will see your pet blooming magnificently. But then the astilbe needs to be replanted.
The fact is that, due to their growth characteristics, astilbe roots, growing, end up near the surface of the soil. They dry out and become vulnerable to frost. The number of inflorescences gradually decreases, the flowers become faded and inconspicuous. Astilbe begins to wither.
To prevent this from happening, the plant must be regularly rejuvenated. To do this, you need to carry out propagation and transplantation.
Reproduction
Astilbe can be propagated:
- division of roots;
- cuttings;
- kidney renewal;
- seeds.
Dividing the bush
Even old bushes can be used for propagation, since after the procedure dormant buds awaken on them.
The division procedure should be carried out more often than once every 3 years. The plant should be dug up in early spring - in March, or at the end of August.
When propagating a bush by division, you need to ensure that each division has 3-4 buds. The rhizomes are divided into 4-5 parts and planted in a new area, maintaining a gap of 35-40 cm between the bushes. The cut areas on the roots are treated with crushed charcoal.
Kidney renewal
- At the beginning of spring, when the young shoots have not yet had time to grow, it is necessary to cut off the buds with the beginning of the rhizome using a sharp garden knife, and then treat the cuts with wood ash.
- The planting material obtained in this way is planted in a mixture consisting of 3 parts peat and 1 part gravel, and then covered with film to create a greenhouse effect.
- Then you should wait for the shoot to take root, which occurs within 3 weeks.
- Young and strong bushes are transplanted to a permanent place in early autumn, or next spring.
By cuttings
- After the bushes reach a height of 10-15 cm, they can be cut and divided into cuttings.
- Then the shoots should be planted in a box filled with a mixture of peat and sand in a 1:1 ratio and watered.
- After which you need to spray the plant with a spray bottle 2 times a day.
- During rooting, the air temperature should be maintained within 20-22 degrees.
- The peduncle formed on the cutting should be removed.
Seeds
The method of propagation by seeds is most often used for selective work, since they do not germinate well.
- Seeds should be sown in the garden bed in spring or autumn, without covering them with soil. The location for the plant is best chosen in the shade.
- The first shoots appear after 10-15 days, and if sowing was carried out in the fall, then in the spring.
- After the plant has its first true leaf, the seedlings should be planted at a distance of 15 cm from each other.
- Stronger bushes can be planted in a permanent place.
- Young plantings are covered with leaves for the winter.
When propagating from seedlings, pre-stratified seeds should be sown in early or mid-March.
- The seed is placed in a planting container 15-17 cm deep with a sand-peat mixture and covered with a layer of snow.
- Melting snow will gradually moisten the soil and allow the seeds to sink to the depth necessary for cultivation.
- The crops should be placed in a cool place for 3 weeks, first covered with film.
- After the first true leaves appear on the sprouts, the picking procedure should be carried out.
- Caring for the plant in the future consists of watering and maintaining a temperature regime of 20-22 degrees.
Watch the video! Astilbe planting and care. Astilbe sowing seeds
Answers to popular questions
Why did astilbe's leaves begin to fade?
The plant lacks moisture. It is necessary to increase the quantity and abundance of watering.
Why prune in the fall?
Removing shoots before winter is necessary so that frost does not “beat” the branches of the bush. This will negatively affect the health of the plant and may lead to its death. When we prune a bush, we cover it with straw or branches. In winter there will be snow on top. As a result, the astilbe will not freeze and die.
Is it possible not to cover astilbe for the winter?
It is not at all necessary to cover the astilbe. This is done if the weather in winter is unstable, or the plant is still very young. If you have nothing to cover the astilbe with, then simply throw more snow on top in winter.
It is not possible to plant astilbe in the shade. What to do?
First, choose varieties with light inflorescences. They tolerate direct sunlight better. Secondly, you will have to water the bush more often. Thirdly, increase the mulch layer by another 2-3 cm.
Diseases and pests
The plant very rarely becomes a victim of diseases and pests; in rare cases it can be affected by:
- slobbering pennies;
- root-knot nematode;
- strawberry nematode.
Pennywort is usually located in the leaf axils of the plant. After some time, saliva-like secretions appear inside them in the form of foam, inside of which the leafhopper larvae are located. Affected leaves wrinkle and become covered with yellow spots. In this case, the bush completely or partially fades.
In order to get rid of this pest, you should use:
- Rogor;
- Confidor;
- Aktaru (2-3 g per 10 liters of water);
- Karbofos.
The buds, flowers, and leaves of the plant are susceptible to the spread of the strawberry nematode. The affected areas of the bush are deformed and covered with necrotic spots of brown or yellow color. Astilbe growth deteriorates.
The root-knot nematode most often affects the roots of the plant and appears in the form of small galls (growths) on their surface, inside which the nematodes are located. The galls are clearly distinguishable already in the second period of the growing season. The flowering and growth of affected bushes noticeably deteriorates, and in some cases the plant dies. Therefore, shoots that show obvious signs of disease must be dug up and destroyed.
Important! During the first growing season, it is very important to carry out the first weeding on time. During the second growing season, the overgrown root system of the plant will independently choke out the weeds.
It is recommended to treat astilbe with Fitoverm.
The young foliage of the plant sometimes suffers from frosts that occur in late spring, but this cannot become an obstacle to the appearance of new leaves and flowers. Perennial astilbe tolerates harsh winters well, but suffers from spring frosts and wetness. The plant is suitable for cultivation in regions with unfavorable climatic conditions, including the Urals , Siberia .
Important! The varieties that have the greatest decorative value, with large inflorescences, can freeze slightly.
Preparing for winter
On bushes that have already bloomed, the panicles must be removed so that they do not set seeds. This procedure will preserve the plant’s strength for wintering.
In winters with little snow, astilbe must be additionally covered:
- In autumn the bush should be pruned.
- Then install a light frame over it.
- Fill the inside of the frame with leaves.
- Lutrasil or spunbond is tightened on top.
- Then cover with plastic to protect from moisture. The edges are pressed with bricks.