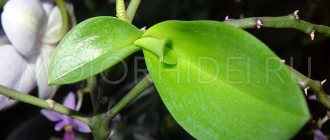
The ability to propagate this exotic flower will always be useful to the gardener, because obtaining a second and third copy will help expand the flower collection if you exchange rooted children for other types of orchids.
Propagation with the help of children is
the most common way to increase the number of bushes of a plant, and even a novice flower lover can do it. In this case, you should follow the recommendations for rooting the baby. Let's find out in more detail how orchids reproduce by children.
When is it better to choose this kind of method?
This method of orchid propagation is used when, instead of a flower, the orchid produces one or more children on the peduncle. They can be placed either at the end of the peduncle or in the center.
Before separating the baby from the original plant, it is preferable to let it grow 3-4 leaves, at least 5 cm long. It is possible to help the baby grow roots by creating the required conditions for it.
HELP: More often, a baby can occur at the roots of an orchid. In this case, it is more difficult to separate it, since it is possible to damage the roots of the older plant. However, if everything is done correctly, such a baby will take root and begin to grow very quickly.
Orchid: propagation at home by cuttings
Some types of orchids are propagated by cuttings.
Instructions:
- In order to propagate in this way, it is necessary to cut off the side stem and cut it into pieces 10-15 cm long.
- It is necessary that there are at least two dormant buds on one piece. Next, you need to take light soil, moisten it and place these pieces of the plant on the soil.
- Cover everything with cling film or a glass cover and constantly spray the pieces.
- After some time, roots and new sprouts will appear from the cuttings, that is, from the dormant buds.
Orchid propagation by cuttings
Breeding and caring for the shoot
There is no need to wait for roots to appear in the children living directly on the flower arrow of the original rosette.
And with the appearance of 4 leaves on the child, it is easy to separate it (since it is believed that in hybrid phalaenopsis the children do not send out roots in this state and are saturated only by the original bush). The cuts on the peduncle and on the baby should be sprinkled with crushed charcoal or cinnamon. It is advised to dry the baby for 24 hours , then plant it in a fine-grained substrate, where they wait for roots to appear. The lower pair of baby phalaenopsis leaves turn yellow over time.
It is better to root the baby phalaenopsis in a small greenhouse; the best temperature for the baby is 22...25 degrees. The emergence of roots takes a very long time; in some cases, phytohormones are used to stimulate them, spraying the substrate with epin or heteroauxin. There is no need to spray the baby leaves themselves with hormones, otherwise the emergence of roots will be delayed and the formation of leaves will begin.
IMPORTANT: It is not recommended to pick them; they will fall off on their own when the supply of calorie elements decreases, by which time the original roots may have already developed.
Another method used to stimulate root growth on children is placing them close to water. They take colorless plastic boxes, a flat piece of foam plastic, in which they make a slight depression, and fix the baby phalaenopsis rosette in it motionlessly and thoroughly.
Next, water is poured into the box, a foam “boat” with the baby is lowered, and covered. More moisture and warmth stimulate the emergence of roots faster . With the appearance of roots, domestic phalaenopsis is transplanted directly into the bark and grown as a mature plant.
Baby orchid
What it is?
This is a fully developed orchid bush, which has its own rosette of small leaves and a root system, where ideally the roots should be up to 5 cm long. The survival rate of a baby in a new place, if all replanting rules are followed, is almost 100%.
A baby is a full-fledged bush that appears on an adult orchid.
factors contribute to the appearance of a baby :
- High temperature in the room;
- Watering with fertilizers with a high proportion of nitrogen;
- High humidity.
Where and under what conditions can it appear?
Wondering how to properly propagate an orchid from children? For this purpose , take an adult and healthy plant with a well-developed root system:
- On a peduncle - to get a baby on a peduncle, it is shortened to a dormant flower bud, from which the scale covering it is removed. A lesion is formed at the site of removal, which is lubricated with cytokinin ointment. No more than 3 children are grown on one plant so as not to deplete the bush. If the room has a low percentage of humidity, then the bud is wrapped in sphagnum moss and moistened from time to time by spraying;
- On the stem. The stem is the same as the peduncle. The technique is similar: a baby appears in this place if the plant is well cared for. Such a baby is trimmed six months later, when it has 5-6 leaf blades and roots at least 5 cm long. To grow the baby to this size, it is grown using fertilizing with nitrogen fertilizers;
- At the roots . Since the root system of the baby is not visible, before cutting it off from the mother plant, it is necessary to remove part of the soil in order to estimate the size of the root system, and only after that cut off the shoot. After separation, the sprout is transplanted into a separate container , and further care goes to building up the root mass.
- On the trunk. If the baby has grown on the trunk of an orchid, then it is not recommended to separate it, because You can destroy the mother plant. Such a baby is left in the mother’s pot and rejoices at the double number of flower stalks.
IMPORTANT! All manipulations to separate the baby should be carried out with a sharp, disinfected knife or pruning shears. This is done with the aim of causing the least harm to the plant and not infecting the entire group if one of the many flowers is already affected by some kind of fungus.
How does it appear?
How to propagate an orchid by children at home? After the plant blooms, sometimes with good care the baby appears on its own without provocation from the grower. Babies can be on peduncles and on the root system, sometimes they appear near the outlet itself. Only there are never babies on the leaf plates.
An adult orchid can grow several children.
The number of children depends on the factors of maintenance and age of the orchid bush - their number reaches up to four. On average, such babies grow for about six months.
First, leaf plates appear, and only then the young root system of the rosette grows. This is a natural process of growth of a young child, which should not be interfered with, since the bush copes with this task on its own .
Whether it is ready or not for transplantation can be determined by the length of the roots . When they reach 5-6 cm in length, the baby is removed.
If the babies do not form on the bush on their own, then you can use hormonal paste and stimulate the appearance of a small bush.
Stimulation
If children do not form on their own, they can be stimulated using a hormonal paste with a growth stimulator - cytokinin paste . It can be found on sale in specialized garden centers or flower shops.
To propagate using paste, you need to have an orchid with a healthy living peduncle and a well-developed root system.
The flower must be in the growing stage . Select healthy buds from the peduncle and carefully remove the brown covering using a knife. After this manipulation, a green bud should remain, so it is smeared with paste.
When growing babies, you don’t need any special care for the mother’s bush, you just need to keep an eye on :
- Regular watering;
- And environmental humidity.
The air temperature in the room should be within 20-25 degrees Celsius . The sun's rays should be diffused, as this is an epiphytic plant that lives in the shade of large trees.
IMPORTANT! Apply an exact amount of hormonal paste to the green bud. If you apply more than a pea, then a flower arrow will begin to form instead of a baby, but there will be no baby.
How to separate from the mother bush?
Recommendations for separating babies ready for breeding:
- Since the young bush is attached to the mother bush very tightly, to separate it they use :
- Sharp scissors;
Or a pruner.
The baby is cut off from the adult plant and the cuts are processed.
In one movement, cut off the sprout from the flower shoot or from the root, depending on where it is located. This technique will cause a small amount of damage to both bushes and the cuts will heal and heal more easily;
IMPORTANT! All small glasses are placed in a closed greenhouse, where high humidity forms after watering. All this will be an excellent stimulant for accelerated root growth.
Conditions under which deposition is possible
If a young rosette is planted very early, then most likely it will die without having time to grow roots and leaf mass on its own.
Therefore, the young rosette is planted if the following conditions are met:
- The young rosette has 5-6 green leaf blades that are fully formed;
- The root system has 3-4 roots, the length of which has reached 5-6 cm;
- The grower should have sphagnum moss, where a young rosette is initially planted to grow the root mass;
- A plastic transparent glass, the volume of which should correspond to the volume of the root system of a young orchid.
IMPORTANT! Only if all these conditions are present can you begin to plant young orchid rosettes from the mother bush.
Root extension
Experienced orchid lovers advise growing the first roots using the mother bush . Since if the baby is separated without roots, then even in specialized soil the young sprout may refuse to grow its own roots on its own. On the mother bush, a young rosette will develop roots many times faster than if it is kept even in greenhouse conditions.
If, after six months, young roots do not form on the baby, then it is wrapped in moss and cellophane , in which holes are made for oxygen access. At the same time, you need to constantly monitor the moisture content of the moss and spray it with water in time.
IMPORTANT! When creating such a greenhouse, the baby is not cut off, but remains on the adult bush.
If for some reason the baby is separated from the main bush, then it cannot be planted in specialized soil for orchids, since there it will not be able to grow roots. It is planted in moistened moss and covered with glass to create greenhouse conditions.
In order to separate the baby, it is necessary that it has a developed root system.
At the same time, the air temperature in the room should not fall below 25 degrees Celsius. These factors will contribute to the growth of young roots. Such a baby can be planted in permanent specialized soil only after it has grown 5-6 cm of roots.
Rooting baby:
- With the help of a greenhouse - a greenhouse is created in order to create high humidity in the environment where the young rosette will grow its roots. If there are few children, you can use:
- Glass jar with an airtight lid;
Or a plastic container.
Sphagnum moss, which requires rare periodic moistening, is laid on the bottom of the container, and children are placed. a certain humid environment is formed in it after a short period of time . The air temperature in the room must be at least 23 degrees Celsius;
Basics of further care
After transplanting a young rosette, it begins an adaptation period and needs certain conditions :
- Scattered light;
- Air temperature 23-26 degrees Celsius;
- High humidity;
- Timely watering;
- The duration of daylight is at least 8 hours.
The most appropriate time to unplug the socket
The best time to plant a young rosette is spring. Therefore, if possible, it is better to cut and plant from mid-March until the onset of sustained heat.
It is best to plant the baby in the spring.
In winter, it is not recommended to separate the baby , since there is not enough warmth, sunny days, and day length - factors that affect the survival rate of the Phalaenopsis baby.
How to propagate: step-by-step instructions
The separation process will be as follows:
- Very carefully separate the shoot from the native stem . The shoot is cut off using a sharp knife. Before replanting the baby, you need to make sure that the new plant is completely ready to live separately and has a root system.
- When the seedling has already been removed, there is no need to rush to bury it in the ground . First, the cut area needs to dry a little, preferably in the sun. The drying process cannot last more than half an hour. Next you will need coal, which is finely crushed. They need to sprinkle the cut area for disinfection.
- A transparent plastic pot should have clear volumes . You need to drill special holes in it, which are also called drainage holes. Now you can begin the landing process. Planting must be done so that the neck of the root type is only at the level of the surface of the pot. At the time of transplantation, you need to carefully monitor the roots so that they do not get injured. In this case, the pot cannot be huge; it should be a little small for the orchid. Directly in this case, the possibility that it will take root is greater.
- The pot should be filled with soil , which must contain minerals. It is necessary to carefully observe the roots. They must be completely covered with the so-called substrate. If some difficulties arise and the roots do not fit into the pot, then they can be placed on top, but in this case they will need to be covered with a certain amount of moss. As a general rule, when you first add soil, you should shake the pot to allow the soil to settle. It is strictly forbidden to press the ground with your fingers.
- After transplanting, you should place the flower near the window . However, it is strictly forbidden to water in the first days. The orchid should be watered on the third day after this process. It takes time for the cut that was made to become extremely dry. Due to this, the orchid is protected from the possibility of contracting any disease due to the influence of humidity or moss microorganisms.
After transplantation, the flower should stand for a certain time in a room where the humidity is slightly increased.
Check out the video showing the reproduction of orchids by children:
Does the plant need to be stimulated?
Sometimes orchids are able to produce babies without intervention. In this case, you just need to watch them until they form 2 pairs of young leaves. After this, aerial roots are formed, and when their length reaches 5 cm, they can be carefully separated.
If this process does not occur, then you need to stimulate the plant, following the following action plan:
- Remove the scales as carefully as possible so as not to injure the dormant buds.
- Apply a small amount of cytokinin ointment to them.
Hormonal paste can be purchased at the store or prepared at home using the following ingredients:
- kinetin – 10 mg;
- water – 1 ml;
- lanolin – 1 g.
All ingredients must be mixed thoroughly until the mixture becomes homogeneous and its color is white.
Quite often during propagation only one side shoot is formed. To prevent this, you need to place the flower in a greenhouse where the temperature is not lower than 28 degrees Celsius. The plant should be in the greenhouse for 5 days, and after that it can be treated with paste.
We invite you to watch a video about the use of cytokinin ointment on orchids:
Photo
Check out the reproduction process in the photo:
Further care of the plant
After the final transplant, you need to take care of the baby like an adult plant. It is important to water the plant properly so that it has enough moisture, but not a very large amount. After the first watering, this plant should be watered again only after the substrate has completely dried.
For a certain time, it is possible to add a small amount of growth stimulants and fertilizers to the irrigation water. Be sure to guarantee the young plant optimal lighting and a comfortable temperature .
It is important to know that there are other ways to propagate an orchid, namely by peduncles, roots, cuttings, and information about propagating the Dendrobium nobile orchid at home may also be useful.
Orchid propagation by rooting in water
Many people have heard that an orchid can be propagated in the classical way, that is, by rooting or propagation in water. To do this, you need to use an already faded sprout, that is, the peduncle itself.
Instructions:
- You will need to cut it directly at the roots and place it in a bottle, the neck of which must be cut 5 cm from the top.
- Pour water, it should be purified, soft, filtered. It is best to melt, add an activated carbon tablet to it. This will help disinfect the sprout to prevent the spread and reproduction of diseases.
- Place the peduncle about 4-5 cm into the water. Now you need to start waking up the sleeping bud.
- You need to use a razor or blade to carefully cut off the scales that are located above the bud. Lubricate the bud itself with a cytokinin mixture, which is sold at any flower shop.
- Now you need to treat with this ointment every week for a month. Be sure to change the liquid in the bottle once a week.
- Remember, temperature is very important, as well as humidity. You will not get any babies or new shoots if the room temperature is below 25 degrees. The optimal temperature is 28-30 degrees. This temperature regime is suitable for flower propagation.
- The ideal period for propagation is after flowering. It is then that the plant is set up to reproduce and all efforts will be directed towards raising children.
Rooting in water
